Guides
When and How to Use JB Weld [Video Explanation]
When You Should Use Epoxy Cement?
When a strong stiff workable (e.g. sandable and/or paintable surface) adhesive is required, especially when applied to metal or hard plastic, epoxy is often the best option.
Because most epoxies dry without dripping or shrinking, they can be used to fill gaps. The biggest problem with epoxies is that they need to be applied using a specific applicator after the user mixes minute quantities of resin and hardener (e.g., a toothpick or popsicle stick).
Some come in a dual-syringe, which isn’t ideal because the components must still be combined by hand before use for optimal hardening and strength.
When You Should Use JB Weld?
JB-Weld epoxy cement is extremely durable. JB-Weld is the product to use if you need to repair a hole in a metal object or join two metal pieces.
Regular epoxy cement or alternative cement/glues are preferred in most cases. Other critics have criticized the descriptive term “weld,” and they have a point. JB Weld has uses that welding does not.
On the other hand, JB Weld has trouble attaching two thin metal rods at a correct angle, an apparently straightforward welding procedure.
How to Use JB Weld?
JB WELD is an excellent filler that can even be used to cast tiny components, but it lacks the strength of actual metal when used in this manner.
When possible, use JB WELD as an adhesive; a thin layer of JB WELD can hold two metal parts together.
Wherever possible, metal should be used for reinforcement. Instead of using JB Weld to build a large flange, you could use scrap metal as the base for the flange and then adhere it in place with JB Weld. A stronger connection is formed when more surface area is in contact.
1. Preparing the Surface
A clean, rough surface is required for any glue. Begin by cleaning the area with a solvent (another reviewer suggests acetone for this, but rubbing alcohol will suffice), then roughen it, and finish by cleaning it again.
Use a new cloth every time you apply the solvent. I usually use a Dremel tool with a tiny grinding wheel to roughen the surfaces. You can also scrape it with a knife or rough sandpaper, depending on the material.
The solvent-cleaning process is designed to remove any remaining traces of oil from previously cleaned areas.
Oil may re-deposit on the surface of greasy components from the cleaning cloth or when the solvent evaporates, even after many solvent cleanings. If you can smell the oil on the component or are unsure whether it is oil-free, degrease it first.
If a professional degreaser is not available, you may manufacture a paste using laundry detergent and a hard brush. The solvent-cleaning procedure can only start when all traces of oil have been eliminated.
A. Cleaning if Joining Broken Parts
Use only minor roughening methods, such as scraping with a wire brush or acid-etching, if you need to repair damaged components with clean but uneven matching surfaces (but be sure to wash off all traces of the acid).
Apply a THIN, even coating, and gently clamp the parts together to remove excess JB WELD. A strong rubber band could be useful at times. Pieces can be stacked so that the top piece’s weight presses the junction together while the JB Weld dries.
A brick or other heavy object can be placed on top if little pressure is required. Wait until the JB Weld has fully cured before releasing the clamp or pressure.
You can trim any excess with a knife or razor after an hour or two, when the glue has set but is still soft, but don’t. Surfaces near a crack are frequently reinforced by building them up.
While the glue cures, parts can be temporarily held together with blue painter’s tape, and temporary support can be made to keep the pieces in the optimal orientation. ScotchBlue 2090-.75A Multi-Surface Painter’s Tape, 3/4″ x 60″ – 1 Roll
B. Cleaning if Joining Dissimilar Parts
Remove as much space as possible, perhaps by sanding, so that the two surfaces are perfectly in contact. To prevent the adhesive from seeping out and leaving unsightly voids, use blue painter’s tape to seal up holes before filling them with JB Weld.
C. Cleaning if Joining Long Thin Parts
If you can’t overlap them, try to overlap them, and if necessary, use JB Weld to reinforce them with a comparable piece of metal.
Cutting two 1″-long “L’s” from a heavy-paper clip (or making L’s from comparable wire) and embedding them in JB-Weld on opposing sides of the joint allows you to connect two 1/8″ steel rods, resulting in a “T” joint (a common and straightforward welding task, practically impossible with simply JB-Weld).
Wrapping fine steel wire around the rods holding the “L”s in place before covering everything with JB-Weld will strengthen the connection even more.
First, inspect the rods and wires for cleanliness (see below). Unwaxed dental floss is surprisingly strong and may be effective at strengthening joints, especially in situations where the wire would be ineffective due to size or other constraints (when embedded in JB Weld). If possible, wrap the floss securely in the pliable JB Weld after using it.
D. Preparing if Filling a Hole
Don’t skip the above-mentioned surface preparation steps, even if you have to roughen the surfaces with an ice pick or an awl. Because JB Weld shrinks very little during curing, it is critical to thoroughly fill the hole before curing.
If you can sand the JB Weld after it has cured, you should slightly overfill the hole. Because JB Weld flows slightly before setting, the surface should be level.
Apply the JB Weld, and then cover the hole with blue painter’s tape until the JB Weld has been set. It is generally better to utilise several tiny pieces of metal immersed in JB Weld rather than one huge mass of JB Weld to close the gap as much as possible.
E. Reinforcing a Leaking Pipe
Work the JB Weld gel into a piece of fiberglass cloth or spread it on with a spatula, then fill in any gaps and smooth the edges with more JB Weld. Layers of JB Weld-impregnated fiberglass cloth may be required. In these cases, wire cloth (window screening) is sometimes used.
F. Holes in Car Body Panels
If at all possible, cover the hole with sheet metal (held in place with JB Weld); using pop rivets and JB Weld together is a common and effective solution, though the pop rivet heads must be sanded off afterward. 40 Rivets for the TEKTON 6555 Rivet Gun in a pack of 40.
2. Mixing the Gel
Follow the instructions on the package. Popsicle sticks make excellent mixing implements, and a paper plate makes an excellent mixing surface.
Be aware that the resin and hardener must be used in equal parts and fully blended before use. Mix for twice as long as you think it will take to get everything together to ensure a uniform consistency. Seriously!!!
3. Wait for Curing
Be patient and wait longer than recommended; the longer you wait, the stronger the connection. It is acceptable to have at least two days at 70 degrees or 80 degrees.
Epoxies do not “dry” since there are no solvents to evaporate; instead, a chemical reaction hardens the cement (a plastic resin). The rate of chemical reaction increases as the temperature rises (the rule of thumb is that for every 10 degrees, the reaction speed doubles).
If it takes one day to heal at 80 degrees, it will take 16 days to cure at 40 degrees, and even then, only marginally. Okay, I understand that waiting this long isn’t always an option; in most cases, a 4-hour cure at 90° (but no higher than 95°) and a few days of “taking it easy” should suffice.
When you should use Other Epoxies?
When working with nonmetal materials, especially hard plastics, different epoxies perform better than JB Weld. There are transparent epoxies, white epoxies, and epoxies that serve a specific purpose. CLEARBOND H-3S Clear Strong Epoxy Adhesive Syringe -.85oz, for example.
When you should use Quick Epoxies?
Ordinary (slow) epoxies like JB Weld or other epoxies are superior to rapid epoxies because they dry tougher. To summarise, epoxies are made to be as strong as possible, so if you don’t need that, you probably don’t need epoxy.
Rapid epoxies should be used when:
- The hardening time is critical.
- While the epoxy sets, the item cannot be maintained in the appropriate orientation (at least several hours).
- Flowage must be strictly limited. In many cases, superglue can be used as a suitable substitute.
When you should use Other Cement or Glues?
While epoxies may be the best choice for certain applications, such as when a hard cement for metal or rigid plastic is needed, there are numerous times when other glues are preferable.
Epoxies do not adhere well to glass, metal, or other rigid surfaces and are thus not recommended for use on flexible surfaces such as leather, wood, or flexible plastic. Although epoxies can adhere to porous materials, alternative adhesives outperform epoxies in the majority of cases.
1. White Glue
Ordinary white glue is safe, cleaning is simple, and repairs can usually be redone if they go wrong; it is ideal for light-duty interior domestic applications that do not require waterproofing.
White glue contracts significantly during the drying process, making it unsuitable for large gaps and holes. One such product is Elmer’s All-Purpose White Glue, 7 5/8 oz (E379)
2. Glue Sticks
Glue sticks are white, thick household glue sticks. When used with paper, glue sticks shine, but they have little else to offer. Avery Glue Stix Pack of 6, 0.26 oz (98095)
3. Wood Glue
When dry, carpenters’ wood glue is similar to the regular white glue you might have in your house. It has a superior ability to penetrate and reinforce wood when compared to other glues.
It can be used without hesitation, and cleanup is a breeze. Because wood is brittle, if the seam breaks again, you can re-glue it. Consider the following example: Elmer’s E701 Carpenter’s Wood Glue, 8 oz.
4. Goop
Many different types of materials, such as leather, plastics, glass, and metal, may be permanently joined together with Goop. The weld is both hard and flexible, and it is also very robust, water-resistant, and transparent.
Goop is translucent, so spills are seldom seen. The Goop also produces a “cushioned” surface that will avoid scratches to dishes. It has been used to repair broken ceramic plant pots, water hoses, and shoe pieces as well as to fix tiny holes in window screens, seal rust spots on my dishwasher rack, and patch holes in air mattresses.
Goop can effectively repair electrical cable damage. Amazing Multi-Purpose Goop for the Home, 3.7-Ounce Tube (130012)
5. Silicon Glue
The best adhesive for glass and other flexible materials is silicone glue (for example, to absorb vibrations). This is a great alternative to Goop for everyday home use on glass, plastic, and metal when maximum power is not required.
It’s less dangerous than Goop and much easier to clean up after. Silicon glue, like Goop, takes time to dry (days to get to a usable strength, weeks to get to its maximum). you can consider the following example: GE Silicone II Household Glue, 2.8 oz.
6. Fabric Glue
Beacon Fabri-Tac Permanent Adhesive, 4-ounce bottle, works well on textiles, thoroughly moistening the surfaces to provide a permanent bind but without seeping through. In some cases, fabric glue may be preferable to stitching. Its adaptability makes it an excellent choice for items made of leather or thick vinyl (such as women’s purses, shoes, luggage, and so on).
7. Super Glue
Superglue hardens quickly and is extremely strong. It’s similar to 2-minute epoxy, except it doesn’t have to be mixed before use. Although superglue is very strong, it is also very fragile, so it should not be used on anything that bends or flexes.
Super glue is hazardous because it has the potential to permanently adhere to skin, hair, and other body parts. For years, I relied on super glue whenever I needed a clear bond (say, on jewelry), but Goop is superior, safer, and more convenient.
Because superglue has a short shelf life after opening, even when stored in airtight glass containers, I recommend purchasing it in packages of many small tubes. BAZIC Super Glue 3g/0.10oz (6 Pack)
8. Liquid Construction Adhesive
When you need to permanently connect a large area of any type of surface, Construction Adhesive is usually the best choice. Instead of nails, use construction adhesive to join two 2x4s to make a 4×4.
Because construction adhesives are frequently quite flexible, they can be used on leather (to fix a worn-out shoe sole, etc.). Construction glue stains can penetrate porous surfaces and even show through thin materials. For projects of this size, Goop is usually the better option.
9. Caulking Compund
Caulking compound is used to repair holes and is similar to white glue mixed with a large amount of inert filler. Although it is the least powerful adhesive here, it becomes quite effective when applied to a large area, such as the back of a ceramic tile.
I built this brick column a few years ago to support a mailbox. The traditional option would have been a mortar, but it would have taken a long time to prepare.
While construction glue would have sufficed, any excess squeezed out would have been unsightly. Caulking compound, on the other hand, was simple to apply, inexpensive, and visually appealing.
10. Hot Glue
In summary, hot glues are a good choice if you need glue to cure quickly, especially if you have a large amount of gluing to do. Several readers have pointed out that hot glues (in the form of glue sticks used in glue guns) often perform better or are more convenient than comparable cold glues.
The most notable feature shared by most hot glues is their lightning-fast setting time, which is frequently only a few seconds. Because most hot glues set quickly, it may be tempting to use too much.
To get the best results, use as little hot glue as possible and apply gentle pressure until the glue sets. Because my knowledge of hot glue is limited, I am unable to make specific recommendations.
Informational
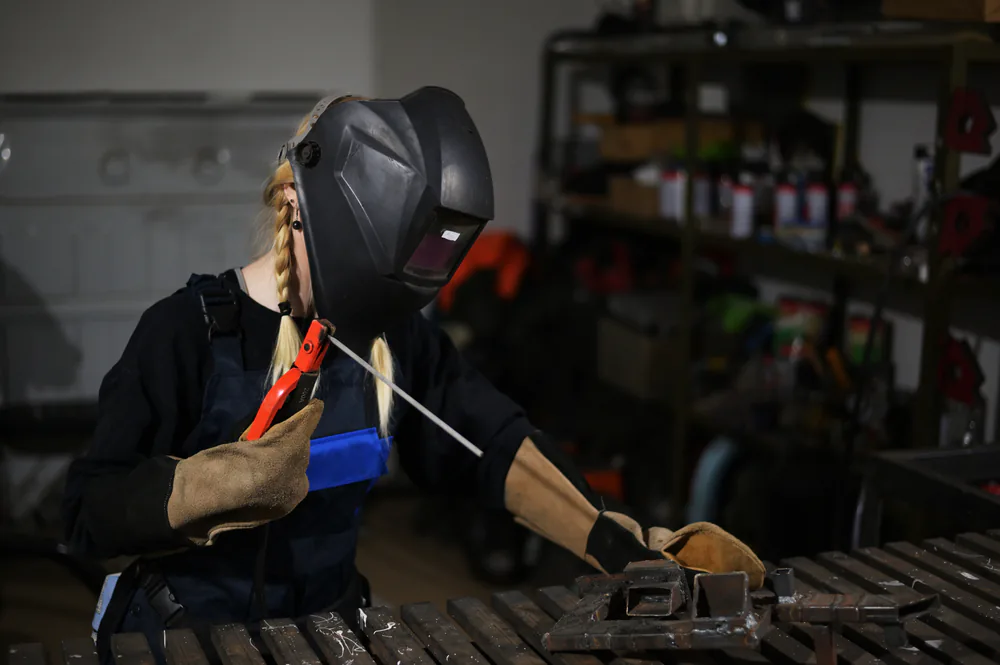
How to Weld If You Have Long Hair? Pro Welder’s Tips

Any welding operation that you perform puts you and anyone else in the area in danger of a number of different things. As a result, it is completely reasonable for you to be concerned about preventing your hair from becoming entangled in any welding equipment and posing a threat to your health. In this article, I will talk about how you can safely weld if you have long hair.
If you want to weld while having long hair, a French braid is the best option for keeping your hair together. This will help you in tying your hair and hold it together behind your neck. The French braid should keep the hair compact and close to your head’s shape, and it also allows you to wear a welding helmet. As a result, you will be able to wear full safety equipment.
When you are dealing with hot weld spatters, having long hair can present a particularly difficult challenge. Therefore, if you are interested in learning more about how you can safely weld with long hair, continue reading the rest of this article, where I will discuss the topic in greater detail and share some helpful hints.
How Your Long Hair Can be an Issue While Welding?
Welding procedures, as I indicated earlier, expose the operator as well as anybody else in the vicinity of the workplace to a wide variety of risks. A project involving welding presents a number of potential dangers and threats; it is important that you be aware of these issues in order to protect not only yourself but also others around you. Especially when dealing with spatters, it is easy for things to go wrong if you have long hair.
Before we look at all of the tips you may weld with long hair, we need to first understand the potential risks you run and everything that might go wrong. Long hair poses a unique set of challenges when it comes to welding. A few are mentioned below:
- Spatters are your hair’s worst enemy.
- UV rays can permanently damage your hair.
- With long hair, grinders can cause serious accidents.
Let’s look at these problems one by one:
1. Take Spatters Seriously
The spatter, sparks, and heat generated by the arc provides the greatest challenge throughout the welding process since they may travel up to 35 feet and enter any nearby place. You will want to provide enough protection for your long hair if you are going to be in an atmosphere like this.
Not just your hair, but everything else that might catch fire should be kept at least 35 feet away from the welding location. In addition, a fire extinguisher should never be far away. In the event that a fire breaks out.
2. UV Rays Can Damage Your Hair Permanently
Molten metals, welding arcs, and ultraviolet radiation will be present in the work environment while welding is being done. The interaction of all these factors puts you at an increased risk of serious burns. The actual welding arc may reach temperatures of up to 10,000 degrees Fahrenheit, making it one of the hottest processes possible.
And believe me when I say that you do not want that welding arc to get anywhere near your hair. Your hair will suffer a significant amount of damage as a result, and it is possible that it could even be burned.
3. Grinder Can Give You Nightmares
The usage of grinders is another factor that may create issues for your lengthy hair. Using grinders and welding go hand in hand when working with metals. Therefore, if you are a welder, you will most likely make extensive use of the grinder. And grinders are really your worst enemy when it comes to your long hair.
When you’re working, you can find yourself crouching over a grinder, which can cause serious accidents if you don’t protect your hair properly.
Tips from a Pro Welder to Protect Your Long Hair When Welding
Now you know what the most obvious dangers that you have when welding with long hair. The next step is to tell you how you can keep yourself safe from those dangers.
Here are a few of the tips that you can consider:
- Braid your hair while welding
- Put your hair in a tight knot behind your neck
- Consider buying a welding cap
- You can use a bandana too if you are a bandana lover
Let’s discuss these tips one by one:
1. Braiding is the Best Option You Have
Welding hoods, helmets, or shields will provide the optimum amount of protection from any sparks, heat, UV rays, flash burns, or infrared light that may be present. They will protect not only your face and neck but also your eyes and hair. As a result, I feel that acquiring one is the best approach to protecting oneself.
Welding hoods are often made of cotton or leather and are rather light in weight and can go easily along with helmets. Make sure that whichever helmet you decide to purchase, is not too heavy and that it is comfortable to wear. It must also include a spatter barrier, the ability to be modified, a sensor bar, and the availability of replacement components.
2. You Can Simply Put Your Hair in a Tigh Knot
The most conventional and easiest technique for a welder operator to keep their long hair out of their face is to pull it back into a tight bun. Wrap an elastic band over your buns and secure them in place to prevent them from falling on your face.
If there are any unruly hairs, just use bobby pins to push them up and you should be OK. Anything that prevents your hair from falling on your face will suffice.
3. Consider Buying a Welding Cap
A welding cap is a good option if you want something that is both lightweight and comfortable. It must adequately shield your head from any hot metal, sparks, or splatters that may be present.
Not only they are effective in protecting your hair, but they are also made completely of cotton, making them incredibly breathable and also preventing sweat from pouring down your eyebrows while working.
4. Bandana is Another Option That You Can Use
Braids are not easy to create for everyone, and they may even be difficult to perform on a regular basis. If you don’t know how to braid my easiest suggestion would be to put a bandana over your head and tuck all of your hair within.
When welding, sparks will fly everywhere, and this will keep you safe. Make use of bobby pins or a bun to tuck in all of the ends. Bandanas aren’t my first choice for headgear. But it works. It’s a good option to have in case you don’t know how to braid your hair.
Few Other Safety Measures That You Need to Take
In addition to your hair, there are a few other parts of your body that need your attention. Some of these essential measures for ensuring your safety are listed below:
- Protect your eyes at all cost
- Always keep a fire extinguisher in your shop
- Wear protective clothing
- Make habit of using respirators
- Beware of leakages in your welding system
- Keep your welding space clean
Let’s discuss them one by one:
1. Protect your eyes at all cost
Be sure to always wear safety glasses in your workplace to protect your eyes from flying debris, which is often composed of metal. If you routinely do welding tasks, you will be exposed to a significant amount of flying debris.
You should make it a routine to put them on as soon as you come in the door; this will ensure that you are protected at all times.
2. Always keep a fire extinguisher in your shop
You shouldn’t be shocked if anything catches fire at some time during a welding operation because of all of the intense heat and sparks that are produced throughout the process. Because fires are a very real risk, you should always have an extinguisher on hand in case one breaks out.
3. Wear protective clothing
If you’ve ever imagined yourself beginning your first welding project in a pair of shorts, an old t-shirt, and a pair of flip-flops, you should rethink that idea. Wearing the necessary protective clothing at all times when welding is required if you wish to prevent injuries to your body, notably burns, that may be caused by the process.
4. Make habit of using respirators
You should always wear a respirator if you are going to be dealing with metals or any other materials that have the potential to emit harmful vapors.
Welding or cutting certain materials may produce a welding plume, which is a combination of hazardous gases, fumes, and smoke. This is not the type of thing you want to breathe in if you want to keep your lungs healthy and prevent respiratory issues.
5. Beware of leakages in your welding system
There is a good chance that you have pressurized containers in your welding shop that hold liquids or gases. Take extra precautions to check that none of those containers or the items that you are attaching to them have any leaks in them.
See my other article to know more about leakages and how to detect them.
6. Maintain your equipment
If you want to establish the safest possible working environment for your welding projects, you need to give your equipment a lot of TLC and make sure it’s in good operating order at all times. If your welding equipment and tools are in disrepair, an accident is almost waiting to happen every time you use them. However, the vast majority of incidents of this kind are avoidable if proper care is taken with the equipment.
Wrapping it Up
When it comes to welding, safety is the most important thing to keep in mind at all times. Because because welding involves a significant amount of fire and spatters, it is essential that you take a significant amount of precaution to protect your hair. I really hope that you’ll be able to keep your hair under control while welding thanks to the advice that’s been provided in this article.
Guides
How to Repair Damaged Pinch Weld? Is it possible?
Every vehicle has a pinch weld, which is the most difficult connection and is required for safety. However, pinch welds can be damaged by improper floor jack placement. Is there really a way to solve this problem if this happens? In this article, I’ll go over how to repair pinch welds in great detail.
Pinch welds can be repaired, but how you do it will depend on the circumstances and kind of damage. It is sometimes simple to fix them, but there are other times when it is impossible or extremely difficult to fix your pinch welds. You might want to replace your pinch welds in that case.
Damaged pinch welds can be catastrophic for your vehicle, as they can lead to the destruction of joints and components. A major cause for concern is the fact that a defective pinch weld can led to the total destruction of a vehicle body. Whether or not pinch welds can be repaired is a frequently asked question. Thus, a simple response like the one above will not suffice.
In the following paragraphs, I will describe in detail the various types of damage that can occur to your car’s pinch welds, as well as the methods for repairing them. So, let’s get started.
There are 3 Types of Damage to Pinch Welds
As I have mentioned earlier how you’ll fix your pinch weld heavily depends on what sort of damage you have. So, if you’re trying to repair your pinch weld, the first and most critical step is to determine the kind and extent of your damage.
Here are a few of the most common pinch weld damage types:
- The joint getting bent inwards
- Rust damage
- Entire joint breakage or getting messed up
So let’s discuss these damage types one by one
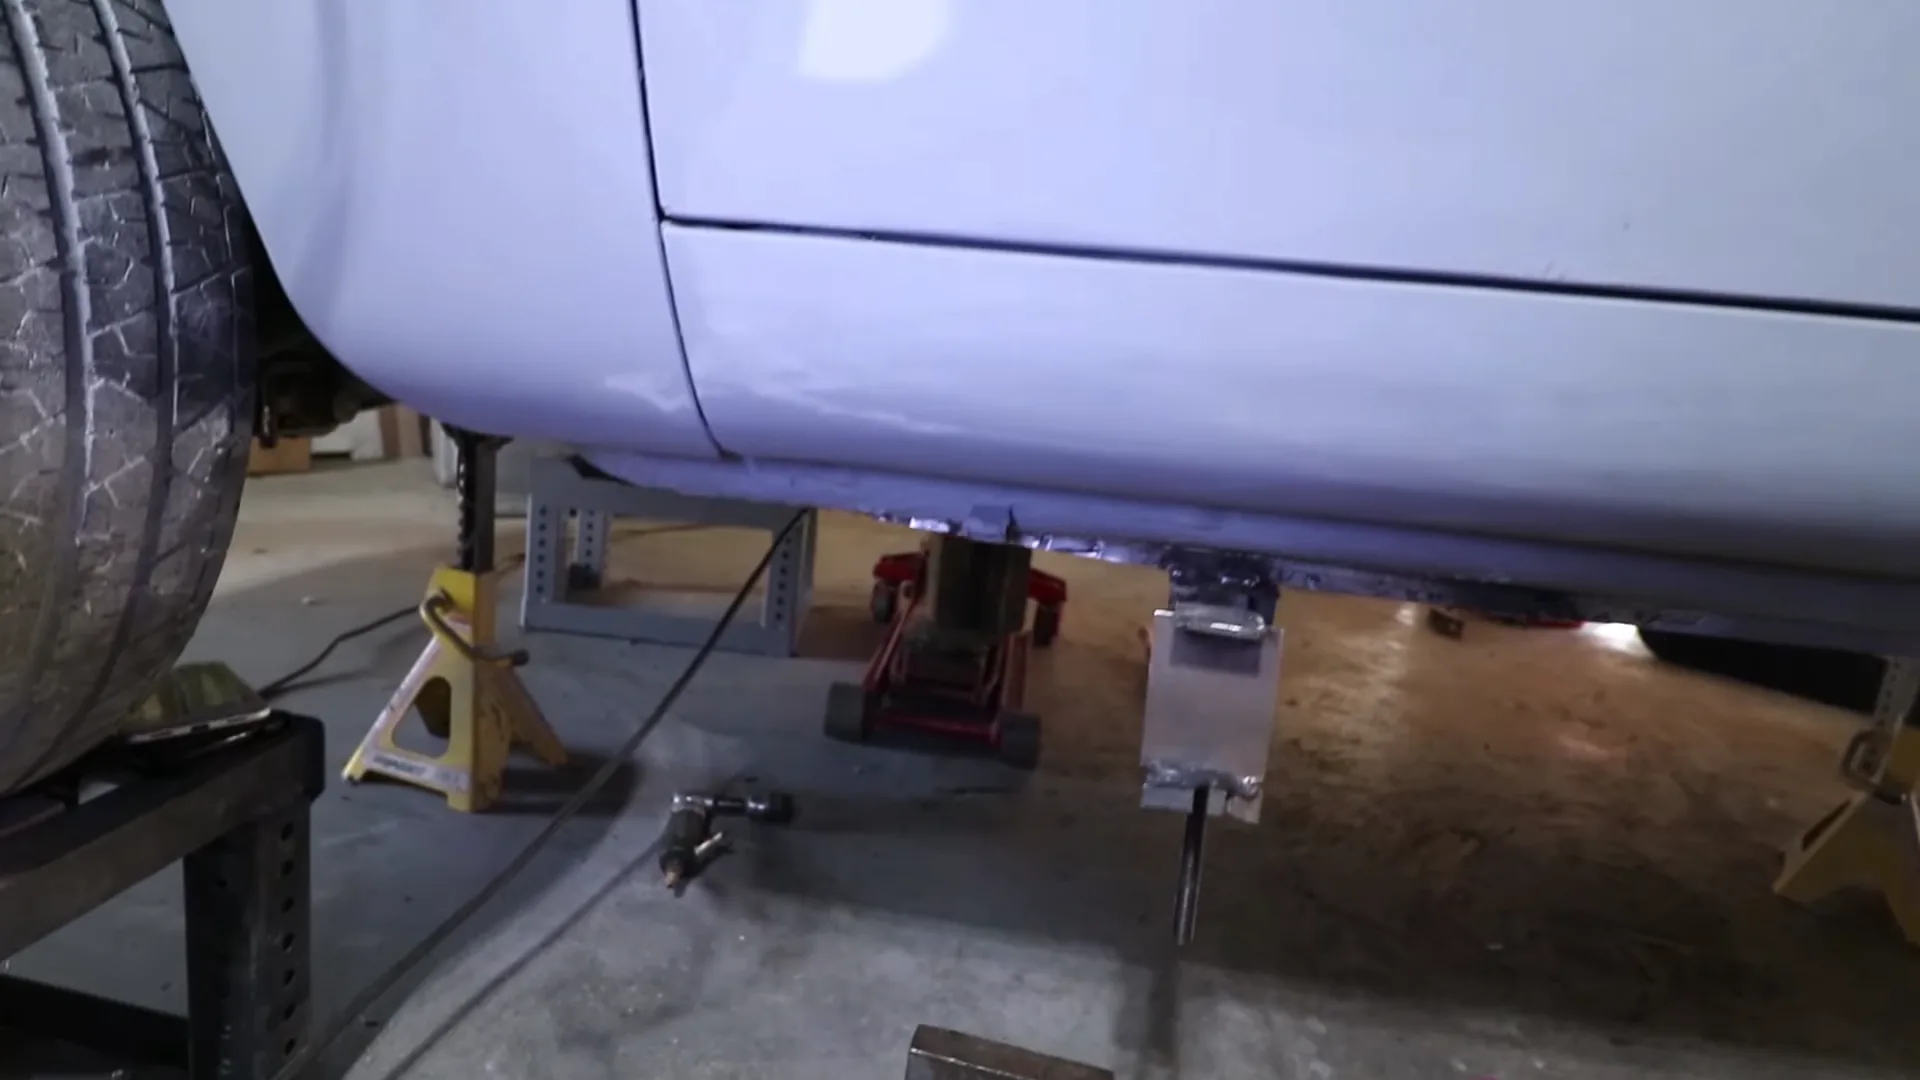
1. Pinch Weld Joint Getting Bent Inwards
The first type of damage that we have is called an inward bent of joint. The majority of the time, this occurs as a result of improper placement of the jack. If a vehicle is jacked up incorrectly, the weight of the entire vehicle has the possibility to become concentrated in a single point.
Because of this, there is a chance that the joint will bend inwards, but there is also a chance that it will bend outwards.
2. Rusty Pinch Welds
Rust damage is the most prevalent type of damage that can occur. Rust has the potential to cause significant damage to an automobile’s pinch weld, which can ultimately lead to the total destruction of the vehicle’s body. Rust damage is difficult to predict because each instance is unique.
In easy words, there are numerous reasons that can cause rust damage. Depending on the severity of the damage, it is possible that this type of damage will prove to be the most challenging to repair. which we will discuss in greater depth in the following paragraphs.
3. Entire Joint Breakage
The third and most dangerous scenario is that the joint will either sustain total damage or destroy entirely. This is the worst-case scenario. If this happens then the two parts of the joint will no longer be able to be connected to one another.
It is possible that this could happen due to improper jacking, but in most cases, damage from an accident or from running over a particularly large bump or speed breaker causes it.
Is There a Way to Repair Your Damaged Pinch Welds?
It is possible, as I mentioned earlier, that you can repair the damaged pinch welds, but the success of such an effort is entirely dependent on the nature of the damage. There are some types of damage that might not be able to be fixed at all, despite the fact that the majority of damages can be fixed with some trial and error.
Now that we are aware of the type of damage, I believe that it is time for us to move on to the solution for it. In the following paragraphs, I will go over a few of the techniques that can be used to repair pinch welds.
How to Repair Damaged Pinch Welds?
Here are a few methods that you can use to fix your damaged pinch welds
- Straighten it out with a wrench.
- Straighten it out with a vice clamp.
- Make your own tools to pull the pinch weld down
When it comes to repairing the pinch weld, the approach mentioned above will be determined by the level of damage sustained. Repairing dents and loose components is often a simpler task than repairing rust damage.
If Your Pinch Weld is Bent
If your pinch weld is bent then you have 2 options to fix it
Option 1: Using a wrench
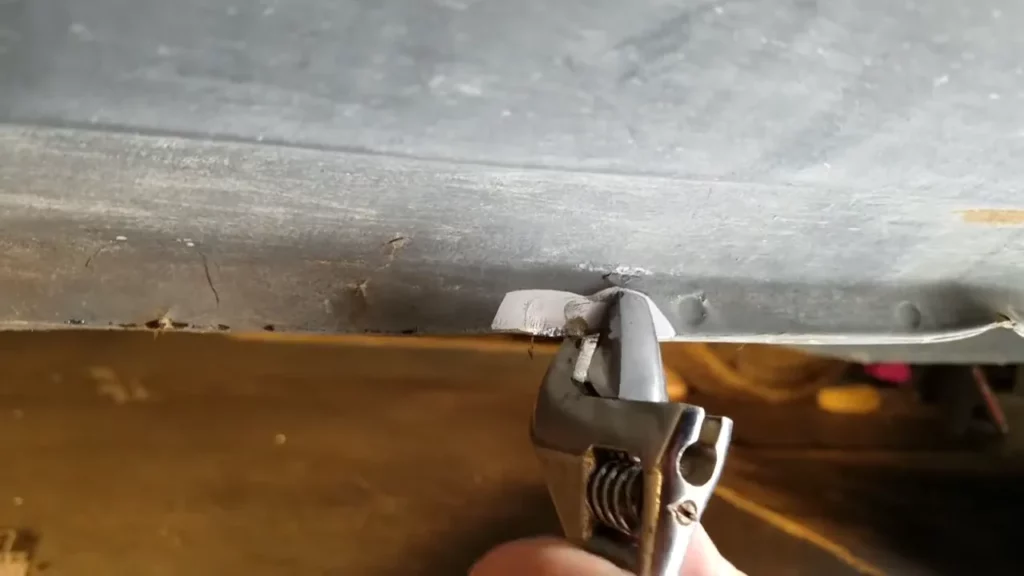
So this is the simplest and quickest fix. Simply insert a wrench into the pinch weld and tighten it according to the diameter. And then turn the wrench in the opposite direction of the bend until it straightens up. This procedure will cause paint loss and expose the metal. You can cover it up with a spray.
Option 2: Using Vice clamp
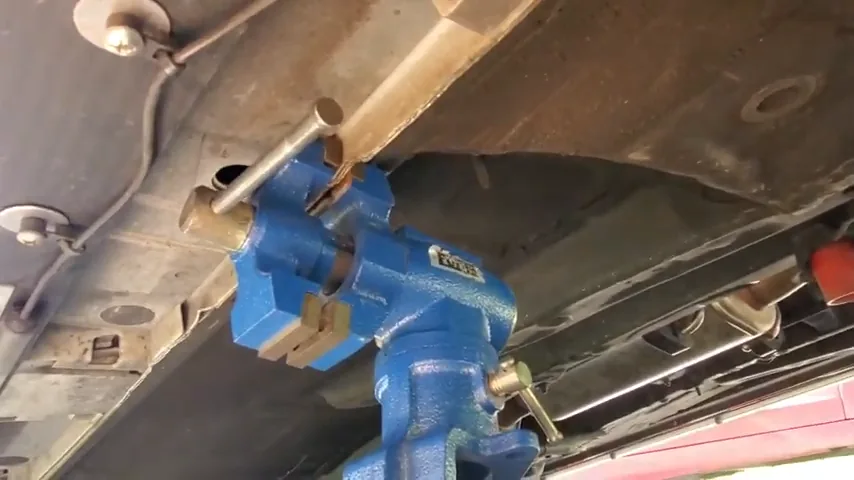
This method is similar to the previous one, but instead of a wrench, a vice clamp is used to straighten the bent. Simply place the vice clamp at the point of the bend and tighten it until the bend is straightened.
If Your Pinch Weld is Rusty
In a situation like this one, the method that will be required will be determined by the degree of rusting that occurred to the pinch weld. If the pinch weld on your vehicle has only developed a light tint of rust, you should be able to easily remove the rust from your pinch weld by using an anti-rust spray.
On the other hand, if the damage is too severe, you might want to consider replacing the pinch weld.
If Your Pinch Weld is Pressed and Wrecked
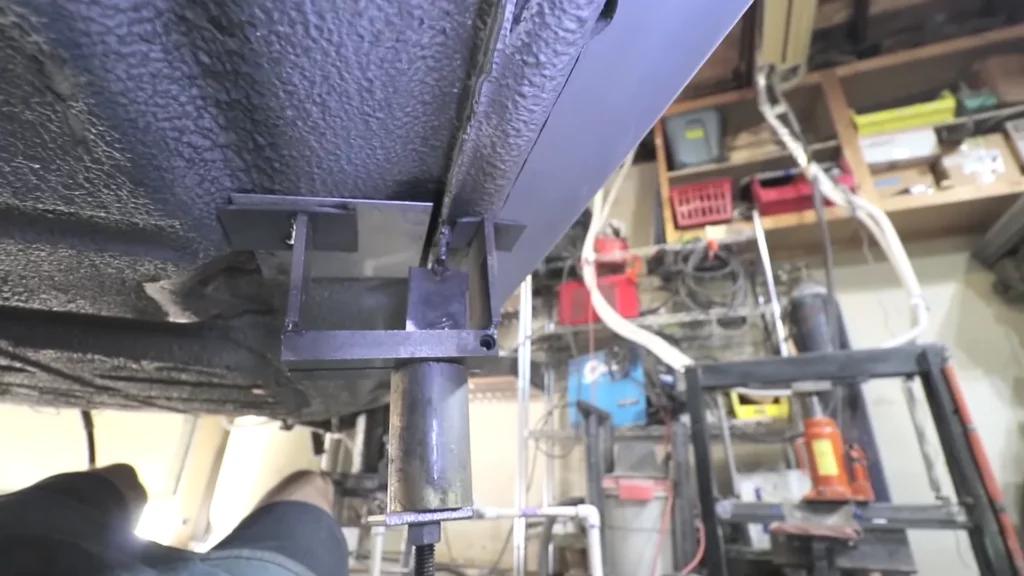
In this case, you may want to create your own custom tool. You may be wondering what custom tool I’m referring to. The solution is to design a tool that can pull the bent down for you. This requires a lot of imagination and hard work, but don’t worry, I’ve got a video for you.
Take a look at this video to get an idea of the type of tool you’ll need to build.
Please keep in mind that if your pinch weld is overly pressed in, these tools will not help you. The only thing you can do is replace the pinch weld.
Wrapping it Up
Any damage caused by pinch welding can be repaired in a variety of ways. Depending on the severity of the damage to your pinch weld, you will have a few different options to choose from when attempting to repair it. Additionally, there may be times when you need to completely replace your pinch weld.


Kitchen Tools and Equipment that You Must Have

Optimizing Your Bedroom Lighting for a Perfect Sleep: 7 Ways to Follow

Energy Efficiency and Style: The Advantages of Roof Windows in the Modern Home

How to Weld If You Have Long Hair? Pro Welder’s Tips

What are Floating Kitchen Cabinets? Complete guide to Floating Cabinets!

How to Repair Damaged Pinch Weld? Is it possible?

How Do I Choose a Cup Size of TIG Welding [Cup Size Chart]

How Much Electricity Does Welding Consume? [Excel Sheet]

Which is the Best Welding Rod for Pipe Fence?

E6013 Welding Rod: A Complete Guide With Specifications, Settings & Amps Table

Why Won’t My Solder Stick? 6 Common Causes and Solutions

Does Welding Shorten Your Life: Life expectancy of a welder?