Informational
How to Weld If You Have Long Hair? Pro Welder’s Tips

Any welding operation that you perform puts you and anyone else in the area in danger of a number of different things. As a result, it is completely reasonable for you to be concerned about preventing your hair from becoming entangled in any welding equipment and posing a threat to your health. In this article, I will talk about how you can safely weld if you have long hair.
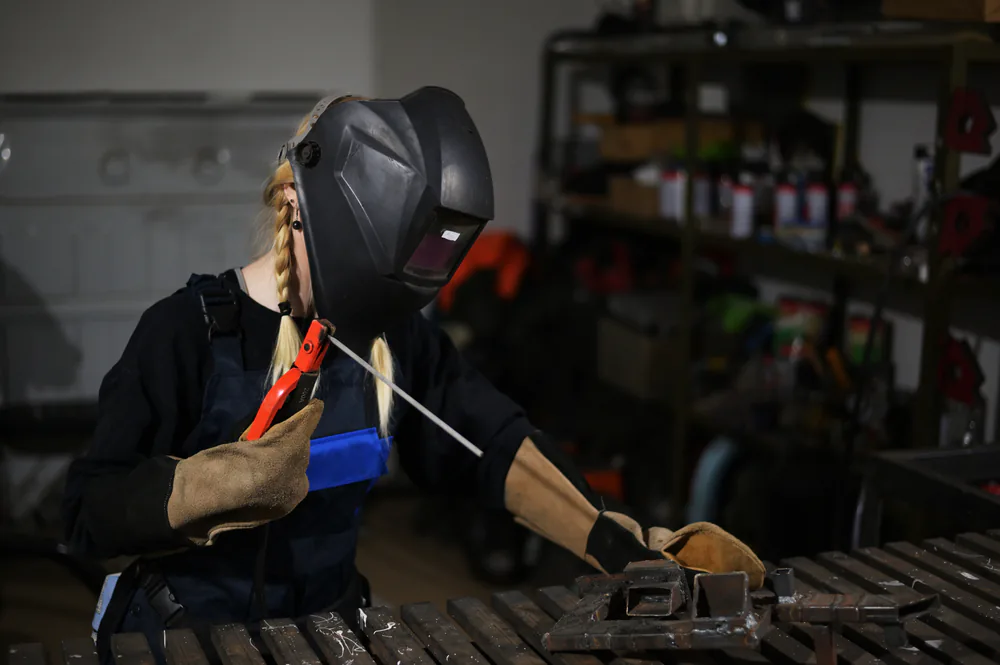
If you want to weld while having long hair, a French braid is the best option for keeping your hair together. This will help you in tying your hair and hold it together behind your neck. The French braid should keep the hair compact and close to your head’s shape, and it also allows you to wear a welding helmet. As a result, you will be able to wear full safety equipment.
When you are dealing with hot weld spatters, having long hair can present a particularly difficult challenge. Therefore, if you are interested in learning more about how you can safely weld with long hair, continue reading the rest of this article, where I will discuss the topic in greater detail and share some helpful hints.
How Your Long Hair Can be an Issue While Welding?
Welding procedures, as I indicated earlier, expose the operator as well as anybody else in the vicinity of the workplace to a wide variety of risks. A project involving welding presents a number of potential dangers and threats; it is important that you be aware of these issues in order to protect not only yourself but also others around you. Especially when dealing with spatters, it is easy for things to go wrong if you have long hair.
Before we look at all of the tips you may weld with long hair, we need to first understand the potential risks you run and everything that might go wrong. Long hair poses a unique set of challenges when it comes to welding. A few are mentioned below:
- Spatters are your hair’s worst enemy.
- UV rays can permanently damage your hair.
- With long hair, grinders can cause serious accidents.
Let’s look at these problems one by one:
1. Take Spatters Seriously
The spatter, sparks, and heat generated by the arc provides the greatest challenge throughout the welding process since they may travel up to 35 feet and enter any nearby place. You will want to provide enough protection for your long hair if you are going to be in an atmosphere like this.
Not just your hair, but everything else that might catch fire should be kept at least 35 feet away from the welding location. In addition, a fire extinguisher should never be far away. In the event that a fire breaks out.
2. UV Rays Can Damage Your Hair Permanently
Molten metals, welding arcs, and ultraviolet radiation will be present in the work environment while welding is being done. The interaction of all these factors puts you at an increased risk of serious burns. The actual welding arc may reach temperatures of up to 10,000 degrees Fahrenheit, making it one of the hottest processes possible.
And believe me when I say that you do not want that welding arc to get anywhere near your hair. Your hair will suffer a significant amount of damage as a result, and it is possible that it could even be burned.
3. Grinder Can Give You Nightmares
The usage of grinders is another factor that may create issues for your lengthy hair. Using grinders and welding go hand in hand when working with metals. Therefore, if you are a welder, you will most likely make extensive use of the grinder. And grinders are really your worst enemy when it comes to your long hair.
When you’re working, you can find yourself crouching over a grinder, which can cause serious accidents if you don’t protect your hair properly.
Tips from a Pro Welder to Protect Your Long Hair When Welding
Now you know what the most obvious dangers that you have when welding with long hair. The next step is to tell you how you can keep yourself safe from those dangers.
Here are a few of the tips that you can consider:
- Braid your hair while welding
- Put your hair in a tight knot behind your neck
- Consider buying a welding cap
- You can use a bandana too if you are a bandana lover
Let’s discuss these tips one by one:
1. Braiding is the Best Option You Have
Welding hoods, helmets, or shields will provide the optimum amount of protection from any sparks, heat, UV rays, flash burns, or infrared light that may be present. They will protect not only your face and neck but also your eyes and hair. As a result, I feel that acquiring one is the best approach to protecting oneself.
Welding hoods are often made of cotton or leather and are rather light in weight and can go easily along with helmets. Make sure that whichever helmet you decide to purchase, is not too heavy and that it is comfortable to wear. It must also include a spatter barrier, the ability to be modified, a sensor bar, and the availability of replacement components.
2. You Can Simply Put Your Hair in a Tigh Knot
The most conventional and easiest technique for a welder operator to keep their long hair out of their face is to pull it back into a tight bun. Wrap an elastic band over your buns and secure them in place to prevent them from falling on your face.
If there are any unruly hairs, just use bobby pins to push them up and you should be OK. Anything that prevents your hair from falling on your face will suffice.
3. Consider Buying a Welding Cap
A welding cap is a good option if you want something that is both lightweight and comfortable. It must adequately shield your head from any hot metal, sparks, or splatters that may be present.
Not only they are effective in protecting your hair, but they are also made completely of cotton, making them incredibly breathable and also preventing sweat from pouring down your eyebrows while working.
4. Bandana is Another Option That You Can Use
Braids are not easy to create for everyone, and they may even be difficult to perform on a regular basis. If you don’t know how to braid my easiest suggestion would be to put a bandana over your head and tuck all of your hair within.
When welding, sparks will fly everywhere, and this will keep you safe. Make use of bobby pins or a bun to tuck in all of the ends. Bandanas aren’t my first choice for headgear. But it works. It’s a good option to have in case you don’t know how to braid your hair.
Few Other Safety Measures That You Need to Take
In addition to your hair, there are a few other parts of your body that need your attention. Some of these essential measures for ensuring your safety are listed below:
- Protect your eyes at all cost
- Always keep a fire extinguisher in your shop
- Wear protective clothing
- Make habit of using respirators
- Beware of leakages in your welding system
- Keep your welding space clean
Let’s discuss them one by one:
1. Protect your eyes at all cost
Be sure to always wear safety glasses in your workplace to protect your eyes from flying debris, which is often composed of metal. If you routinely do welding tasks, you will be exposed to a significant amount of flying debris.
You should make it a routine to put them on as soon as you come in the door; this will ensure that you are protected at all times.
2. Always keep a fire extinguisher in your shop
You shouldn’t be shocked if anything catches fire at some time during a welding operation because of all of the intense heat and sparks that are produced throughout the process. Because fires are a very real risk, you should always have an extinguisher on hand in case one breaks out.
3. Wear protective clothing
If you’ve ever imagined yourself beginning your first welding project in a pair of shorts, an old t-shirt, and a pair of flip-flops, you should rethink that idea. Wearing the necessary protective clothing at all times when welding is required if you wish to prevent injuries to your body, notably burns, that may be caused by the process.
4. Make habit of using respirators
You should always wear a respirator if you are going to be dealing with metals or any other materials that have the potential to emit harmful vapors.
Welding or cutting certain materials may produce a welding plume, which is a combination of hazardous gases, fumes, and smoke. This is not the type of thing you want to breathe in if you want to keep your lungs healthy and prevent respiratory issues.
5. Beware of leakages in your welding system
There is a good chance that you have pressurized containers in your welding shop that hold liquids or gases. Take extra precautions to check that none of those containers or the items that you are attaching to them have any leaks in them.
See my other article to know more about leakages and how to detect them.
6. Maintain your equipment
If you want to establish the safest possible working environment for your welding projects, you need to give your equipment a lot of TLC and make sure it’s in good operating order at all times. If your welding equipment and tools are in disrepair, an accident is almost waiting to happen every time you use them. However, the vast majority of incidents of this kind are avoidable if proper care is taken with the equipment.
Wrapping it Up
When it comes to welding, safety is the most important thing to keep in mind at all times. Because because welding involves a significant amount of fire and spatters, it is essential that you take a significant amount of precaution to protect your hair. I really hope that you’ll be able to keep your hair under control while welding thanks to the advice that’s been provided in this article.
Weld Types
Different Welding Methods: Applications of Each Method
Welding is joining two pieces of metal together by melting and cooling them until they become one piece. Welding processes include:
- Oxyacetylene welding
- Shielded metal arc welding (Stick)
- Gas tungsten arc welding (TIG)
- Gas metal arc welding (MIG)
- Flux-cored arc welding
- Torch or oxyfuel brazing
Some methods employ both heat and pressure, while others employ only heat. Welding is commonly used to construct automobiles, airplanes, and buildings. Other metal-cutting methods, such as oxy-acetylene and plasma arc cutting, use heat or electricity to cut through metal.
1. Oxyacetylene welding
Oxyacetylene welding (OAW) is a method of joining two pieces of metal using heat generated by the combustion of oxygen and acetylene gas.
Torch brazing (TB) is similar, but the metal is not completely melted. Instead, a special alloy is melted and used to join the two metal pieces.
Oxyfuel gas cutting (OFC) is a method of cutting metal that uses the same tools and gases as OAW and TB.
To generate heat and bond the metal, all of these methods employ a torch and special gases. They are frequently used on small or thin metal pieces.
Applications:
- Welding and brazing thin or small pieces of metal
- Welding and brazing dissimilar metals
- Cutting and piercing metal
Situations to Avoid:
- Welding thick or heavy sections of metal
- Welding high alloy or stainless steel
- Welding in high wind or outdoor conditions (due to the open flame)
- Welding in confined spaces (due to the production of harmful gases)
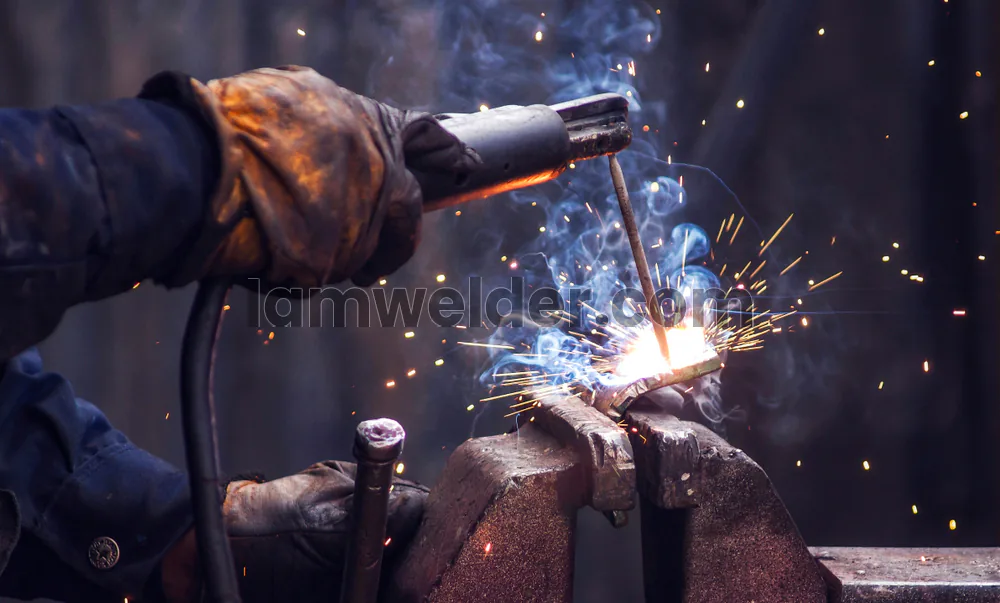
2. Shielded metal arc welding (Stick)
Shielded metal arc welding, or SMAW, is a way of welding metal together using an electrode that is coated with a special kind of flux.
The electrode melts and becomes a part of the welded metal. To do SMAW welding, you need a transformer, two welding cables, a work clamp, and an electrode holder.
There are many different types of electrodes you can use for SMAW welding, so you can choose the one that is best for your project. With SMAW welding, you can join different types and thicknesses of metal using the same machine.
Applications:
- Welding thick or heavy sections of metal
- Welding in outdoor conditions
- Welding in dirty or contaminated environments
- Welding on dirty or painted surfaces
Situations to Avoid:
- Welding thin or small pieces of metal (more suited for TIG welding)
- Welding high alloy or stainless steel (can affect the quality of the weld)
- Welding in confined spaces (due to the production of harmful gases)
- Welding in the presence of high winds (due to the electric arc)
3. Gas tungsten arc welding
GTAW, or gas tungsten arc welding, is a method of joining metal using a tungsten electrode. The tungsten electrode generates an electric arc, which melts the metal being welded as well as the end of the filler metal, which is manually applied.
Shielding gas is emitted from the welding gun to protect the molten weld metal from dirt and other contaminants. A foot or thumb switch can be added to the GTAW equipment to help the welder better control the welding.
GTAW welding produces very clean, high-quality welds, but it is slower and requires more skill than other welding methods. It is particularly useful for joining metal alloys that can only be joined with GTAW.
Applications:
- Welding thin or small pieces of metal
- Welding high alloy or stainless steel
- Welding in outdoor conditions (with proper shielding gas)
- Welding materials with high levels of contaminants or impurities
- Welding in high-precision environments
Situations to Avoid:
- Welding thick or heavy sections of metal (more suited for MIG welding)
- Welding in high production environments (slower process)
- Welding in confined spaces (due to the production of harmful gases)
- Welding in the presence of high winds (due to the electric arc)
4. Gas metal arc welding (MIG)
Mig welding is a type of arc welding that uses a continuously supplied wire electrode and gas to weld metal together.
It is becoming more popular because it is easier to learn than other types of welding, like stick and tig welding, and it is faster because you don’t have to stop and change the electrode as often.
Mig welding also creates less slag and spatter, which makes it more enjoyable to use and easier to clean up.
However, MIG welding equipment is more expensive and the MIG gun, which is the portable part of the equipment, can be difficult to use in small spaces. Mig welding also requires a shielding gas to work, so it is not as good for outdoor use.
Applications:
- Welding thick or heavy sections of metal
- Welding high alloy or stainless steel
- Welding in high-production environments
- Welding in outdoor conditions (with proper shielding gas)
Situations to Avoid:
- Welding thin or small pieces of metal (more suited for TIG welding)
- Welding in confined spaces (due to the production of harmful gases)
- Welding in the presence of high winds (due to the electric arc)
- Welding materials with high levels of contaminants or impurities (can affect the quality of the weld)
5. Flux-cored arc welding
Flux-cored arc welding, or FCAW, is a method of joining metal using a special type of electrode wire known as a flux core wire.
The wire is fed from a spool continuously through the welding equipment and out of the gun. The welding current flows through the equipment, melting the wire and the base metal.
Some flux core wires generate their own shielding gas as they melt, while others require the use of additional shielding gas. As the wire melts, it produces a gaseous cloud that shields the weld surface and removes impurities from the molten metal.
After the weld is completed, a layer of slag must be removed from the weld’s top. Despite this additional step, FCAW is a popular welding technique because it produces high-quality welds quickly and is very versatile.
FCAW equipment is similar to that used in gas metal arc welding (GMAW), and both methods are semiautomatic, which means that the wire is fed automatically but the welder moves the gun manually. Welding supply stores and other retailers stock FCAW equipment and filler metals.
Applications:
- Welding thick or heavy sections of metal
- Welding in outdoor conditions (with proper shielding gas)
- Welding in high-production environments
- Welding in dirty or contaminated environments
Situations to Avoid:
- Welding thin or small pieces of metal (more suited for TIG welding)
- Welding high alloy or stainless steel (can affect the quality of the weld)
- Welding in confined spaces (due to the production of harmful gases)
- Welding in the presence of high winds (due to the electric arc)
Comparison Table:
| Welding Process | Applications | Situations to Avoid |
|---|---|---|
| Oxyacetylene welding | Welding and brazing thin or small pieces of metal; welding and brazing dissimilar metals; cutting and piercing metal | Welding thick or heavy sections of metal; welding high alloy or stainless steel; welding in high wind or outdoor conditions; welding in confined spaces |
| Shielded metal arc welding (Stick) | Welding thick or heavy sections of metal; welding in outdoor conditions; welding in dirty or contaminated environments; welding on dirty or painted surfaces | Welding thin or small pieces of metal; welding high alloy or stainless steel; welding in confined spaces; welding in the presence of high winds |
| Gas tungsten arc welding (TIG) | Welding thin or small pieces of metal; welding high alloy or stainless steel; welding in outdoor conditions (with proper shielding gas); welding materials with high levels of contaminants or impurities; welding in high-precision environments | Welding thick or heavy sections of metal; welding in high production environments; welding in confined spaces; welding in the presence of high winds |
| Gas metal arc welding (MIG) | Welding thick or heavy sections of metal; welding in high production environments; welding in outdoor conditions; welding on dirty or painted surfaces | Welding thin or small pieces of metal; welding high alloy or stainless steel; welding in confined spaces; welding in the presence of high winds |
| Flux-cored arc welding | Welding thick or heavy sections of metal; welding in high production environments; welding in outdoor conditions; welding on dirty or painted surfaces | Welding thin or small pieces of metal; welding high alloy or stainless steel; welding in confined spaces; welding in the presence of high winds |
Informational
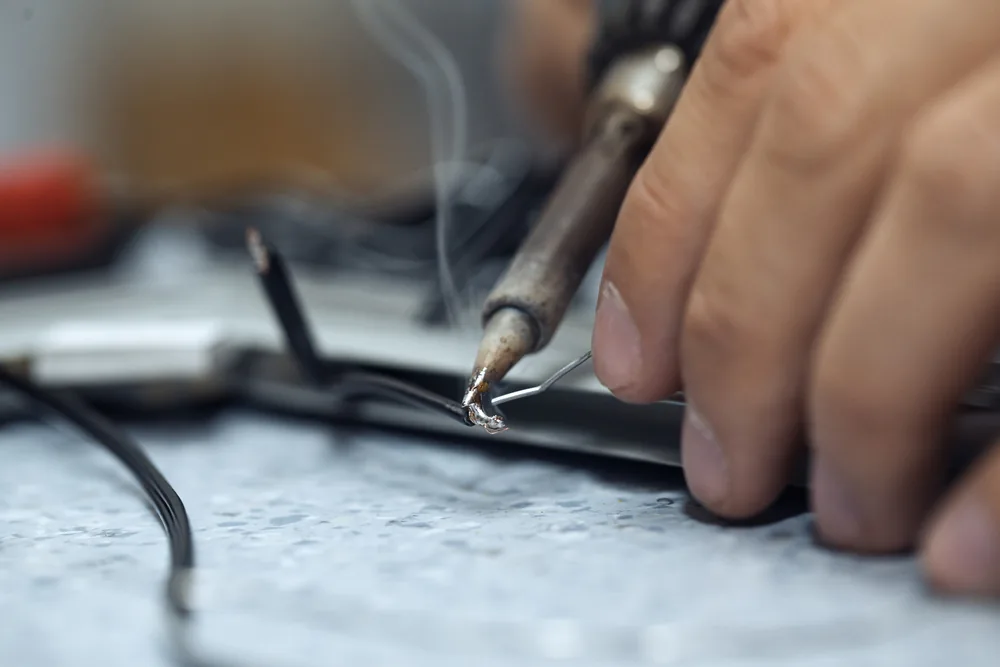
Why Won’t My Solder Stick? 6 Common Causes and Solutions
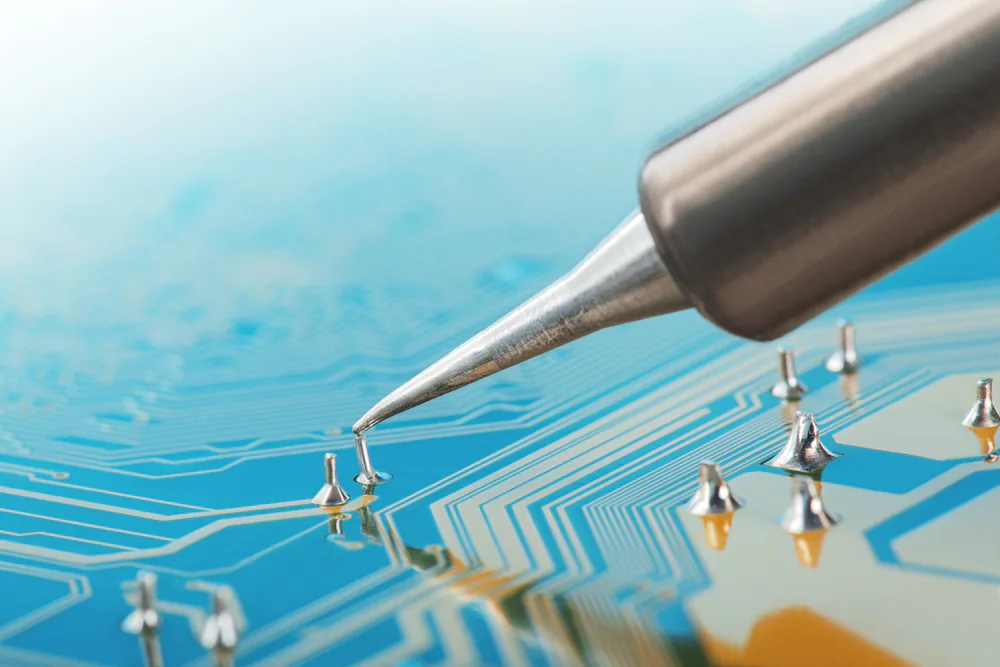
Soldering is a critical skill for anyone who wants to work with electronics or metalwork, but it can be frustrating when the solder just won’t stick. In this blog post, we’ll explore some of the common reasons why solder might not adhere properly to surfaces like copper wire, as well as solutions for troubleshooting these issues.
6 Common Reasons for Solder Not Sticking
- Oxidized solder tip.
- Insufficient heat.
- Poor heat distribution.
- Bad technique.
- Surface contamination.
- Poor surface preparation.
Summary
| Reason | Causes | Prevention |
|---|---|---|
| Oxidized solder tip | Exposure to air, high temp, acidic flux | Clean regularly, use tip cleaner, lower temp, use non-acidic flux, tin tip |
| Insufficient heat | Low temp, wrong tip size, poor thermal transfer | Set the correct temp, use the appropriate tip size, and preheat joint |
| Poor heat distribution | Wrong tip size, low wattage, dirty/damaged tip, uneven surfaces | Ensure high enough wattage, keep the tip clean, and ensure even surfaces |
| Bad technique | Improper soldering techniques | Improve soldering technique |
| Surface contamination | Dirty, greasy, or oily surfaces | Clean surfaces before soldering |
| Poor surface prep | Uneven, rough, or dirty surfaces | Properly prep surfaces before soldering |
Reason 1: Oxidized Solder Tip

An oxidized solder tip can result in the solder not sticking for several reasons. Oxidation occurs when the iron in the solder tip reacts with oxygen in the air, creating a layer of iron oxide on the surface of the tip.
This layer of iron oxide is a poor conductor of heat, which can cause problems with the soldering process, such as:
1- Difficulty melting solder: The oxidized layer on the tip can create a barrier between the tip and the solder, making it harder to melt the solder and get it to flow onto the joint.
2- Poor wetting: When the solder does melt, it may not “wet” the joint properly, meaning it won’t make a strong, lasting connection. This is because the oxidized layer can prevent the solder from bonding with the metal surfaces.
3- Cold joints: If the solder doesn’t flow properly, it can result in “cold joints,” where the joint isn’t heated enough to create a strong, lasting connection.
Causes of Oxidized Solder Tip
The causes for an oxidized solder tip can vary, but some common factors include:
1- Exposure to air: The longer a solder tip is exposed to air, the more likely it is to become oxidized. This is why it’s important to properly store your soldering iron when it’s not in use.
2- High temperature: Running your soldering iron at a high temperature can cause the tip to oxidize more quickly. This is because the high heat speeds up the reaction between iron and oxygen.
3- Acidic flux: Some types of flux can be acidic, which can speed up the oxidization process.
How to Prevent Oxidized Solder Tip?
To prevent an oxidized solder tip, you can take the following steps:
1- Clean your tip regularly: Wiping your solder tip with a damp sponge or brass wool can help remove any oxidation that may have built up on the surface.
2- Use a solder tip cleaner: A specialized solder tip cleaner can help remove oxidation and keep your tip in good condition.
? Solder Tip Cleaner, See Price on Amazon
3- Tin your tip: Applying a small amount of fresh solder to your tip can help protect it from oxidation.
4- Lower the temperature: Running your soldering iron at a lower temperature can help slow down the oxidation process.
5- Use a non-acidic flux: Using a non-acidic flux can help prevent oxidation from occurring.
? Flux Paste, See Price on Amazon
Reason 2: Insufficient Heat
Insufficient heat can also be a reason why solder not sticking properly during the soldering process. When there isn’t enough heat, the solder may not melt and flow onto the joint correctly, which can lead to cold joints, poor wetting, and weak connections.
Causes of Insufficient Heat:
Here are some causes of insufficient heat and ways to prevent it:
1- Low Temperature: If the temperature of the soldering iron is too low, the solder won’t be able to melt and flow onto the joint properly.
2- Soldering Tip Size: The size of the soldering tip can also impact the heat that is transferred to the joint. A larger tip may not heat the joint evenly, resulting in insufficient heat.
3- Thermal Transfer: The joint may not be heating up properly, which can result in insufficient heat. This can be caused by factors like poor thermal conductivity of the material being soldered or poor thermal transfer due to poor contact between the soldering tip and the joint.
How to Prevent Insufficient Heat
1- Set the Correct Temperature: Make sure that the temperature of the soldering iron is set to the appropriate level for the job.
Different types of solder and materials require different temperatures, so it’s important to check the recommended temperature for your specific job.
2- Use the Right Size Soldering Tip: Choose a soldering tip that is appropriate for the size of the joint you are working on. A smaller tip may work better for smaller joints, while a larger tip may be better for larger joints.
3- Use a Good Thermal Transfer Method: Make sure that the joint is properly heated. This may involve holding the soldering iron at the right angle, ensuring good contact between the tip and the joint, and using a heat sink to draw away excess heat from sensitive components.
4- Preheat the Joint: Preheating the joint can help ensure that it reaches the required temperature. You can use a heat gun or a preheating plate to warm up the joint before applying the solder.
Reason 3: Poor Heat Distribution
Poor heat distribution can also result in solder not sticking properly during the soldering process. This occurs when the heat is not evenly distributed across the joint, which can lead to cold spots where the solder doesn’t melt and flow properly.
Causes of Poor Heat Distribution:
Here are some causes of poor heat distribution and ways to prevent it:
1- Soldering Tip Size: If the soldering tip is too small for the size of the joint being soldered, it may not be able to distribute heat evenly across the entire joint.
2- Soldering Iron Wattage: If the wattage of the soldering iron is too low for the job, it may not be able to distribute enough heat to the joint.
3- Dirty or Damaged Tip: A dirty or damaged soldering tip can result in poor heat distribution, as the heat may not be able to transfer properly through the tip.
4- Uneven Surfaces: If the surfaces being soldered are not flat or even, heat may be distributed unevenly across the joint.
Ways to Prevent Poor Heat Distribution:
1- Choose the Right Soldering Tip: Select a soldering tip that is the appropriate size for the joint being soldered. A larger tip may be needed for larger joints, while a smaller tip may be needed for smaller joints.
2- Use a Soldering Iron with Adequate Wattage: Make sure the wattage of your soldering iron is appropriate for the job. Higher-wattage soldering irons are better for larger or more complex joints.
3- Clean and Maintain Your Soldering Tip: Regularly clean and maintain your soldering tip to ensure that it is in good condition and able to transfer heat properly.
4- Flatten Uneven Surfaces: If the surfaces being soldered are uneven, use a file or sandpaper to smooth them out before beginning the soldering process.
Reason 4: Bad/Poor Technique
A bad or poor technique during the soldering process can also result in the solder not sticking properly to the joint.
Causes of Bad/Poor Technique
Here are some causes of poor technique and ways to prevent it:
1- Insufficient Flux: Flux is used to clean and prepare the surfaces being soldered, as well as to help the solder flow properly. If the insufficient flux is used, the solder may not be able to properly wet the surfaces and stick to the joint.
2- Incorrect Solder Placement: The soldier should be placed on the joint, not on the soldering iron. If the solder is applied to the iron first and then transferred to the joint, it may not properly adhere to the surface.
3- Insufficient Contact Time: The soldering iron should be held in contact with the joint for an appropriate amount of time to ensure that the solder melts and flows properly. If the iron is not held in place long enough, the solder may not be able to properly adhere to the joint.
4- Excessive Movement: Excessive movement of the joint or soldering iron during the soldering process can cause the solder to cool and solidify before it has a chance to properly wet the joint and create a strong bond.
Ways to Prevent Bad/Poor Techniques:
1- Use Sufficient Flux: Use enough flux to properly clean and prepare the surfaces being soldered. The flux helps to remove oxides and other impurities and allows the solder to properly wet the surfaces.
2- Place Solder Directly on the Joint: Apply the solder directly to the joint, not to the soldering iron. This helps ensure that the solder properly adheres to the surface being soldered.
3- Hold the Soldering Iron in Place: Hold the soldering iron in place on the joint for an appropriate amount of time to ensure that the solder melts and flows properly. This will help create a strong bond between the joint and the solder.
4- Minimize Movement: Minimize movement of the joint and soldering iron during the soldering process to allow the solder to properly flow and wet the surfaces being joined.
Reason 5: Surface Contamination
Surface contamination is also a big reason why solder won’t stick properly during the soldering process. Contamination on the surfaces being soldered can prevent the solder from wetting the surface and adhering properly.
Causes of Surface Contamination:
Here are some causes of surface contamination and ways to prevent it:
1- Oils and Grease: Oils and grease from fingerprints or other sources can leave a residue on the surface being soldered, preventing the solder from properly wetting the surface.
2- Oxidation: Oxidation can occur on metal surfaces that are exposed to air, especially at higher temperatures. This can create a layer of oxide on the surface that can prevent the solder from properly wetting the surface.
3- Residues from Previous Soldering: Residues from previous soldering jobs, such as solder flux or excess solder, can remain on the surface and prevent the new solder from properly adhering.
Ways to Prevent Surface Contamination:
1- Clean the Surfaces: Clean the surfaces being soldered before beginning the soldering process to remove any oils, grease, or other contaminants. Use a solvent such as an isopropyl alcohol to clean the surface thoroughly.
2- Use Flux: Flux can help to remove oxides and other contaminants from the surface being soldered, allowing the solder to properly wet the surface. Use flux appropriate for the type of solder being used and follow the manufacturer’s instructions for its use.
? Flux Paste, See Price on Amazon
3- Avoid Excess Heat: Excessive heat can lead to oxidation on the surface being soldered. Use the appropriate temperature for the job and avoid overheating the surface.
4- Remove Residues: Remove any residues from previous soldering jobs before beginning a new soldering job. Use a desoldering braid or soldering iron to remove any excess solder, and use a solvent to clean any remaining flux residue.
Cause 6: Poor Surface Preparation
Poor surface preparation can also result in solder not sticking properly during the soldering process. Surface preparation is critical to ensure that the surfaces being joined are clean, smooth, and properly aligned.
Causes of Poor Surface Preparation:
Here are some causes of poor surface preparation and ways to prevent it:
1- Inadequate Cleaning: Inadequate cleaning of the surfaces being soldered can leave contaminants such as oils, dirt, and oxides that can prevent the solder from properly wetting the surfaces.
2- Poor Alignment: Poor alignment of the surfaces being soldered can cause the solder to flow to one side, leaving the joint weak and poorly formed.
3- Uneven or Rough Surfaces: Uneven or rough surfaces can prevent the solder from properly adhering to the surfaces being joined.
Ways to Prevent Poor Surface Preparation:
1- Thorough Cleaning: Thoroughly clean the surfaces being soldered to remove any contaminants. Use a solvent such as an isopropyl alcohol to clean the surface thoroughly.
2- Proper Alignment: Properly align the surfaces being soldered to ensure that the solder flows evenly and forms a strong joint. Use clamps or other tools to hold the surfaces in place during the soldering process.
3- Smooth and Even Surfaces: Ensure that the surfaces being soldered are smooth and even. Use sandpaper or other tools to smooth out any rough spots or uneven surfaces.
4- Use Flux: Flux can help to remove oxides and other contaminants from the surface being soldered, allowing the solder to properly wet the surface. Use flux appropriate for the type of solder being used and follow the manufacturer’s instructions for its use.
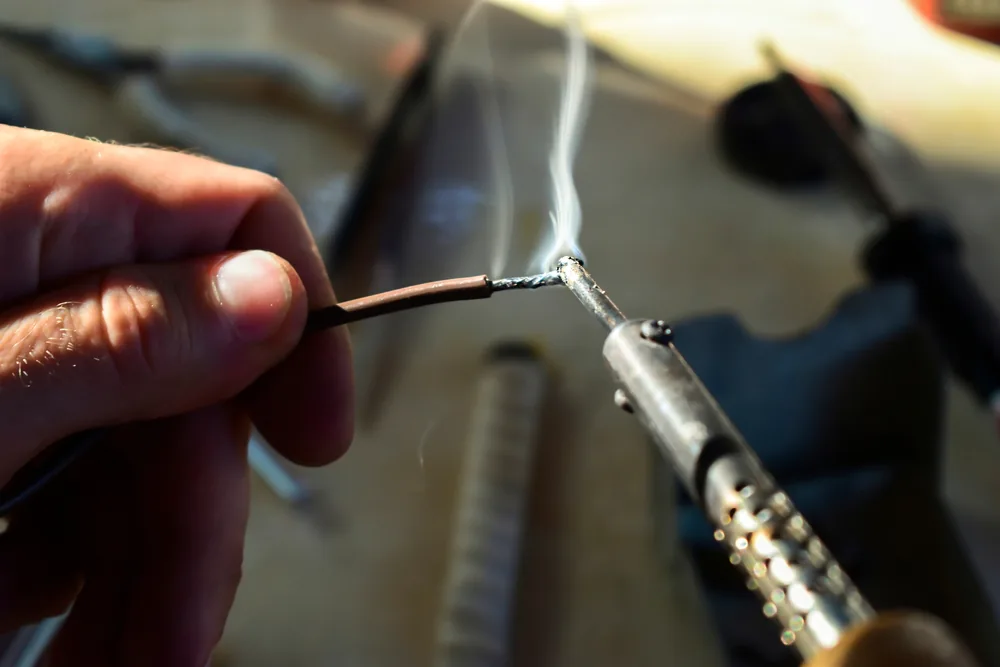
Why Solder Won’t Stick to Cooper?
Solder not sticking to copper can be a frustrating problem during the soldering process.
Here are some common causes and their solutions, few of these causes we have already discussed above:
1- Oxidation
Copper oxidizes easily and can form a layer of oxide on the surface that prevents the solder from properly wetting the copper.
To prevent oxidation, clean the copper surface thoroughly before soldering and use a solder flux that is designed to remove oxides from copper surfaces.
2- Contamination
Copper surfaces can also become contaminated with oils, dirt, or other contaminants that prevent the solder from sticking.
Clean the copper surface thoroughly with a solvent such as an isopropyl alcohol to remove any contaminants.
3- Insufficient Heat
Copper is a good conductor of heat and can dissipate heat quickly. Insufficient heat can prevent the solder from melting and adhering properly to the copper surface.
Use a soldering iron with enough power to heat the copper surface adequately and hold the soldering iron in place for a sufficient amount of time to allow the solder to melt and flow.
4- Inadequate Flux
Inadequate or improper flux can also prevent the solder from adhering properly to copper surfaces. Use a flux that is appropriate for copper surfaces and follow the manufacturer’s instructions for its use.
5- Poor Surface Preparation
Poor surface preparation can also prevent the solder from sticking properly to copper surfaces. Ensure that the copper surface is clean, smooth, and free of any contaminants before soldering.
By addressing these common causes of solder not sticking to copper, you can improve your soldering results and create strong, lasting connections.
Conclusion
soldering is a fundamental skill in electronics, and understanding why solder won’t stick is crucial for producing reliable electronic circuits.
There are several common causes of this problem, including poor heat distribution, insufficient heat, bad technique, surface contamination, poor surface preparation, and oxidation.
Fortunately, by taking proper precautions and addressing each of these issues with the appropriate solutions, such as using the right soldering techniques, preparing surfaces thoroughly, and applying the right flux, you can significantly improve your soldering results and create stronger, more reliable electronic connections.
With practice and attention to detail, anyone can master the art of soldering and create high-quality, lasting electronic circuits.


Kitchen Tools and Equipment that You Must Have

Optimizing Your Bedroom Lighting for a Perfect Sleep: 7 Ways to Follow

Energy Efficiency and Style: The Advantages of Roof Windows in the Modern Home

How to Weld If You Have Long Hair? Pro Welder’s Tips

What are Floating Kitchen Cabinets? Complete guide to Floating Cabinets!

How to Repair Damaged Pinch Weld? Is it possible?

How Do I Choose a Cup Size of TIG Welding [Cup Size Chart]

How Much Electricity Does Welding Consume? [Excel Sheet]

Which is the Best Welding Rod for Pipe Fence?

E6013 Welding Rod: A Complete Guide With Specifications, Settings & Amps Table

Why Won’t My Solder Stick? 6 Common Causes and Solutions

Does Welding Shorten Your Life: Life expectancy of a welder?