Equipment
Don’t Let Welding Rods Go Bad: Tips for Proper Storage
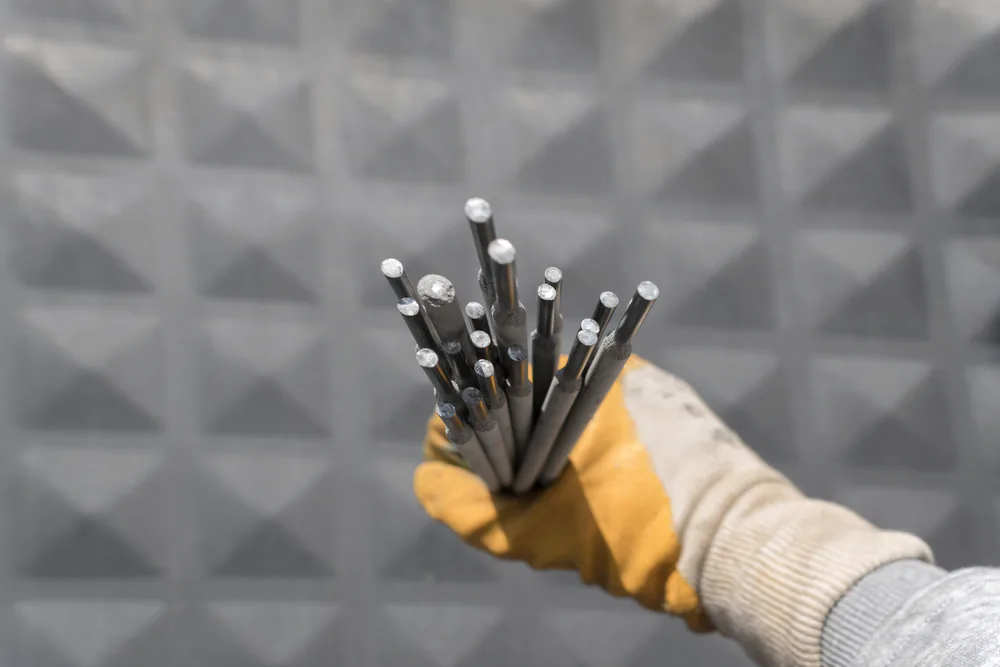
Welding rods play a crucial role in the welding process and it’s important to ensure that they are stored and handled properly. Improper storage and handling can lead to rust, deterioration and loss of quality.
Making the rods less effective when used. In this blog, we will provide tips and best practices for storing welding rods to ensure that they remain in good condition and ready for use whenever they are needed.
By following these tips you can avoid wasting money on poorly stored rods and ensure that your welding projects are completed with the highest quality materials.
What Happens When Welding Rods Go Bad?
Keeping welding rods dry is crucial for achieving a high-quality weld. When welding rods are in contact with moisture, they absorb an excessive amount of water, which can negatively impact the welding process in several ways.
1- Welding cracks and porosity
Firstly, damp rods can result in porosity and weld cracking, which reduces the strength of the weld and can make it more susceptible to breaking or failing.
This is because the moisture interferes with the chemical reactions that take place during welding, preventing the metal from fusing together properly.
2- Reduced arc performance
Secondly, the moisture can compromise the arc performance of the welding rod. The arc is the electrical current that creates the heat that fuses the metal together and it is essential for the weld to have a consistent and stable arc in order to produce a high-quality weld.
Moisture can interfere with the arc, causing it to flicker or become unstable, which makes it difficult to control the heat and results in an inconsistent weld.
3- Hydrogen induced cracking
In addition to these issues, damp rods with a low hydrogen content can result in hydrogen-induced cracking. Which is a type of cracking that occurs as a result of hydrogen entering the metal.
This type of cracking is most likely to occur in harder metals. And it can make the weld joint more brittle thus reducing its overall strength and making it more susceptible to breaking or failing.
4- Excessive fluidity of slag
Finally, the use of damp rods can lead to other issues such as excessive fluidity of the slag, difficulties in removing the slag, and a rough surface on the weld.
All of these issues can negatively impact the quality and strength of the weld, making it essential to use dry welding rods to achieve the best results.
Why Welding Rods Can Go Bad?
Following are some of the factors that may be responsible for welding rods going bad:
1- Moisture
The primary factor that causes welding rods to deteriorate is the amount of moisture they contain. When electrodes are exposed to ambient humidity they will absorb moisture causing them to get wet and eventually dissolve. Moisture content greater than 0.5% in low hydrogen rods (E7108) can make them useless.
2- Rod composition
The kind of rod an electrode is made of influences how much moisture it can withstand before being damaged, and certain electrodes are more susceptible to moisture than others.
3- Moisture level in coating
The presence of moisture in the coating is essential for the proper functioning of non-low hydrogen electrodes (E6010, E7014), but an excessive amount of moisture can have adverse consequences. A moisture content of 1.0% is considered acceptable for non-low hydrogen electrodes.
4- Rusting
Mild rods may rust if left unattended for a long period of time.
5- Temperature
Temperature also contributes to the deterioration of welding rods.
6- Surface layer breakdown
Moisture can trigger the breakdown of the surface layer of the electrode, leaving behind a useless black flux on low hydrogen electrodes or a white powdery residue.
7- Storage conditions
It is important to store electrodes in a warm and dry environment after the package has been opened, to get the most out of their capabilities.
What are the Ideal Storage Conditions?
Welding rods are typically stored under the following conditions to ensure their optimal performance:
Temperature: Store welding rods in a dry, cool place, away from heat sources. Ideal temperature range is between 10°C and 25°C.
1- Humidity:- Welding rods should be stored in a low-humidity environment to prevent moisture absorption which can weaken the rods and cause porosity in the welds.
2- Light:- Rods should be stored in a dark place as exposure to light can cause the rods to deteriorate.
3- Contamination:- They should be stored in a clean and dust-free environment to prevent contamination which can weaken the rods and affect the quality of the weld.
4- Ventilation:- Welding rods should be stored in a well-ventilated area to prevent the buildup of gases which can weaken the rods and affect the quality of the weld.
5- Protection from mechanical damage:- Welding rods should be stored in a place where they won’t be subject to mechanical damage such as being crushed or bent.
| Parameter | Ideal Value |
|---|---|
| Temperature | 20°C to 25°C (68°F to 77°F) |
| Humidity level | 40% to 60% relative humidity |
| Light | Dark, cool and dry place |
| Ventilation | Good ventilation to reduce moisture levels |
What is the Proper Way to Store Welding Rods?
The proper procedures for storing and handling welding electrodes include:
1- Store the Electrodes in a Dry Location
Storing electrodes in a dry place is important to prevent rust and deterioration. Welding electrodes are coated with a thin layer of flux to protect them from rust and oxidation.
This protective layer can be damaged if the electrodes are exposed to moisture or humidity. Which can cause the electrodes to rust and deteriorate.
2- Keep the Electrodes in the Original Packing
Keeping electrodes in their original packaging until ready to use helps maintain their quality. The packaging provides protection against moisture, impact and other environmental factors that can affect the quality of the electrodes.
3- Avoid Impacts
Avoiding impact or rough handling of electrodes helps to maintain the protective coating and prevent damage to the electrodes.
Welding electrodes are delicate and rough handling can damage the protective coating which makes the electrodes less effective when used.
4- Control the Environment Temperature
Keeping electrodes in a temperature-controlled environment is important to avoid affecting their performance.
Welding electrodes can be sensitive to extreme temperature changes which can cause them to expand or contract and affect their ability to perform as intended.
5- Keep Note of the Expiration Date
Checking the expiration date of electrodes and discarding any that have expired is important to ensure the quality and performance of the electrodes.
Welding electrodes have a shelf life and can deteriorate over time, making them less effective when used.
6- Dispose of the Used or Damaged Rods
Properly disposing of used or damaged electrodes is important to prevent environmental contamination.
Welding electrodes contain materials that can be harmful to the environment and proper disposal is necessary to prevent environmental contamination.
How to Dry Wet Welding Rods?
Drying wet welding rods is a crucial step in ensuring that the stick electrodes or shielded metal arc welding (SMAW) electrodes can deposit high-quality welds.
Low Hydrogen Stick Electrodes
Low hydrogen stick electrodes are particularly sensitive to moisture and need to be kept dry. If the containers are sealed, they can provide excellent protection, but opened containers should be stored in a cabinet at a temperature between 120 to 150 degrees Celsius (250 to 300 degrees Fahrenheit).
Moisture-resistant electrodes with a “R” suffix in the AWS classification are less susceptible to moisture pickup, but even they should be maintained properly.
Proper Way to Redry Wet Stick Electrodes
Redrying wet stick electrodes correctly is crucial to regain their ability to deposit high-quality welds. The correct temperature for redrying varies depending on the type of electrode and its condition.
The time needed at the ultimate temperature is one hour, but temperatures higher than the required ones should be avoided.
Electrodes with a strength category of E8018 and above should not be redried more than three times for an hour each, in the temperature range of 370 to 430 degrees Celsius (700 to 800 degrees Fahrenheit).
This helps reduce the risk of oxidation and loss of tensile or impact capabilities. If severe redrying causes the electrode coating to become brittle or results in a change in handling or arc characteristics, the electrode should be discarded.
To ensure that each electrode reaches the drying temperature, they should be removed from their container and spread out in the oven.
Temperature Recommendations
Electrodes that have been exposed to air for less than a week or had no direct contact with water can be redried at a temperature between 340 to 400 degrees Celsius (650 to 750 degrees Fahrenheit).
Electrodes that have been in prolonged contact with water or often exposed to damp conditions should be redried at 80 to 105 degrees Celsius (180 to 220 degrees Fahrenheit).
Final Words
Proper storage and handling of welding rods is essential to ensure their quality and effectiveness. By following the tips outlined in this blog you can avoid the common pitfalls of poor storage practices and extend the lifespan of your welding rods.
Taking the time to properly store your welding rods can save you time, money and ensure the success of your welding projects. So don’t let welding rods go bad and invest in proper storage to ensure that your welding materials are always ready for use.
Informational
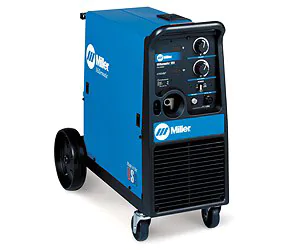
Millermatic 251 Complete Buying Guide: Used vs New? [Solved]
The Millermatic 251 is a tool that almost all welders are thinking about getting or are already using at work. In the welding community, however, there are a lot of misunderstandings and questions about the Millermatic 251.
In this article, I’ll talk in-depth about the specs of the Millermatic 251, and we’ll also talk about whether you should buy a new or used machine.
Millermatic 251 is a Great Machine in the Right Hands
The Miller company is known for making great welders, and the Millermatic 251 is one of their successful products. It will only work best for you only if you know how to use it.
With 250 Amps at 28 VDC, the Millermatic 251 Mig Welder has the highest output rating in its class.
Digital timers and a big digital control panel on the front of the welder let you change settings like voltage and wire feed speed.
In a single pass, the Millermatic 251 is able to weld materials with thicknesses ranging from 22 gauge all the way up to 1/2 inch.
The Active Arc Stabilizer technology provides excellent starts, and the line voltage compensation provides constant output despite fluctuations in the amount of input power.
The “Auto Gun Detect” function of the machine makes it possible to pull the trigger on the MIG gun, spool gun, or push-pull gun.
If the gun has a timer, the welder will pick it up right away, along with the voltage and the speed of the wire feed.
The Millermatic 251 Mig Welder has a unique flip-down chamber that holds the welder’s parameter chart and other consumables. This lets customers get it right the first time they use it.
Things You Will Get Along with the New Millermatic 251
If you have decidee to buy a new Millermatic 251 then these are a few of the things that you will get along with it for free.
- The power cord and plug (only for the 200/230 V model)
- M-25 MIG gun with a range of 12 feet (3.7 meters) and a capacity of 250 amps for.030/.035-inch wire
- Cable and clamp for working.
- Argon mixture regulator and flow gauge, along with a hose
- Extra contact tips
- reversible drive rolls with running gear and cylinder rack installed from the factory at.030/.035 in.
What Year was the Millermatic 251 Made?
The Millermatic 251 was made in 2005, according to the user manual included with the machine. Miller Industries, on the other hand, does not reveal the machine’s exact production date.
How Many Amps is Millermatic 251?
Millermatic 251 has an Amperage range of 30 – 300 Amps. This machine has a duty cycle of 60p% when it is operated at 200 amperes. And if you use it at 250 amps, the duty cycle will be 40%.
[table id= 17/]
How Many Watts is the Millermatic 251?
When working with 28 VDC, the power of the Millermatic 251 ranges from 5600 to 7000 watts. Both 200 amps and 250 amps can be used with this machine.
You can easily figure out how many watts a Millermatic 251 has by multiplying the amps by VDC.
Millermatic 251’s Amps = 200 – 250 Amps
Millermatic 251’s Volts = 28 VDC
Watt Power = Amps X Volts
Watt Power of Millermatic 251 = 200 x 28 = 5600 watts or 250 x 28 = 7000 watts.
Can a Millermatic 251 Weld Aluminum?
Millermatic 251 can be used to weld aluminum, but a Spool gun module is required. The 251 Vintage Millermatic spool gun module employs both flux core (FCAW) and MIG (GMAW) welding.
The following spool guns are compatible with Millermatic 251:
- Spoolmatic 15A
- Spoolmatic 30A
Millermatic 251 Specifications Chart
[table id= 18/]
Millermatic 251 weighs about 98 kg and has dimensions of 32 x 19 x 39 in. It supports solid steel, stainless steel, and flux-cored wires with a wire diameter range of 0.6 to 1.2 mm. It can also work at either a 40% or 60% duty cycle.
Specification image from manual
What is the Duty Cycle of Millermatic 251?
Duty Cycle: The duty cycle is the proportion of 10 minutes that the device can weld at full power without overheating. If the equipment overheats, the thermostat(s) opens, the output stops, and the cooling fan operates. Allow fifteen minutes for the device to cool.

The Millermatic 251 is able to function at a duty cycle of either 60% or 40%. This indicates that the machine can weld for 6 minutes at a current of 200 amperes before needing to rest for four minutes.
whereas at a current of 250 amperes it works for 4 minutes before needing to rest for six seconds.

If the Millermatic 251 begins to overheat, one of two things must happen: either the user must wait fifteen minutes for the machine to cool down, or the user must reduce the duty cycle before restarting the welding process.
Pros of Millermatic 251
- The highest-rated output of all the welders (250 Amps)
- Large digital control panel
- Built-in digital timers
- The voltage compensation feature keeps the power supply constant
- Starts can be smooth with an adjustable run-in period.
- No additional module is needed to connect a Spoolmatic 30A or 15A gun.
- If the welding tip becomes shorted to the work surface, the “Tip Saver” feature will cut power to the welding machine.
- If no arc is detected within three seconds of pulling the gun’s trigger, the weld output will be cut off.
- Automatically adjusting digital thermometers with a fan function
- Heavy-duty, aluminum-casting, dual-gear industrial drive system
Cons of Millermatic 251
- No negative feedback from users, apart from price issues
Is it Worth Buying a Used Millermatic 251?
If you are just starting out in the welding industry and are a novice, you should get a used Millermatic 251 since it will save you money that you can use towards other necessary instruments. However, if you have a successful company and earn a lot of money, you should invest in a modern Millermatic 251, which will save you money on energy and increase the quality of your welds.
Old vs New Millermatic 251: Price Comparison
At the time of writing, a brand-new Millermatic 250 could be purchased on Amazon for $4800. If you wish to purchase a used one, the price might range from $1500 to $2200, depending on the machine’s condition.
[table id= 16/]
Checklist for Buying a used Millermatic 251
When buying a used welder, there are a few things you should look at more closely. You don’t want to add a broken welder to your collection of tools.
- Does it make beads of the same size?
- When the wire is being fed, does it move smoothly or does it slip and jerk?
- Make sure the gas cup is in the right place, the tip is not bent, and there is no slag blocking the wire feed.
- Make sure the size and tension of the wire are right for the driving wheels.
Miller 251 Alternatives
Equipment
New to Welding? Check Out These 6 Machines
Whether you are a DIY enthusiast, a hobbyist or looking to start a new career. Welding is a valuable skill to have. However with so many different types of welding machines available. It can be overwhelming to choose the right one for you.
In this blog post, we will look at 6 of the best welding machines for beginners. Thus Making it easy for you to find the perfect fit for your needs.
List of 6 Best Welding Machines for Beginners
- Hobart Handler 140 MIG Welder
- Eastwood 200 AC/DC TIG Welder
- Hobart 500570 Stickmate 160i Arc Welder
- Weldpro MIG155Gsv Beginner MIG/Stick Arc Welder
- Forney Easy Weld 140FC-I Flux Core Welder For Beginners
- YesWelder MIG-205DS MIG/Flux Core/TIG/Stick Welder
Short Summary
If we compare all 6 welders then in my opinion the Hobart Handler 140 MIG Welder is the best option for beginners. The reason why I say because it is a versatile and reliable machine that is easy to set up and use.
It is capable of welding a wide range of materials and has a compact size and portability which makes it perfect for small projects and repairs.
It also has a variety of features such as an exclusive 3 groove drive roll, built-in contactor and generous operating parameters. which makes it an excellent choice for beginners.
Please keep in mind that this is my own opinion and may vary depending on individual experiences and usage of the product.
1- Hobart Handler 140 MIG Welder
The Hobart Handler 140 MIG Welder is a reliable and versatile machine that is perfect for beginners. It is easy to set up and use.
It is capable of welding a wide range of materials. Its compact size and portability make it ideal for small projects and repairs.
Key Features
- Exclusive 3-groove drive roll for easy switching between small diameter carbon steel MIG wire for exhaust work and auto body applications.
- Built-in contactor and self resetting thermal overload protection for added safety and convenience.
- Flux-Cored and MIG welding capabilities allowing for versatile use in a variety of welding applications.
- Generous operating parameters allowing you to weld thin gauge steel up to 1/4in. steel plate.
- Five position voltage control selector for a smooth stable arc at all welding thicknesses and amperage output of 25-140 Amps.
Specification Table
| Specification | Details |
|---|---|
| Input Voltage & Amperage | Volts: 115, Amps: 25, Max. Amps: 140 |
| Max Weld Thickness | 0.25 in |
| Duty Cycle | 20% at 90A |
| Dimension | 12 x 18 x 24 in |
| Weight | 66.0 lbs |
| Warranty | 12 months parts / 12 months labor |
Note: The list of Pros and Cons provided are based on user reviews found on the product page and may vary depending on individual experiences and usage of the product.
2- Eastwood 200 AC/DC TIG Welder
The Eastwood 200 AC/DC TIG Welder is a high performance machine that is ideal for welding both aluminum and steel.
It is perfect for beginners who want to learn TIG welding because it is easy to use and has a wide range of adjustable settings.
Key Features
- Dual voltage capability allowing for operation on either 110vAC, 15-amp circuit or 220vAC, 30-amp circuit.
- 1/4″-thick welding capacity on 220VAC.
- High-frequency start for precise arc control and square-wave inverter for accurate aluminum welding.
- Flex Head WP-17-type torch that accepts common cups and collets with up to 1/8″ electrodes and also a Gas lens kit to greatly improve your fabrication skills
- Rocker Style foot pedal with machine mounted controls and flow meter gauge for improved gas flow control and quick repeatable flow adjustments.
Specification Table
| Specification | Details |
|---|---|
| Input Voltage | 120vAC or 240vAC |
| Amperage | TIG: 10-190 amps, Stick: 10-185 amps |
| Duty Cycle | TIG: 60% at 190 amps and 100% at 143 amps Stick: 60% at 185 amps and 100% at 143 amps |
| Dimensions | 17.8” x 8.4” x 20.20” |
| Weight | 38 lbs |
| Warranty | 3 Years |
3- Hobart 500570 Stickmate 160i Arc Welder
The Hobart 500570 Stickmate 160i Arc Welder is a powerful and versatile stick welding machine that is perfect for beginners. It has a wide range of adjustable settings which makes it easy to use. It is also capable of welding a variety of materials.
Key Features
- Dependable, reliable, and rugged design for long-lasting use.
- Lightweight and portable design with a weight of under 20 lbs, making it easy to carry and store.
- Quick and easy starts with hot start technology.
- High output of up to 160A for welding up to 5/32 inch mild steel.
- Dual voltage input power of 120V/240V for easy connection to both 120 and 240V receptacles without the need for additional tools.
Specification Table
| Specification | Description |
|---|---|
| Input Voltage & Amperage | 240 Volts |
| Max Weld Thickness | Not specified |
| Duty Cycle | Not specified |
| Dimension | 13.38 x 7.13 x 10.5 inches |
| Weight | 15 pounds |
| Warranty | 5/3/1 Industrial Use |
4- Weldpro MIG155Gsv Beginner MIG/Stick Arc Welder
The Weldpro MIG155Gsv Beginner MIG/Stick Arc Welder is a versatile machine that is perfect for beginners. It is easy to set up and use. It can be used for both MIG and stick welding. It is also capable of welding a wide range of materials.
Key Features
- Dual Input Power Capability: This welder has the ability to select between 120-volt input power for home and generator-driven environments or 230-volt input for shop applications with thicker materials.
- Complete Package: The welder comes complete as pictured, ready for use.
- Wide Welding Range: With a welding range of 30 to 155 amps, this welder can handle a variety of welding tasks.
- Versatility: This welder can handle MIG, flux-cored and stick welding, allowing for a wide range of welding capabilities.
- Adjustable Settings: With the ability to feed wire at 78 inches to 396 inches per minute and infinitely adjustable wire speed and heat settings, this welder offers precision and control for your welding projects.
Specification Table
| Specification | Value |
|---|---|
| Input Voltage & Amperage | 115V/230±15%, 30 to 155 Amp |
| Max Weld Thickness | 1/4 inch mild steel |
| Duty Cycle | Not specified |
| Dimension | 14.96 x 13.58 x 6.69 inches |
| Weight | 21.2 pounds |
| Warranty | 3 Years |
5- Forney Easy Weld 140FC-I Flux Core Welder
The Forney Easy Weld 140FC-I Flux Core is a reliable flux core welding machine. It is perfect for beginners who want to learn flux core welding because it has a wide range of adjustable settings and it is capable of welding a variety of materials same as others.
Key Features
- EASY TO USE: This machine is ideal entry-level welder with infinite voltage and wire feed speed control for perfect welds every time.
- POWERFUL: 140 AMP output allows for welding up to 1/4″ of mild steel with protection from an all-metal case.
- PORTABLE: Only weighs 19 lbs., it is easily portable for any DIY project, maintenance and repair job, garage and more!
- FLUX-CORE WELDING: Uses .030″ flux-core wire and doesn’t require gas, can run on standard household power with at least a 20 AMP breaker.
- DIMENSIONS: 16.75″ (425.45 millimeters) x 8.125″ (206.38 millimeters) x 12″ (304.8 millimeters)
Specification Table
| Specification | Detail |
|---|---|
| Input Voltage & Amperage | 120V |
| Max Weld Thickness | 1/4″ of mild steel |
| Duty Cycle | 30% @ 90A |
| Dimension | 16.7 x 12 x 8.1 inches |
| Weight | 19 pounds |
| Warranty | 12 month |
6- YesWelder MIG-205DS MIG/Flux Core/TIG/Stick Welder
The YesWelder MIG-205DS MIG/Flux Core/TIG/Stick Welder is a versatile and powerful machine which is perfect for beginners.
It is capable of welding a wide range of materials and can be used for MIG, flux core, TIG and stick welding. It also has a wide range of adjustable settings which makes it easy to use for beginners
Key Features
- MIG Function: Synergic Controlled on MIG function for very easy and simple operation.
- 4 in 1 Functionality: Four functions in 1 of Gas MIG /Gasless MIG / Lift TIG / Stick
- Wire Compatibility: Takes up to 0.9mm(.035″) MIG solid wire(Gas MIG) and 0.9mm(.035″) MIG Flux wire(Gasless MIG)
- MIG Roll Compatibility: Apply to D100/D200 rolls (<10lbs) of MIG wire
- Amp Rating: 200 Amp Gas/Gasless MIG welder with a 50 Amp plug(220V) and 160 Amp Gas/Gasless MIG welder with a 35 Amp plug(110V).
Specification Table
| Specification | Value |
|---|---|
| Input Voltage & Amperage | 110V/220V 50/60 Hz |
| Max Weld Thickness | Not specified |
| Duty Cycle | @110V, 60%@160A, 100%@123A @220V, 60%@205A, 100%@158A |
| Dimension | 18.11″*8.07″*14.17″ |
| Weight | 23lb |
| Warranty | Not specified |
Conclusion
Selecting the right welding machine can be a daunting task for beginners but with the right information and research it can be a smooth process.
These six above mentioned machines are some of the best options available in the market . They are reliable, easy to use and versatile machines that can cater to a wide range of welding applications.
We hope this blog post has helped you in your search for the perfect welding machine. Happy welding.


Kitchen Tools and Equipment that You Must Have

Optimizing Your Bedroom Lighting for a Perfect Sleep: 7 Ways to Follow

Energy Efficiency and Style: The Advantages of Roof Windows in the Modern Home

How to Weld If You Have Long Hair? Pro Welder’s Tips

What are Floating Kitchen Cabinets? Complete guide to Floating Cabinets!

How to Repair Damaged Pinch Weld? Is it possible?

How Do I Choose a Cup Size of TIG Welding [Cup Size Chart]

How Much Electricity Does Welding Consume? [Excel Sheet]

Which is the Best Welding Rod for Pipe Fence?

E6013 Welding Rod: A Complete Guide With Specifications, Settings & Amps Table

Why Won’t My Solder Stick? 6 Common Causes and Solutions

Does Welding Shorten Your Life: Life expectancy of a welder?