Guides
Aluminum Stick Welding Made Simple: A How-To Guide
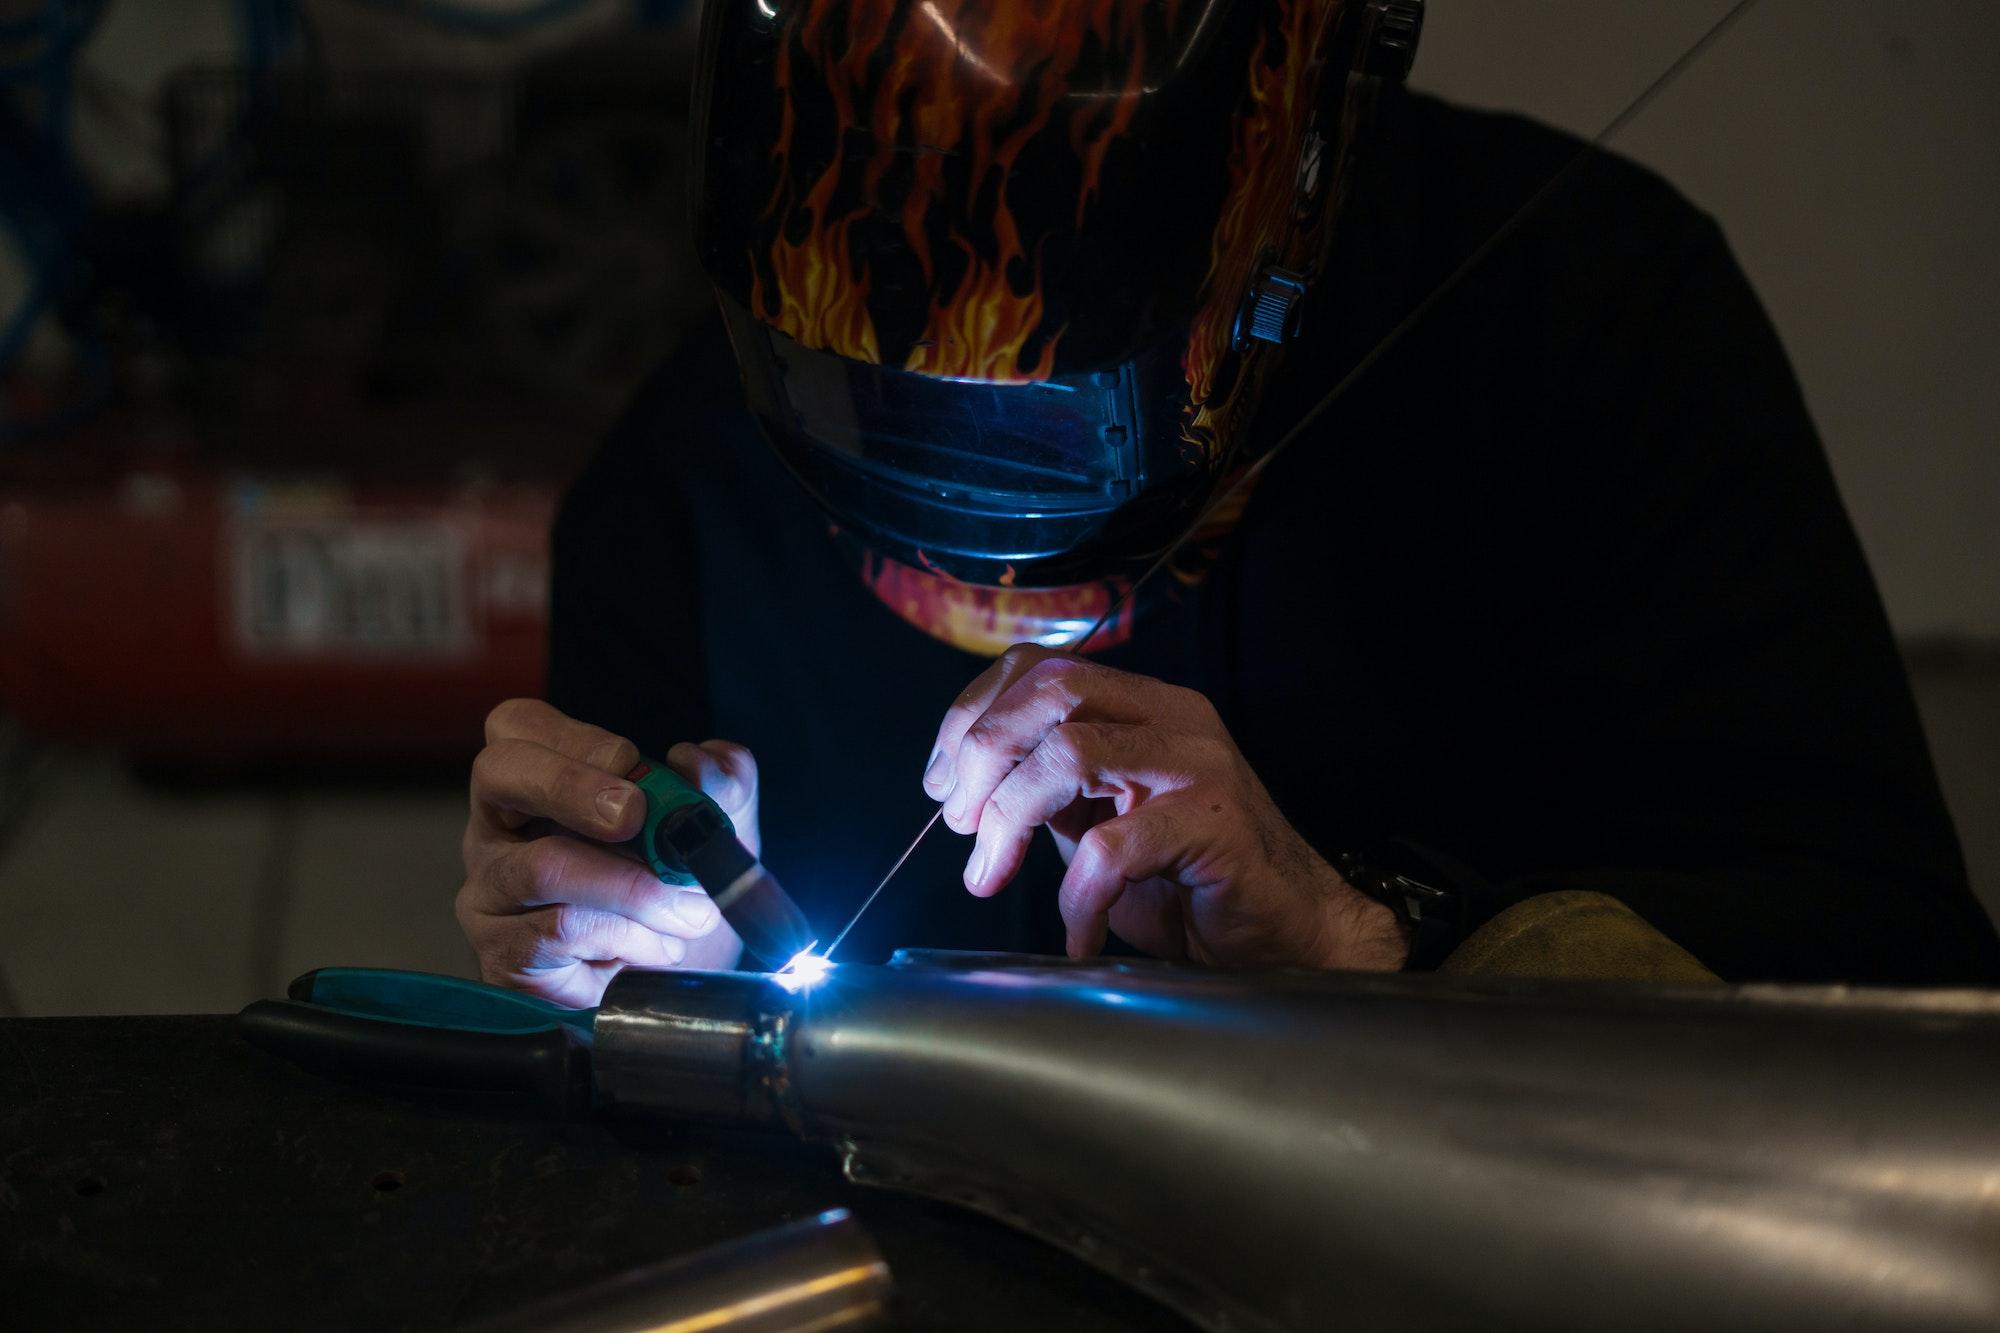
With its lightweight and corrosion-resistant properties, aluminum is a darling of many industries.
But its unique characteristics make it tricky to weld, especially for novices. Enter stick welding is one of the oldest and most adaptable welding processes.
But how effective is it for aluminum? Let’s dive deep into stick-welding aluminum and unravel its intricacies.
“Welding is like art, but instead of paint and a canvas, you have metal and fire.” – Remootify
Understanding Stick Welding
What Exactly is Stick Welding?
Stick welding is a manual arc welding process formally known as Shielded Metal Arc Welding (SMAW). It utilizes a consumable electrode covered in flux to produce the weld.
As the electrode melts under the arc’s heat, the flux coating disintegrates, releasing vapors that act as a shielding gas, safeguarding the weld from atmospheric contamination.
This results in slag formation, a layer of residue that must be removed post-welding. For a more detailed understanding, you can read this article on Stick Welding Fundamentals.
Advantages of Stick Welding:-
1-Broad Applicability:- Suitable for a wide variety of metals and alloys.
2-Mobility and Convenience:- Lightweight equipment without external shielding gas.
3-Economical Choice:- Generally more affordable than other welding processes.
4-Tolerance to Imperfections:- Can handle metals with some rust or contaminants.
5-Versatile Welding Positions:- Effective in all welding positions.
Limitations of Stick Welding:-
1-Skill Intensive:- Requires significant practice to master.
2-Time-Consuming:- Replacing electrodes and removing slag can slow the process.
3-Aesthetic Concerns:- Welds might lack the finesse of TIG or MIG welding.
4-Not Suitable for All Thicknesses:- Can be challenging on fragile materials.
5-Waste Production:- Generates waste in the form of electrode stubs and slag.
Can You Stick Weld Aluminum?
Aluminum can be stick welded, but it’s more complex than stick-welding steel. The finished joint appearance might not be as refined.
You need the right electrode, appropriate settings, good experience, and realistic expectations to achieve a successful weld.
Some argue that stick welding aluminum isn’t worth the effort due to its challenges and less appealing results.
However, understanding the nuances of welding aluminum can help make an informed decision.
Challenges of Stick Welding Aluminum
1-Aluminum Oxide Formation
One of the primary challenges of stick welding aluminum is the rapid formation of an aluminum oxide layer when exposed to air.
This oxide layer is much more complex and has a much higher melting point than the aluminum beneath. Welders need to break through this layer to achieve a successful weld.
The oxide layer can lead to weak welds and potential joint failures if not addressed.
2-High Thermal Conductivity
Aluminum’s high thermal conductivity disperses heat quickly. This can make it challenging to maintain a consistent weld pool, mainly when stick welding, which doesn’t offer the same level of heat control as other methods.
3-Electrode Selection
Stick welding aluminum requires specific electrodes different from those used for welding steel. These electrodes can be more expensive and are sensitive to moisture, requiring careful storage.
4-Difficulty in Achieving Clean Welds
Stick welding, in general, can produce rougher welds compared to other methods. The process can produce inconsistent and less aesthetically pleasing welds when applied to aluminum, which requires precise heat control.
5-Welding Speed
Stick welding aluminum requires a faster welding speed than steel. This can be challenging for beginners or those unfamiliar with welding aluminum, leading to issues like incomplete fusion.
6-Thickness Limitations
Stick welding is not ideal for thin aluminum sheets. The process runs hot, and there’s a risk of burning through the material.
7-Outdoor Challenges
While stick welding might be preferred for outdoor conditions where wind can disperse shielding gas, the challenges of stick welding aluminum might still outweigh the benefits in some cases.
8-Pre-cleaning is Essential
Before stick welding, aluminum surfaces must be thoroughly cleaned to remove any oxide layer. This step is crucial to ensure a strong weld. A stainless steel brush dedicated only to aluminum can help in this process.
For a deeper understanding of the challenges and tips on stick welding aluminum, you can refer to this comprehensive guide.
Conditions to Avoid Stick Welding Aluminum
While stick welding has its advantages, there are situations where it might not be the best choice for welding aluminum:
1-High Aesthetic Standards:- Stick welding can be messier than other methods like TIG or MIG welding. If you’re looking for a clean, aesthetically pleasing weld, stick welding might not be the best Choice.
2-Thin Materials:- Due to the intense heat generated by stick welding, there’s a risk of burning through thin aluminum sheets.
For thin materials, other welding methods might be more appropriate.
3-Flux Issues:- Stick welding uses electrodes covered in flux. This flux can sometimes introduce contaminants when welding aluminum, leading to weaker welds.
Additionally, the flux can result in porosity issues in the weld, compromising its strength and appearance.
4-Complex Welds:- For intricate or detailed welds, especially in tight spaces, the bulkier stick welding equipment might not be as suitable as other methods.
Best Stick Welding Rod Type and Size for Welding Aluminum
The Choice of electrode or rod is crucial. The type of rod you choose can significantly impact the quality and strength of your weld.
Here’s a guide to selecting the best rod for stick welding aluminum:-
1-4043 Rod:- This is one of the most commonly used aluminum welding rods. It’s versatile and works well for many applications.
It offers good fluidity and less sensitivity to weld cracking. Additionally, it provides good resistance to corrosion, especially in saltwater environments.
However, it has a lower strength and may not be ideal for environments with severe corrosion.
2- 5356 Rod:- This rod is another popular choice for welding aluminum. It has a higher tensile strength than 4043 and is often used for welding 5XXX series aluminum alloys.
It’s particularly suitable for applications with higher strength and better flexibility.
3-Avoid Steel Rods:- Never use steel rods for welding aluminum. Steel rods can cause rapid corrosion and damage the welded metals and the surrounding environment.
Rod Thickness
For stick welding, the thickness of the rod is crucial. For instance:
- 1/8″ rods are suitable for 3/32″ up to 3/8″ thick workpieces, ideally from 1/8″ to 1/4″.
- Due to increased tip vibration, 3/32″ rods can be a bit more challenging to use.
- 5/32″ rods are excellent for thicker workpieces, allowing for higher amperage and faster joint filling.
Optimal Stick Welding Machine Setting for Welding Aluminum
When stick welding aluminum, it’s essential to set the machine correctly to ensure a successful weld.
Here are some key settings and techniques:
1-Polarity:- Always use DC+ polarity for stick welding aluminum.
2-Amperage:- Aluminum requires a high amperage due to its low melting point and high heat conductivity. The exact amperage depends on the rod’s thickness. For example, for a 4043 rod:
- 3/32″ (2.4 mm): 50-80A
- 1/8″ (3.2 mm): 70-120A
- 5/32″ (4 mm): 100-160A
- 3/16″ (4.8 mm): 130-200A
3-Inverter Stick Welders Settings:- Modern inverter stick welders have features like hot-start and arc-force. A 35-40% hot start is typically sufficient, while an arc-force value of around 20-25% is recommended.
4-Preheating:- Preheating aluminum is crucial, especially if it’s 1/4″ or thicker. It helps maintain the puddle, reduces strength loss, and lowers the risk of cracking. A preheating temperature of 200 °F (94 °C) is generally adequate.
5-Rod Manipulation:- Proper rod manipulation is vital. Maintain a tight traveling angle of 5-10° from vertical and always pull the rod to push the slag material back.
The traveling Speed for aluminum rods is typically twice as fast as steel rods.
| Setting | Description |
|---|---|
| Polarity | DC+ polarity |
| Amperage | 3/32″ (2.4 mm): 50-80A |
| 1/8″ (3.2 mm): 70-120A | |
| 5/32″ (4 mm): 100-160A | |
| 3/16″ (4.8 mm): 130-200A | |
| Inverter Settings | Hot-start: 35-40% |
| Arc-force: 20-25% | |
| Preheating | 1/4″ or thicker: 200 °F (94 °C) |
| Rod Manipulation | Traveling angle: 5-10° from vertical |
| Pull the rod to push back slag | |
| Traveling Speed | Typically twice as fast as steel rods |
Note: The amperage values provided are specific to a 4043 rod.
How To Weld Aluminum With a Stick Welder
Achieving a solid weld on aluminum using a stick welder is no small feat, but with the proper steps, it’s entirely doable.
- Check Your Stick Welder:- Ensure it’s up to the task, especially regarding power and settings.
- Choose the Right Electrode:- Opt for electrodes like the 4043 or 5356, designed for aluminum.
- Check the Aluminum Thickness:- Remember, thicker pieces are generally easier to weld than thin sheets.
- Prepare the Surface:- Cleanliness is next to godliness in welding. Ensure the aluminum is free from contaminants.
- Fit-Up Properly:- A tight fit ensures a better weld quality.
- Welder Settings:- Adjust based on the electrode and aluminum thickness.
- Get the Right Arc Movement:- Consistency is critical.
- Use the Correct Angle:- A 10-15 degree angle usually yields the best results.
- End of the Weld:- Finish smoothly to prevent cratering.
- Clean-up:- A clean weld is a strong weld. Remove any slag or residue post-welding.
Things to Avoid When Welding Aluminum
Welders should avoid certain pitfalls and mistakes to ensure a strong and durable weld. Here are some crucial things to steer clear of when welding aluminum:-
1-Excessive Current:- Using too much Current can lead to overheating, which can cause metal warping and poor bonding between the two pieces. Sticking with low amperage settings and adjusting based on test welds is essential.
2-Flux-cored Electrodes:- The flux core in some electrodes can react adversely with aluminum, leading to porosity and weakening the weld. It’s best to use solid electrodes or rods without flux cores.
3-Moisture:- Welding in the presence of moisture can cause steam pockets and other defects, weakening the welds. Always ensure you’re welding in dry conditions and check for any condensation on the metal surface.
4-Overheating:- Overheating can lead to distortion of the metal and a poor weld. It’s crucial to use the lowest possible amperage for your weld and take breaks when needed.
5-High Travel Speed:- A high travel speed can lead to weak welds prone to cracking. Adjust your Speed as needed to ensure a consistent and robust weld.
6-Excessive Filler Metal:- Using too much filler metal can result in an inconsistent weld. Ensure you’re using just the right amount necessary for a strong weld.
7-Slow Movement:- While you don’t want to move too fast, moving too slowly can be problematic. Ensure you’re moving at a consistent pace to avoid overheating the metal.
8-Dirty Tools:- Always ensure your tools and the metal welding are clean. Dirt or debris can weaken your welds.
9-Not Taking Breaks:- If you’re struggling or feel unsure, take a break and come back with a fresh perspective. This can help ensure you produce the best possible welds.
FAQ: Stick Welding Aluminum
1. Can a stick welder weld aluminum?
Aluminum can be stick welded. However, it’s more complex than stick-welding steel. The finished joint appearance might not be as aesthetic as other methods.
Proper electrode selection, correct settings, and experience are crucial. While some argue that stick welding aluminum isn’t worth the effort, it’s possible with the proper knowledge and tools.
2. What should I set my stick welder to for aluminum?
The settings for your stick welder will largely depend on the thickness of the aluminum and the diameter of the electrode being used.
It’s essential to have a variable amperage output to adjust your heat appropriately. For instance, a 3/32 in. electrode requires 50 – 80 amps, while a 5/32 in. electrode needs 100 – 160 amps.
The electrode manufacturer’s specifications will provide a more accurate range.
3. What is the best stick welding rod for aluminum?
The best welding rods for aluminum are 4043 and 5356. The Choice between these two depends on the specific application and desired outcome.
The 4043 electrode is commonly used for welding aluminum alloys with high silicon content, while the 5356 is often chosen for welding marine-grade aluminum.
For a deeper dive into the best welding rods for aluminum, check out this guide.
4. What size welding rod for aluminum?
The size of the welding rod you should use depends on the thickness of the aluminum and the specific welding task. Common sizes include:
- A 3/32 in. electrode for 50 – 80 amps
- A 1/8 in. electrode for 80 – 130 amps
- A 5/32 in. electrode for 100 – 160 amps
It’s essential to consult the electrode manufacturer’s specifications to determine the best size for your project.
Conclusion
Stick welding aluminum is undoubtedly challenging but can be mastered with the proper knowledge, tools, and techniques.
Whether you’re a hobbyist looking to take on a new project or a professional aiming to refine your skills, understanding the nuances of stick welding aluminum can significantly enhance your welding journey. Remember, every challenge is an opportunity to learn and grow.
Informational
How to Weld If You Have Long Hair? Pro Welder’s Tips

Any welding operation that you perform puts you and anyone else in the area in danger of a number of different things. As a result, it is completely reasonable for you to be concerned about preventing your hair from becoming entangled in any welding equipment and posing a threat to your health. In this article, I will talk about how you can safely weld if you have long hair.
If you want to weld while having long hair, a French braid is the best option for keeping your hair together. This will help you in tying your hair and hold it together behind your neck. The French braid should keep the hair compact and close to your head’s shape, and it also allows you to wear a welding helmet. As a result, you will be able to wear full safety equipment.
When you are dealing with hot weld spatters, having long hair can present a particularly difficult challenge. Therefore, if you are interested in learning more about how you can safely weld with long hair, continue reading the rest of this article, where I will discuss the topic in greater detail and share some helpful hints.
How Your Long Hair Can be an Issue While Welding?
Welding procedures, as I indicated earlier, expose the operator as well as anybody else in the vicinity of the workplace to a wide variety of risks. A project involving welding presents a number of potential dangers and threats; it is important that you be aware of these issues in order to protect not only yourself but also others around you. Especially when dealing with spatters, it is easy for things to go wrong if you have long hair.
Before we look at all of the tips you may weld with long hair, we need to first understand the potential risks you run and everything that might go wrong. Long hair poses a unique set of challenges when it comes to welding. A few are mentioned below:
- Spatters are your hair’s worst enemy.
- UV rays can permanently damage your hair.
- With long hair, grinders can cause serious accidents.
Let’s look at these problems one by one:
1. Take Spatters Seriously
The spatter, sparks, and heat generated by the arc provides the greatest challenge throughout the welding process since they may travel up to 35 feet and enter any nearby place. You will want to provide enough protection for your long hair if you are going to be in an atmosphere like this.
Not just your hair, but everything else that might catch fire should be kept at least 35 feet away from the welding location. In addition, a fire extinguisher should never be far away. In the event that a fire breaks out.
2. UV Rays Can Damage Your Hair Permanently
Molten metals, welding arcs, and ultraviolet radiation will be present in the work environment while welding is being done. The interaction of all these factors puts you at an increased risk of serious burns. The actual welding arc may reach temperatures of up to 10,000 degrees Fahrenheit, making it one of the hottest processes possible.
And believe me when I say that you do not want that welding arc to get anywhere near your hair. Your hair will suffer a significant amount of damage as a result, and it is possible that it could even be burned.
3. Grinder Can Give You Nightmares
The usage of grinders is another factor that may create issues for your lengthy hair. Using grinders and welding go hand in hand when working with metals. Therefore, if you are a welder, you will most likely make extensive use of the grinder. And grinders are really your worst enemy when it comes to your long hair.
When you’re working, you can find yourself crouching over a grinder, which can cause serious accidents if you don’t protect your hair properly.
Tips from a Pro Welder to Protect Your Long Hair When Welding
Now you know what the most obvious dangers that you have when welding with long hair. The next step is to tell you how you can keep yourself safe from those dangers.
Here are a few of the tips that you can consider:
- Braid your hair while welding
- Put your hair in a tight knot behind your neck
- Consider buying a welding cap
- You can use a bandana too if you are a bandana lover
Let’s discuss these tips one by one:
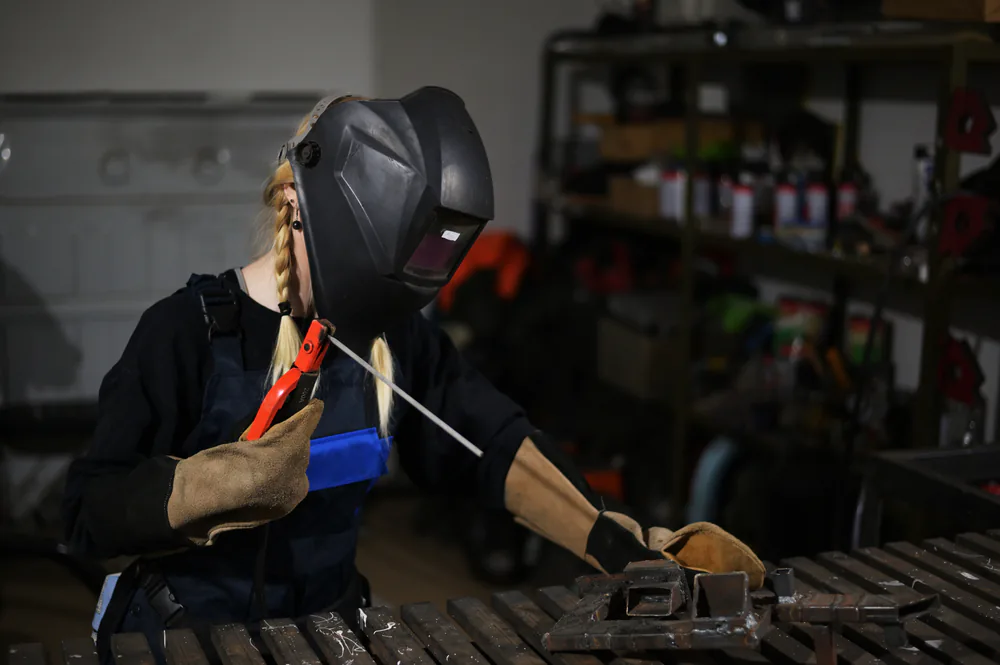
1. Braiding is the Best Option You Have
Welding hoods, helmets, or shields will provide the optimum amount of protection from any sparks, heat, UV rays, flash burns, or infrared light that may be present. They will protect not only your face and neck but also your eyes and hair. As a result, I feel that acquiring one is the best approach to protecting oneself.
Welding hoods are often made of cotton or leather and are rather light in weight and can go easily along with helmets. Make sure that whichever helmet you decide to purchase, is not too heavy and that it is comfortable to wear. It must also include a spatter barrier, the ability to be modified, a sensor bar, and the availability of replacement components.
2. You Can Simply Put Your Hair in a Tigh Knot
The most conventional and easiest technique for a welder operator to keep their long hair out of their face is to pull it back into a tight bun. Wrap an elastic band over your buns and secure them in place to prevent them from falling on your face.
If there are any unruly hairs, just use bobby pins to push them up and you should be OK. Anything that prevents your hair from falling on your face will suffice.
3. Consider Buying a Welding Cap
A welding cap is a good option if you want something that is both lightweight and comfortable. It must adequately shield your head from any hot metal, sparks, or splatters that may be present.
Not only they are effective in protecting your hair, but they are also made completely of cotton, making them incredibly breathable and also preventing sweat from pouring down your eyebrows while working.
4. Bandana is Another Option That You Can Use
Braids are not easy to create for everyone, and they may even be difficult to perform on a regular basis. If you don’t know how to braid my easiest suggestion would be to put a bandana over your head and tuck all of your hair within.
When welding, sparks will fly everywhere, and this will keep you safe. Make use of bobby pins or a bun to tuck in all of the ends. Bandanas aren’t my first choice for headgear. But it works. It’s a good option to have in case you don’t know how to braid your hair.
Few Other Safety Measures That You Need to Take
In addition to your hair, there are a few other parts of your body that need your attention. Some of these essential measures for ensuring your safety are listed below:
- Protect your eyes at all cost
- Always keep a fire extinguisher in your shop
- Wear protective clothing
- Make habit of using respirators
- Beware of leakages in your welding system
- Keep your welding space clean
Let’s discuss them one by one:
1. Protect your eyes at all cost
Be sure to always wear safety glasses in your workplace to protect your eyes from flying debris, which is often composed of metal. If you routinely do welding tasks, you will be exposed to a significant amount of flying debris.
You should make it a routine to put them on as soon as you come in the door; this will ensure that you are protected at all times.
2. Always keep a fire extinguisher in your shop
You shouldn’t be shocked if anything catches fire at some time during a welding operation because of all of the intense heat and sparks that are produced throughout the process. Because fires are a very real risk, you should always have an extinguisher on hand in case one breaks out.
3. Wear protective clothing
If you’ve ever imagined yourself beginning your first welding project in a pair of shorts, an old t-shirt, and a pair of flip-flops, you should rethink that idea. Wearing the necessary protective clothing at all times when welding is required if you wish to prevent injuries to your body, notably burns, that may be caused by the process.
4. Make habit of using respirators
You should always wear a respirator if you are going to be dealing with metals or any other materials that have the potential to emit harmful vapors.
Welding or cutting certain materials may produce a welding plume, which is a combination of hazardous gases, fumes, and smoke. This is not the type of thing you want to breathe in if you want to keep your lungs healthy and prevent respiratory issues.
5. Beware of leakages in your welding system
There is a good chance that you have pressurized containers in your welding shop that hold liquids or gases. Take extra precautions to check that none of those containers or the items that you are attaching to them have any leaks in them.
See my other article to know more about leakages and how to detect them.
6. Maintain your equipment
If you want to establish the safest possible working environment for your welding projects, you need to give your equipment a lot of TLC and make sure it’s in good operating order at all times. If your welding equipment and tools are in disrepair, an accident is almost waiting to happen every time you use them. However, the vast majority of incidents of this kind are avoidable if proper care is taken with the equipment.
Wrapping it Up
When it comes to welding, safety is the most important thing to keep in mind at all times. Because because welding involves a significant amount of fire and spatters, it is essential that you take a significant amount of precaution to protect your hair. I really hope that you’ll be able to keep your hair under control while welding thanks to the advice that’s been provided in this article.
Guides
How to Repair Damaged Pinch Weld? Is it possible?
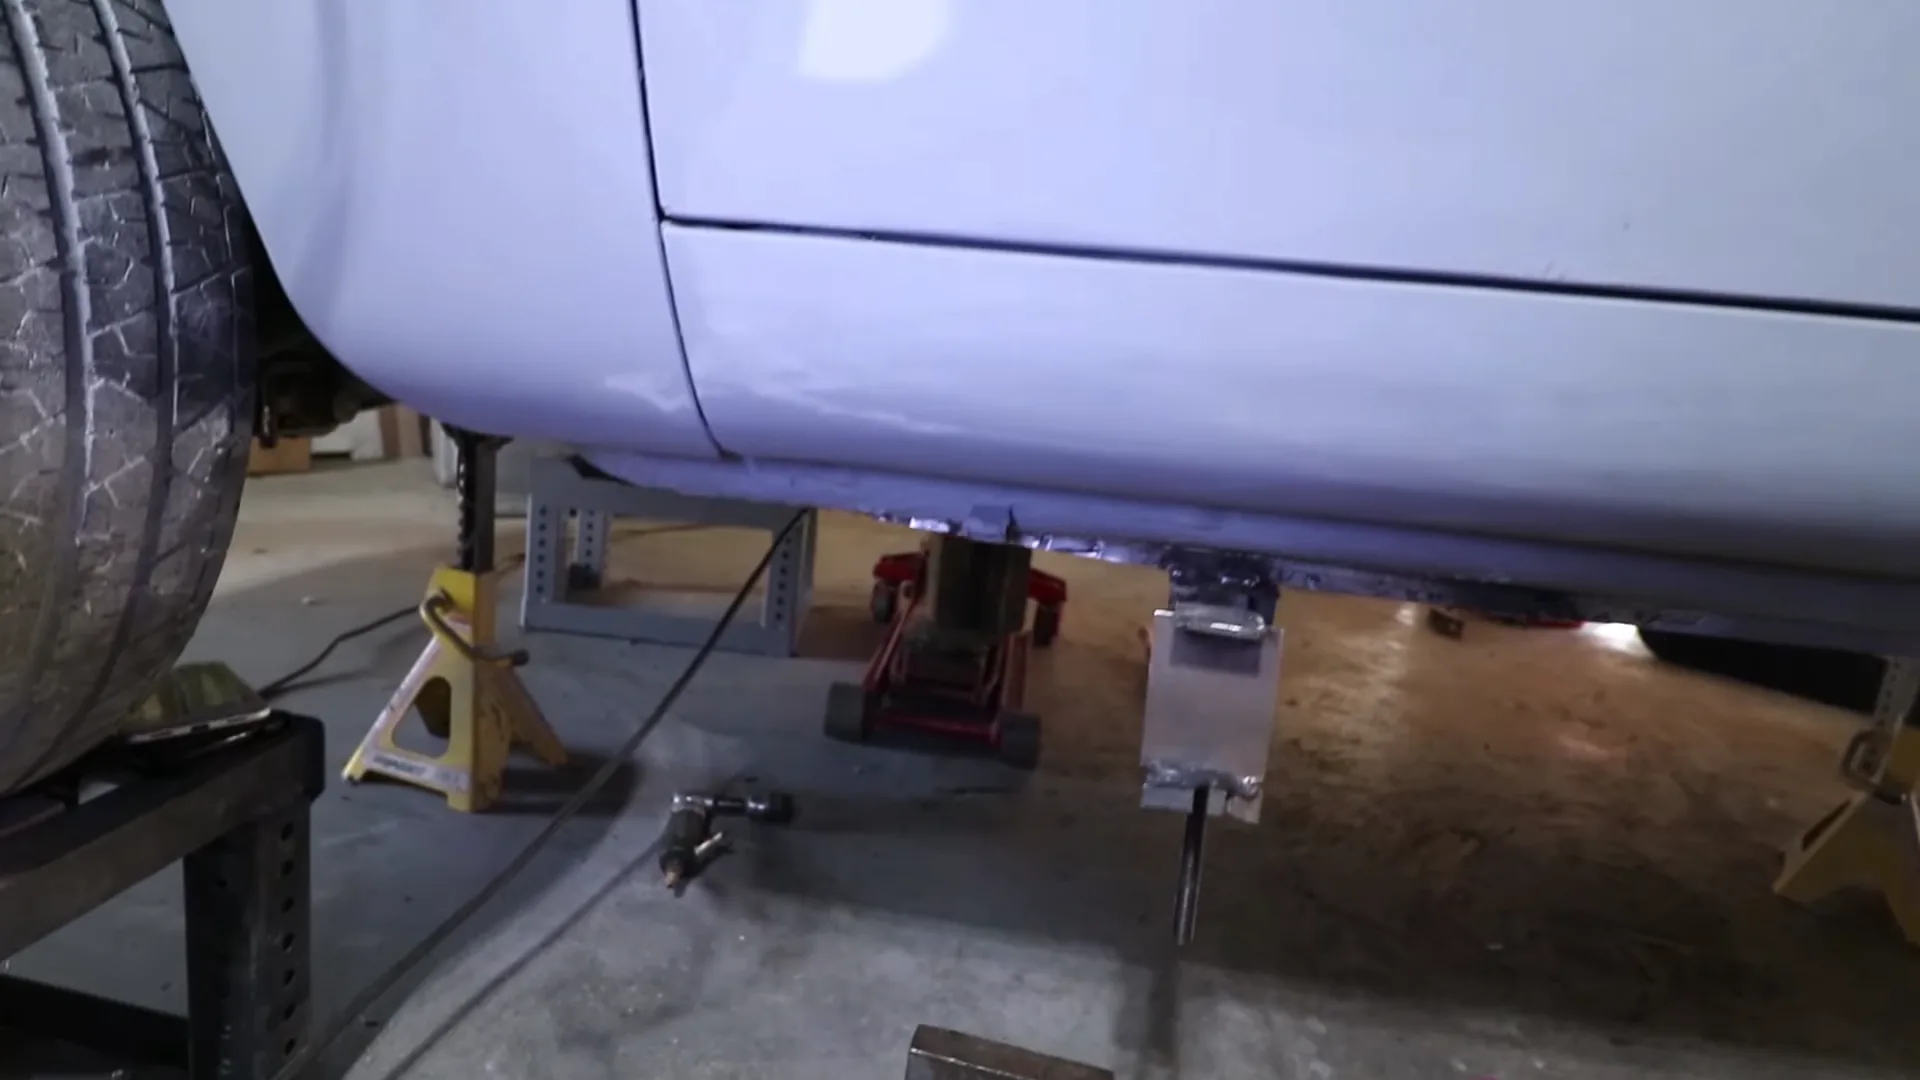
Every vehicle has a pinch weld, which is the most difficult connection and is required for safety. However, pinch welds can be damaged by improper floor jack placement. Is there really a way to solve this problem if this happens? In this article, I’ll go over how to repair pinch welds in great detail.
Pinch welds can be repaired, but how you do it will depend on the circumstances and kind of damage. It is sometimes simple to fix them, but there are other times when it is impossible or extremely difficult to fix your pinch welds. You might want to replace your pinch welds in that case.
Damaged pinch welds can be catastrophic for your vehicle, as they can lead to the destruction of joints and components. A major cause for concern is the fact that a defective pinch weld can led to the total destruction of a vehicle body. Whether or not pinch welds can be repaired is a frequently asked question. Thus, a simple response like the one above will not suffice.
In the following paragraphs, I will describe in detail the various types of damage that can occur to your car’s pinch welds, as well as the methods for repairing them. So, let’s get started.
There are 3 Types of Damage to Pinch Welds
As I have mentioned earlier how you’ll fix your pinch weld heavily depends on what sort of damage you have. So, if you’re trying to repair your pinch weld, the first and most critical step is to determine the kind and extent of your damage.
Here are a few of the most common pinch weld damage types:
- The joint getting bent inwards
- Rust damage
- Entire joint breakage or getting messed up
So let’s discuss these damage types one by one
1. Pinch Weld Joint Getting Bent Inwards
The first type of damage that we have is called an inward bent of joint. The majority of the time, this occurs as a result of improper placement of the jack. If a vehicle is jacked up incorrectly, the weight of the entire vehicle has the possibility to become concentrated in a single point.
Because of this, there is a chance that the joint will bend inwards, but there is also a chance that it will bend outwards.
2. Rusty Pinch Welds
Rust damage is the most prevalent type of damage that can occur. Rust has the potential to cause significant damage to an automobile’s pinch weld, which can ultimately lead to the total destruction of the vehicle’s body. Rust damage is difficult to predict because each instance is unique.
In easy words, there are numerous reasons that can cause rust damage. Depending on the severity of the damage, it is possible that this type of damage will prove to be the most challenging to repair. which we will discuss in greater depth in the following paragraphs.
3. Entire Joint Breakage
The third and most dangerous scenario is that the joint will either sustain total damage or destroy entirely. This is the worst-case scenario. If this happens then the two parts of the joint will no longer be able to be connected to one another.
It is possible that this could happen due to improper jacking, but in most cases, damage from an accident or from running over a particularly large bump or speed breaker causes it.
Is There a Way to Repair Your Damaged Pinch Welds?
It is possible, as I mentioned earlier, that you can repair the damaged pinch welds, but the success of such an effort is entirely dependent on the nature of the damage. There are some types of damage that might not be able to be fixed at all, despite the fact that the majority of damages can be fixed with some trial and error.
Now that we are aware of the type of damage, I believe that it is time for us to move on to the solution for it. In the following paragraphs, I will go over a few of the techniques that can be used to repair pinch welds.
How to Repair Damaged Pinch Welds?
Here are a few methods that you can use to fix your damaged pinch welds
- Straighten it out with a wrench.
- Straighten it out with a vice clamp.
- Make your own tools to pull the pinch weld down
When it comes to repairing the pinch weld, the approach mentioned above will be determined by the level of damage sustained. Repairing dents and loose components is often a simpler task than repairing rust damage.
If Your Pinch Weld is Bent
If your pinch weld is bent then you have 2 options to fix it
Option 1: Using a wrench
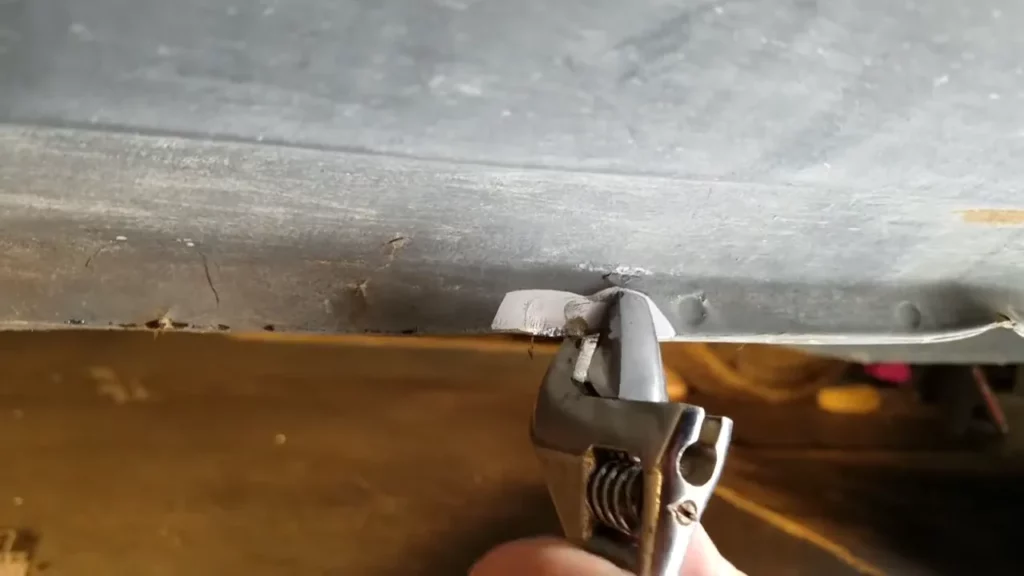
So this is the simplest and quickest fix. Simply insert a wrench into the pinch weld and tighten it according to the diameter. And then turn the wrench in the opposite direction of the bend until it straightens up. This procedure will cause paint loss and expose the metal. You can cover it up with a spray.
Option 2: Using Vice clamp
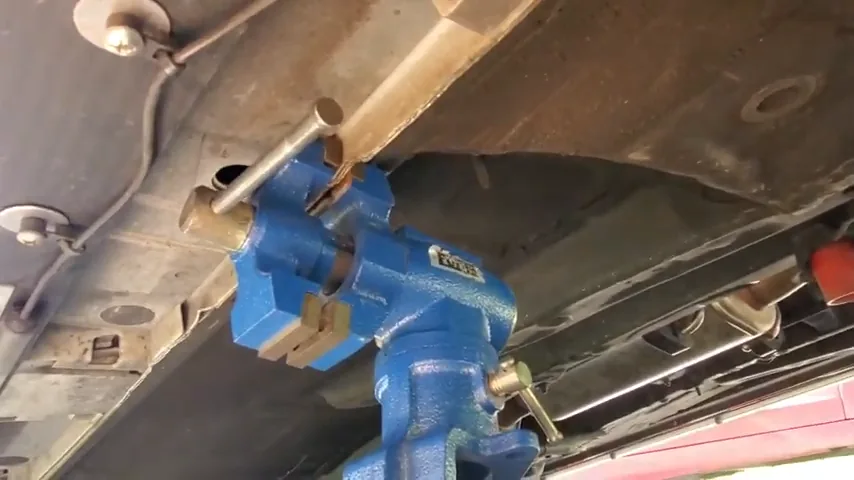
This method is similar to the previous one, but instead of a wrench, a vice clamp is used to straighten the bent. Simply place the vice clamp at the point of the bend and tighten it until the bend is straightened.
If Your Pinch Weld is Rusty
In a situation like this one, the method that will be required will be determined by the degree of rusting that occurred to the pinch weld. If the pinch weld on your vehicle has only developed a light tint of rust, you should be able to easily remove the rust from your pinch weld by using an anti-rust spray.
On the other hand, if the damage is too severe, you might want to consider replacing the pinch weld.
If Your Pinch Weld is Pressed and Wrecked
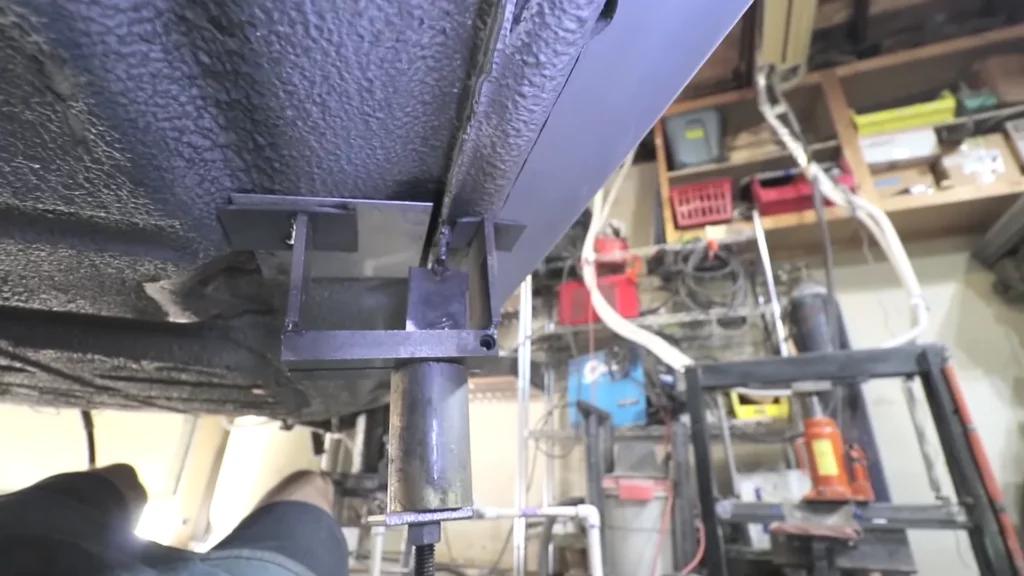
In this case, you may want to create your own custom tool. You may be wondering what custom tool I’m referring to. The solution is to design a tool that can pull the bent down for you. This requires a lot of imagination and hard work, but don’t worry, I’ve got a video for you.
Take a look at this video to get an idea of the type of tool you’ll need to build.
Please keep in mind that if your pinch weld is overly pressed in, these tools will not help you. The only thing you can do is replace the pinch weld.
Wrapping it Up
Any damage caused by pinch welding can be repaired in a variety of ways. Depending on the severity of the damage to your pinch weld, you will have a few different options to choose from when attempting to repair it. Additionally, there may be times when you need to completely replace your pinch weld.


