Guides
You Need Only These 8 Items to Start Welding [Answered]
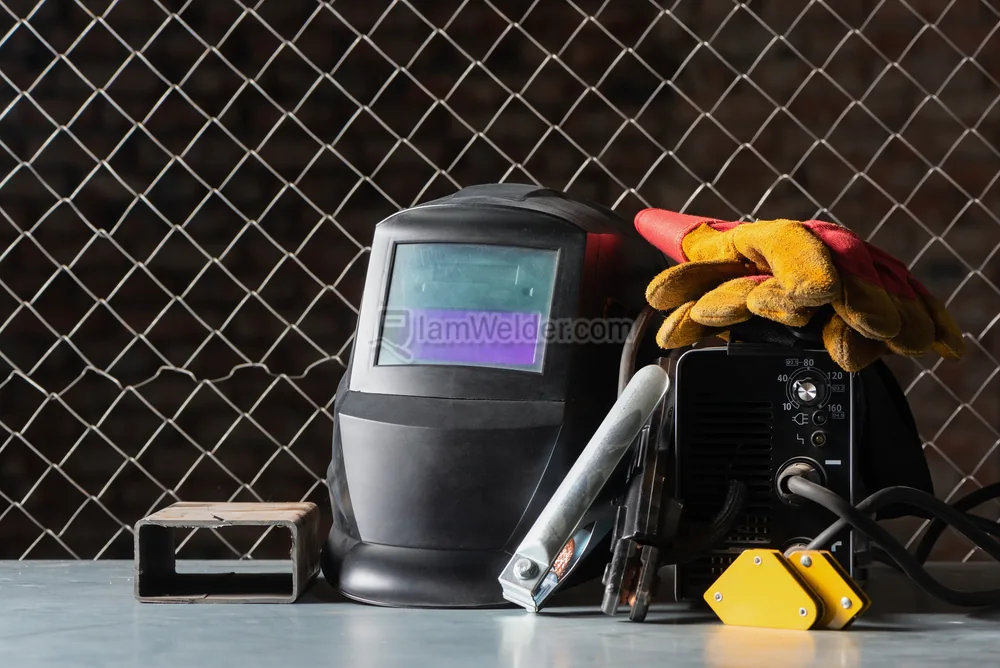
The location and tools available to the welder are the two most important factors in the success of any welding project. Welding, particularly high-quality welding, necessitates a specific environment, from the building’s structure to the tools and other equipment used in the process.
Importance of Choosing the Right Location and Equipment in Welding
For those new to welding, it may appear that all they need to do is clear some space in their garage, purchase a welder from an online retailer, and they’ll be well on their way to producing professional-quality welds.
Don’t draw any conclusions! When designing a welding area, it is critical to consider both productivity and safety. It’s critical to have all of the necessary welding equipment on hand, as well as a few extras.
I’ll go over the equipment you’ll need to get started welding. First, I’ll go over the specifics of finding a good welding location. Even though no two welding processes or jobs are alike, there are a few constants that must be followed at any welding site if your employees are to be safe and efficient.
After that I then discuss welding equipment, emphasizing the importance of carefully considering your specific needs before making a purchase.
Note: Prices mentioned in this article may vary depending on the location and time you are reading this article.
List of Essential Things That You Need For Starting Welding Business
[table id= 31/]
1. Choosing the Location for Your Welding Shop
Welding is one of the most adaptable occupations and hobbies. Expert welders can weld in some amazing places (underwater and in space, for example).
However, becoming a welder requires only a few basic steps to get started. You don’t need a large, high-tech facility for your welding project; instead, make sure your welding area has the following necessities:
1. Proper Lighting
Welding, like any other trade, calls for bright illumination of the work area. Make sure your welding area is well-lit, either by natural or artificial means, or a combination of the two.
2. Flame Resistant Floor and Walls
Given that many welding tasks generate sparks, you shouldn’t turn on the old welding machine in a room with shag carpeting and wallpaper. Look for a location that has fireproof surfaces, such as concrete or cinder blocks, for example.
3. Large and Wide Doors
You must have a foolproof method for moving heavy objects into and out of the welding area. It’s important to remember that if you can’t fit certain items into the space, you may be restricted in the types of welding projects you can undertake.
If you want to complete larger projects inside, you’ll need a large door, either roll-up or overhead.
4. Sufficient Electrical Power
Cutting, grinding, and welding machines can eat up a lot of power, so make sure your welding spot is well-serviced.
If you have 220 single-phase service (like the kind of outlets used to plug in an electric clothes dryer) or 110 single-phase service (like the kind of outlets found all over your home, used to plug in lamps and small electrical appliances), and 20-amp circuit breakers, you should be fine. (Those are typical examples of circuit breakers.)
5. Ventilation
Welding can produce harmful gases and smoke, so it’s important to ensure your welding space has adequate ventilation for your own safety and the safety of anyone else in the area.
If you are not sure about how much space you need, then you can read one of my other articles about deciding the space for your welding shop.
Related Information: Deciding between indoor vs outdoor welding setup
2. Choosing Some Basic Hand Tools
Even the most basic welding projects require the use of some simple hand tools.
It’s possible that you already have one or more of these items on hand but You’ll be in distress if you don’t have them, so you should definitely buy them.
Because of the heat and sparks generated by welding, it’s best to avoid tools built with materials other than metal. In the long run, metal tools are more reliable and effective.
Some of the basic tools are mentioned below:
1. Ball-peen Hammer
If you need to hit a chisel or a punch, then you need a ball-peen hammer. Additionally, they can be used to straighten metal. With the rounded head, you can peen to release tension in a newly welded joint. For about $15, you can buy a quality ball-peen hammer at any hardware store.
2. Chipping Hammer
A chipping hammer is a specialized hammer used for chipping away unwanted material (slag) from welds. Although there are many different lengths and weights of chipping hammers, the typical model is about a foot long and weighs one to two pounds. The average price for a new chipping hammer is around $30.
3. Cresent Wrench
One should always have a 12-inch crescent wrench on hand for use in welding. It’s compatible with the vast majority of bolt and nut sizes used in welding.
4. Level
A level is used to ensure the horizontal and vertical alignment of the pieces you are welding and to check the precision of the final product. They take a lot of abuse, so make sure you have a very strong level.
5. Pliers
A good pair of pliers is essential for welding, as the standard pliers most people keep in their toolboxes aren’t up to the task. In order to safely manipulate hot metal, you should use slip joint pliers (pliers that allow you to increase the range of their jaws) that also feature compound lever action.
Tweezers or tongs can also be used. The price range is from $7 to over $20, with the high end being for larger pliers with more features.
When handling hot metal, pliers or tongs are your best bet. In addition to the obvious danger of reaching for hot metal while wearing leather welding gloves, doing so can also harden the leather, reducing the gloves’ durability and comfort.
6. Soapstone or Silver Pencils
Neither regular pencils nor pens will work on metal, so you’ll need soapstone or silver pencils. Both are inexpensive and readily available at any hardware store.
7. Steel Square
In order to ensure that your finished product is perfectly square, a steel square is an excellent, long-lasting tool to have on hand.
It is a steel right angle with one side measuring 16 inches and the other measuring 24 inches in length. On the front of a steel square is a ruler with whole, half, quarter, and eighth-inch markings.
The reverse side features inch markers at the whole, half, and quarter marks.
8. Straightedge
Drawing straight lines, transferring measurements, and checking for straightness all require the use of a straightedge. After all, a skewed weld is something no one wants.
9. Tape Measure
If you want to cut things to the right sizes, you’ll need a tape measure to help you measure and mark your materials.
Among the most common tools available, tape measures are a boon to those who need them. A 25-foot-long, 1-inch-wide tape measure is adequate for most purposes.
10. Vise Grips
These wrenches are a multi-tool that can be used as pliers, wrenches, portable vises, and clamps. Because of the damage, they cause to the fittings you’re working on, they’re not meant to be used in place of box-end wrenches. While vise grips are useful, most people also like to have a pair of pliers on hand.
Never clamp anything made of nonferrous metal (metal without iron) in a vise. Nonferrous metals are particularly vulnerable to the destructive power of vise grips.
11. Wire Brush
After chipping away at welds, you can clean them up with a wire brush. A brush with a long handle is what you should invest in.
Some companies make tools that combine a chipping hammer with a wire brush, which is convenient if you’re trying to multitask. A quality wire brush can be purchased for under twenty dollars.
3. Choosing a Welding Table
Many of your welding projects, especially the smaller ones, will require a very sturdy, reliable surface on which to be built.
An ideal solution would be a welding table. Avoid using a standard table or workbench, as welding materials will quickly spatter and possibly burn the wood or metal surface. Steel for the top and angle iron or pipe for the legs make for a solid welding table.
A welding table can be custom-made by a welder or purchased at a hardware store. The scale of your projects will dictate the size of the table you’ll need.
A 36-by-48-inch table with a 3/8-inch-thick top is what you should look for. Budget at least $50, and keep in mind that once you master welding, you can build a second table to use in place of a store-bought one.
Before purchasing a welding table, check to see if the height is adjustable so that you can work comfortably at it. You shouldn’t have to lean over the table or stretch your back to use it.
4. Choosing Your Welding Machines
There are 3 common types of welding machines depending on the welding process that you are using:
- Stick Welding Machine
- MIG Welding Machine
- TIG Welding Machine
1. Stick Welding Machine
Stick welding is one of the most common and widely used techniques. Stick welding’s low cost is a major selling point, and it requires the least expensive equipment among electric welding techniques.
A complete setup for stick welding consists of welding leads, a ground clamp, and an electrode holder. If you require a stick welding machine for your welding projects, you must first choose between an AC or DC machine.
DC Machine: DC stick welding machines provide a constant stream of electricity and increase the operator’s level of control over the welding process, making it easier to create quality welds.
AC Machine: The low price of AC stick welding machines is a significant advantage. AC stick welders are the most cost-effective and low-maintenance option among welding machines. However, they can be more difficult to operate, particularly for novice welders.
2. MIG Welding Machine
Welding guns, spools of electrodes, feeding units, power sources, cables, hoses, and cylinders of shielding gas are just some of the components that make Mig welding machines more important than stick welding machines.
Machines that use the MIG welding technique can join a wide variety of metals together. However, you’ll need to invest in a few different attachments for your MIG welder if you plan on using it on a wide range of metals.
Steel can be welded with a MIG welder without any additional accessories, but welding aluminum, for instance, requires a spool gun.
If you want to take advantage of your MIG welder’s adaptability and use it to work with a wide variety of metals, a visit to your local welding supply store will reveal exactly what adjustments need to be made.
Some MIG welders are more powerful than others, just like with other types of welding machines. The thickness of the metals you intend to weld will dictate how much power you will need.
Purchase a more robust MIG welding machine if you plan on welding materials thicker than 3/8 inches.
Some companies have started making MIG welding machines that can adjust their settings on their own. Depending on the thickness of the material being welded, the machine will automatically adjust the amount of amperage being sent to the welding arc.
3. TIG Welding Machine
Of all the different types of welding machines, Tig welders are the most adaptable. All metals, both ferrous and nonferrous, can be welded with a tig machine.
Changing the polarity (electric current flow direction) on most tig machines expands the types of materials that can be welded. Welding machines that use tig welding technology and those that use stick welding technology can be used interchangeably with a few adjustments.
Welding machines designed for stick welding can perform tig welding with the addition of a few accessories, and vice versa.
Converting Stick welding to TIG welding is a more straightforward process than TIG welding to stick welding.
I recommend investing in a tig welding machine and the necessary accessories (such as a stick welding electrode holder with a lead and plug) if you intend to use it for both tig welding and stick welding.
5. Considering Few Other Accessories
Your machine, like most others, can benefit from the addition of a few extra tools in the form of accessories. You may want to think about whether or not any of the following accessories would be useful with your machine:
Cable Holder: A cable holder, also known as a hook, is attached to the side of a machine and is used to store the lead and ground cables (and is safer).
Cup Holder: Despite popular belief, welding machines do, in fact, come with cup holders. In any case, cover your beverage.
Storage: Small drawers are available as an accessory for some welding machines, providing a convenient place to keep all the miscellaneous welding supplies.
Welding Machine Carriage: Having a wheeled cart to transport your welding machine is a great time saver. Typically costing around $200 and made out of steel, they are readily available to the general public.
The cost may seem high, but when you consider that some welding machines weigh more than 100 pounds, the money spent on a cart is a bargain compared to the cost of a trip to the chiropractor.
Air Compressor: A high-quality air compressor is essential for operating any pneumatic tool. Cost: $160.
Anvil: A large piece of metal can be hammered into shape or made straight with the help of an anvil. (Of course, if you’re a coyote and you want to kill a roadrunner, this is also helpful.)
Keep in mind that if you don’t have an anvil in your workshop, you can use any large, solid, secured piece of metal (like a railroad rail, for instance). Don’t go tearing up railroad tracks as a cost-cutting measure. Cost: $150.
Creeper: A creeper is a small rolling platform on which one can recline and move about. When you need to crawl under something, creepers come in handy. Cost: $30.
Drill Press: A good, compact drill press is an invaluable addition to any welder’s toolkit. Guarantee that you have a plethora of high-quality, press-compatible bits on hand.
Investment level: $100-$1,000 Don’t get yourself a drill press that’s either too big or too expensive for your projects. However, one cannot always assume that larger is better.
Grinder: A grinder can smooth out any rough spots on a surface. Make sure you have the appropriate size and type of grinding discs for your grinder before you buy it, including ones made of ferrous and nonferrous metals. Prices range from $85 to $125.
Hacksaw: Metal can be easily cut with a hacksaw, which is why they are so popular. Cost: $8 (includes a package of blades) (includes a package of blades).
Portable Welding Curtain: A portable welding curtain made of vinyl that can protect onlookers from the potentially harmful rays emitted during welding. Cost: $10.
Vise: Mounting a small vise to your welding table is something to think about. It’s useful when you’re welding on a small, finicky project that would otherwise be difficult to handle. Cost: $25.
Wall Clock: Having a wall-mounted clock makes it much less of a hassle to check the time while welding than taking off your gloves and rolling up your sleeves every few minutes. When you’re having fun, time flies, so having an easy way to keep track of your welding time is a must. Cost: $3
Important Note:
Just to let you know, you don’t need all of these things right at the beginning of your welding business. There are a few things that you can neglect for a time. I have mentioned all those things that are necessary for the table given above. I hope this will help you make better decisions.
Informational
How to Weld If You Have Long Hair? Pro Welder’s Tips

Any welding operation that you perform puts you and anyone else in the area in danger of a number of different things. As a result, it is completely reasonable for you to be concerned about preventing your hair from becoming entangled in any welding equipment and posing a threat to your health. In this article, I will talk about how you can safely weld if you have long hair.
If you want to weld while having long hair, a French braid is the best option for keeping your hair together. This will help you in tying your hair and hold it together behind your neck. The French braid should keep the hair compact and close to your head’s shape, and it also allows you to wear a welding helmet. As a result, you will be able to wear full safety equipment.
When you are dealing with hot weld spatters, having long hair can present a particularly difficult challenge. Therefore, if you are interested in learning more about how you can safely weld with long hair, continue reading the rest of this article, where I will discuss the topic in greater detail and share some helpful hints.
How Your Long Hair Can be an Issue While Welding?
Welding procedures, as I indicated earlier, expose the operator as well as anybody else in the vicinity of the workplace to a wide variety of risks. A project involving welding presents a number of potential dangers and threats; it is important that you be aware of these issues in order to protect not only yourself but also others around you. Especially when dealing with spatters, it is easy for things to go wrong if you have long hair.
Before we look at all of the tips you may weld with long hair, we need to first understand the potential risks you run and everything that might go wrong. Long hair poses a unique set of challenges when it comes to welding. A few are mentioned below:
- Spatters are your hair’s worst enemy.
- UV rays can permanently damage your hair.
- With long hair, grinders can cause serious accidents.
Let’s look at these problems one by one:
1. Take Spatters Seriously
The spatter, sparks, and heat generated by the arc provides the greatest challenge throughout the welding process since they may travel up to 35 feet and enter any nearby place. You will want to provide enough protection for your long hair if you are going to be in an atmosphere like this.
Not just your hair, but everything else that might catch fire should be kept at least 35 feet away from the welding location. In addition, a fire extinguisher should never be far away. In the event that a fire breaks out.
2. UV Rays Can Damage Your Hair Permanently
Molten metals, welding arcs, and ultraviolet radiation will be present in the work environment while welding is being done. The interaction of all these factors puts you at an increased risk of serious burns. The actual welding arc may reach temperatures of up to 10,000 degrees Fahrenheit, making it one of the hottest processes possible.
And believe me when I say that you do not want that welding arc to get anywhere near your hair. Your hair will suffer a significant amount of damage as a result, and it is possible that it could even be burned.
3. Grinder Can Give You Nightmares
The usage of grinders is another factor that may create issues for your lengthy hair. Using grinders and welding go hand in hand when working with metals. Therefore, if you are a welder, you will most likely make extensive use of the grinder. And grinders are really your worst enemy when it comes to your long hair.
When you’re working, you can find yourself crouching over a grinder, which can cause serious accidents if you don’t protect your hair properly.
Tips from a Pro Welder to Protect Your Long Hair When Welding
Now you know what the most obvious dangers that you have when welding with long hair. The next step is to tell you how you can keep yourself safe from those dangers.
Here are a few of the tips that you can consider:
- Braid your hair while welding
- Put your hair in a tight knot behind your neck
- Consider buying a welding cap
- You can use a bandana too if you are a bandana lover
Let’s discuss these tips one by one:
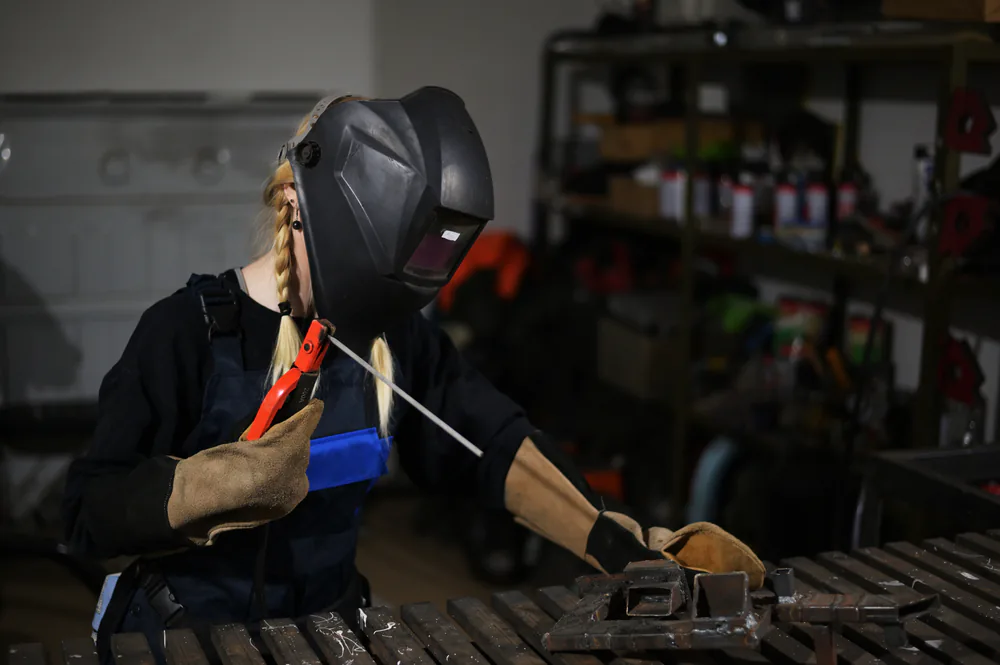
1. Braiding is the Best Option You Have
Welding hoods, helmets, or shields will provide the optimum amount of protection from any sparks, heat, UV rays, flash burns, or infrared light that may be present. They will protect not only your face and neck but also your eyes and hair. As a result, I feel that acquiring one is the best approach to protecting oneself.
Welding hoods are often made of cotton or leather and are rather light in weight and can go easily along with helmets. Make sure that whichever helmet you decide to purchase, is not too heavy and that it is comfortable to wear. It must also include a spatter barrier, the ability to be modified, a sensor bar, and the availability of replacement components.
2. You Can Simply Put Your Hair in a Tigh Knot
The most conventional and easiest technique for a welder operator to keep their long hair out of their face is to pull it back into a tight bun. Wrap an elastic band over your buns and secure them in place to prevent them from falling on your face.
If there are any unruly hairs, just use bobby pins to push them up and you should be OK. Anything that prevents your hair from falling on your face will suffice.
3. Consider Buying a Welding Cap
A welding cap is a good option if you want something that is both lightweight and comfortable. It must adequately shield your head from any hot metal, sparks, or splatters that may be present.
Not only they are effective in protecting your hair, but they are also made completely of cotton, making them incredibly breathable and also preventing sweat from pouring down your eyebrows while working.
4. Bandana is Another Option That You Can Use
Braids are not easy to create for everyone, and they may even be difficult to perform on a regular basis. If you don’t know how to braid my easiest suggestion would be to put a bandana over your head and tuck all of your hair within.
When welding, sparks will fly everywhere, and this will keep you safe. Make use of bobby pins or a bun to tuck in all of the ends. Bandanas aren’t my first choice for headgear. But it works. It’s a good option to have in case you don’t know how to braid your hair.
Few Other Safety Measures That You Need to Take
In addition to your hair, there are a few other parts of your body that need your attention. Some of these essential measures for ensuring your safety are listed below:
- Protect your eyes at all cost
- Always keep a fire extinguisher in your shop
- Wear protective clothing
- Make habit of using respirators
- Beware of leakages in your welding system
- Keep your welding space clean
Let’s discuss them one by one:
1. Protect your eyes at all cost
Be sure to always wear safety glasses in your workplace to protect your eyes from flying debris, which is often composed of metal. If you routinely do welding tasks, you will be exposed to a significant amount of flying debris.
You should make it a routine to put them on as soon as you come in the door; this will ensure that you are protected at all times.
2. Always keep a fire extinguisher in your shop
You shouldn’t be shocked if anything catches fire at some time during a welding operation because of all of the intense heat and sparks that are produced throughout the process. Because fires are a very real risk, you should always have an extinguisher on hand in case one breaks out.
3. Wear protective clothing
If you’ve ever imagined yourself beginning your first welding project in a pair of shorts, an old t-shirt, and a pair of flip-flops, you should rethink that idea. Wearing the necessary protective clothing at all times when welding is required if you wish to prevent injuries to your body, notably burns, that may be caused by the process.
4. Make habit of using respirators
You should always wear a respirator if you are going to be dealing with metals or any other materials that have the potential to emit harmful vapors.
Welding or cutting certain materials may produce a welding plume, which is a combination of hazardous gases, fumes, and smoke. This is not the type of thing you want to breathe in if you want to keep your lungs healthy and prevent respiratory issues.
5. Beware of leakages in your welding system
There is a good chance that you have pressurized containers in your welding shop that hold liquids or gases. Take extra precautions to check that none of those containers or the items that you are attaching to them have any leaks in them.
See my other article to know more about leakages and how to detect them.
6. Maintain your equipment
If you want to establish the safest possible working environment for your welding projects, you need to give your equipment a lot of TLC and make sure it’s in good operating order at all times. If your welding equipment and tools are in disrepair, an accident is almost waiting to happen every time you use them. However, the vast majority of incidents of this kind are avoidable if proper care is taken with the equipment.
Wrapping it Up
When it comes to welding, safety is the most important thing to keep in mind at all times. Because because welding involves a significant amount of fire and spatters, it is essential that you take a significant amount of precaution to protect your hair. I really hope that you’ll be able to keep your hair under control while welding thanks to the advice that’s been provided in this article.
Guides
How to Repair Damaged Pinch Weld? Is it possible?
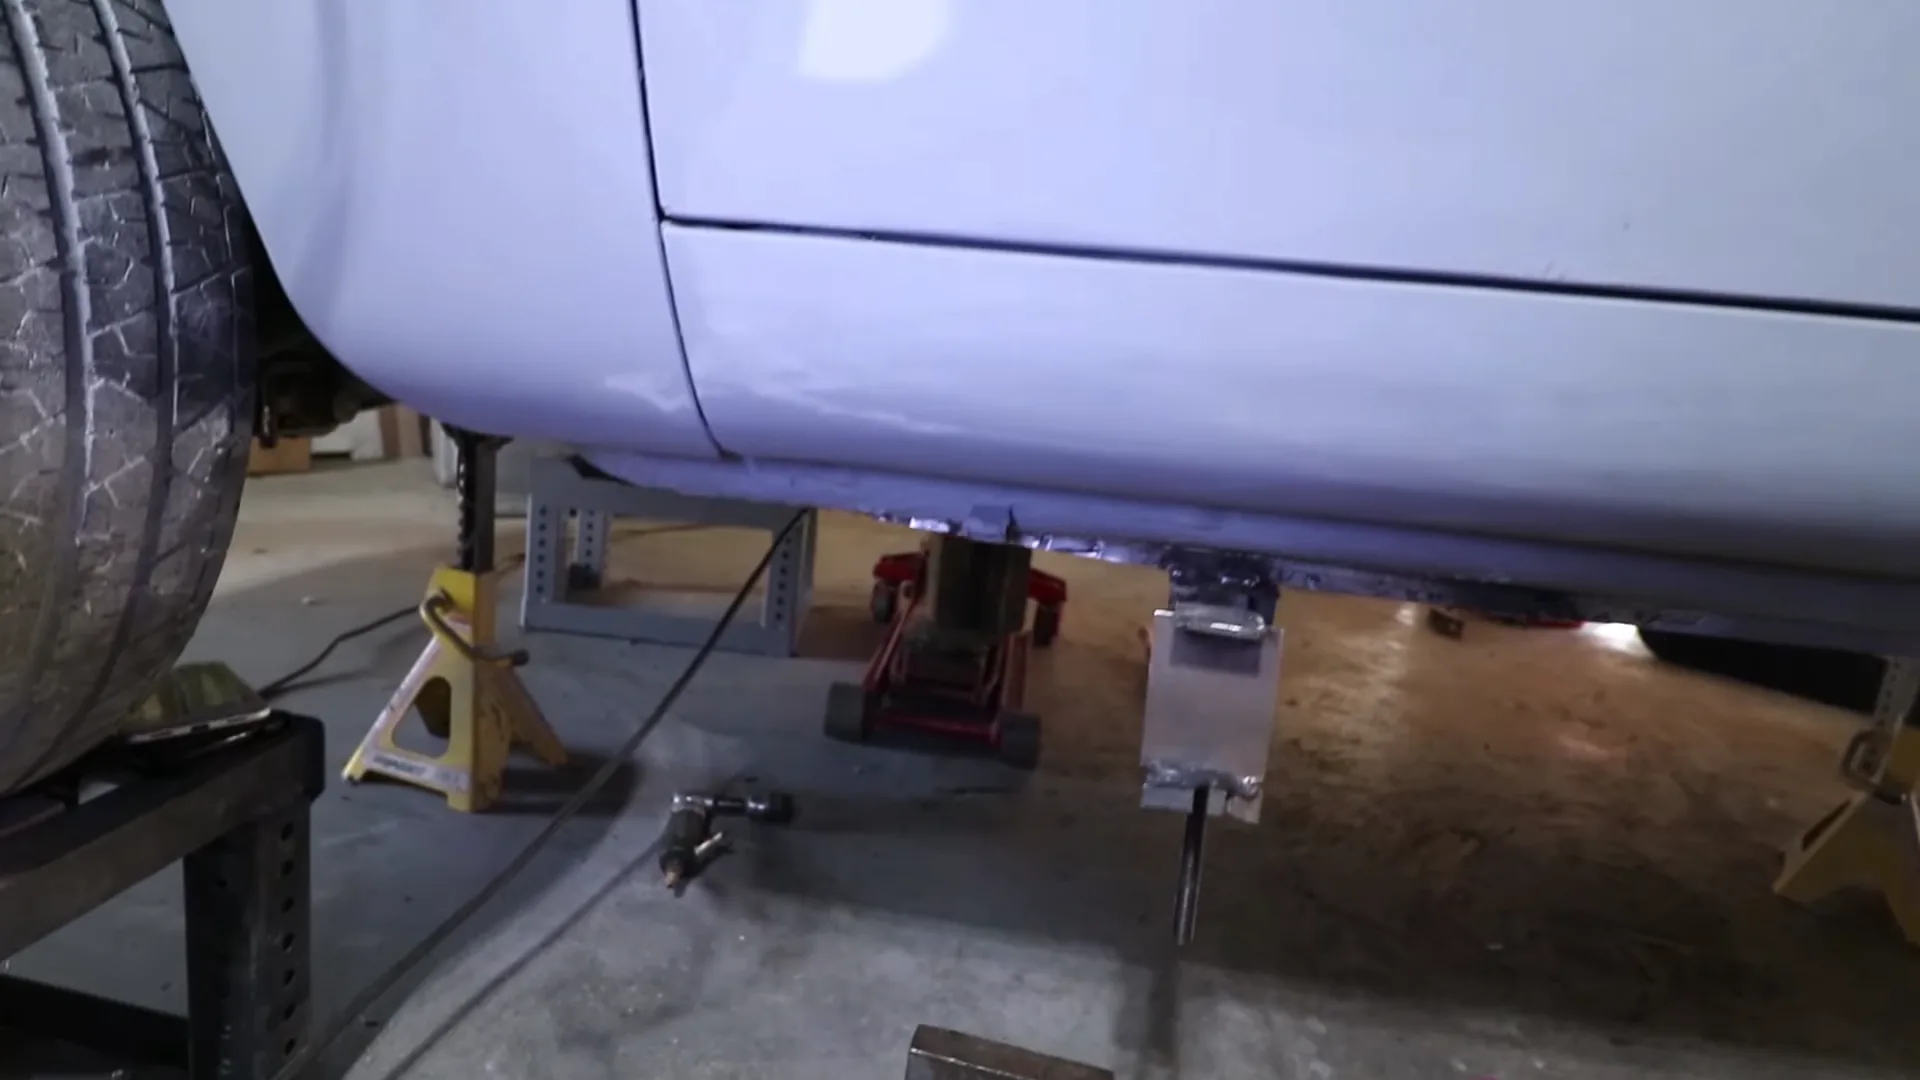
Every vehicle has a pinch weld, which is the most difficult connection and is required for safety. However, pinch welds can be damaged by improper floor jack placement. Is there really a way to solve this problem if this happens? In this article, I’ll go over how to repair pinch welds in great detail.
Pinch welds can be repaired, but how you do it will depend on the circumstances and kind of damage. It is sometimes simple to fix them, but there are other times when it is impossible or extremely difficult to fix your pinch welds. You might want to replace your pinch welds in that case.
Damaged pinch welds can be catastrophic for your vehicle, as they can lead to the destruction of joints and components. A major cause for concern is the fact that a defective pinch weld can led to the total destruction of a vehicle body. Whether or not pinch welds can be repaired is a frequently asked question. Thus, a simple response like the one above will not suffice.
In the following paragraphs, I will describe in detail the various types of damage that can occur to your car’s pinch welds, as well as the methods for repairing them. So, let’s get started.
There are 3 Types of Damage to Pinch Welds
As I have mentioned earlier how you’ll fix your pinch weld heavily depends on what sort of damage you have. So, if you’re trying to repair your pinch weld, the first and most critical step is to determine the kind and extent of your damage.
Here are a few of the most common pinch weld damage types:
- The joint getting bent inwards
- Rust damage
- Entire joint breakage or getting messed up
So let’s discuss these damage types one by one
1. Pinch Weld Joint Getting Bent Inwards
The first type of damage that we have is called an inward bent of joint. The majority of the time, this occurs as a result of improper placement of the jack. If a vehicle is jacked up incorrectly, the weight of the entire vehicle has the possibility to become concentrated in a single point.
Because of this, there is a chance that the joint will bend inwards, but there is also a chance that it will bend outwards.
2. Rusty Pinch Welds
Rust damage is the most prevalent type of damage that can occur. Rust has the potential to cause significant damage to an automobile’s pinch weld, which can ultimately lead to the total destruction of the vehicle’s body. Rust damage is difficult to predict because each instance is unique.
In easy words, there are numerous reasons that can cause rust damage. Depending on the severity of the damage, it is possible that this type of damage will prove to be the most challenging to repair. which we will discuss in greater depth in the following paragraphs.
3. Entire Joint Breakage
The third and most dangerous scenario is that the joint will either sustain total damage or destroy entirely. This is the worst-case scenario. If this happens then the two parts of the joint will no longer be able to be connected to one another.
It is possible that this could happen due to improper jacking, but in most cases, damage from an accident or from running over a particularly large bump or speed breaker causes it.
Is There a Way to Repair Your Damaged Pinch Welds?
It is possible, as I mentioned earlier, that you can repair the damaged pinch welds, but the success of such an effort is entirely dependent on the nature of the damage. There are some types of damage that might not be able to be fixed at all, despite the fact that the majority of damages can be fixed with some trial and error.
Now that we are aware of the type of damage, I believe that it is time for us to move on to the solution for it. In the following paragraphs, I will go over a few of the techniques that can be used to repair pinch welds.
How to Repair Damaged Pinch Welds?
Here are a few methods that you can use to fix your damaged pinch welds
- Straighten it out with a wrench.
- Straighten it out with a vice clamp.
- Make your own tools to pull the pinch weld down
When it comes to repairing the pinch weld, the approach mentioned above will be determined by the level of damage sustained. Repairing dents and loose components is often a simpler task than repairing rust damage.
If Your Pinch Weld is Bent
If your pinch weld is bent then you have 2 options to fix it
Option 1: Using a wrench
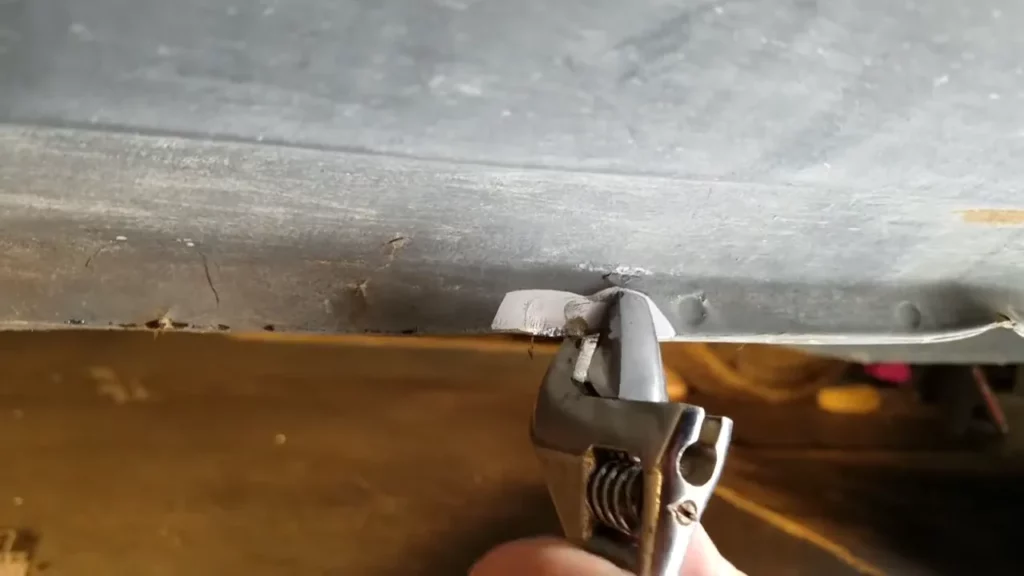
So this is the simplest and quickest fix. Simply insert a wrench into the pinch weld and tighten it according to the diameter. And then turn the wrench in the opposite direction of the bend until it straightens up. This procedure will cause paint loss and expose the metal. You can cover it up with a spray.
Option 2: Using Vice clamp
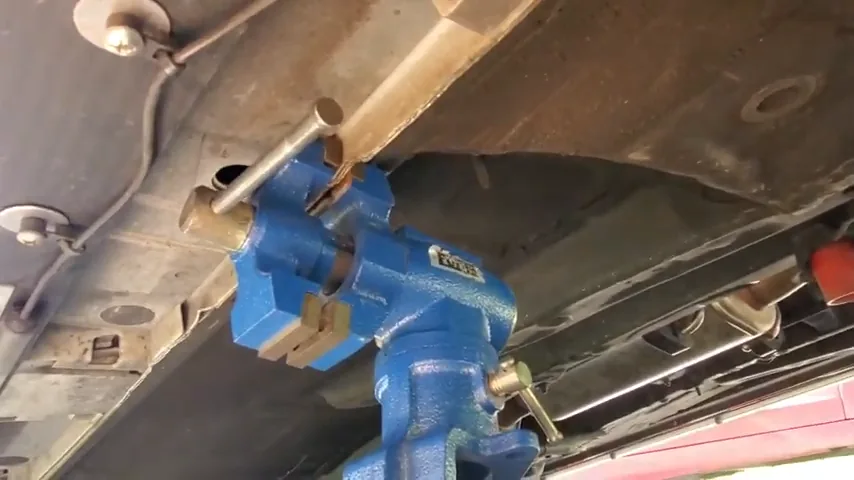
This method is similar to the previous one, but instead of a wrench, a vice clamp is used to straighten the bent. Simply place the vice clamp at the point of the bend and tighten it until the bend is straightened.
If Your Pinch Weld is Rusty
In a situation like this one, the method that will be required will be determined by the degree of rusting that occurred to the pinch weld. If the pinch weld on your vehicle has only developed a light tint of rust, you should be able to easily remove the rust from your pinch weld by using an anti-rust spray.
On the other hand, if the damage is too severe, you might want to consider replacing the pinch weld.
If Your Pinch Weld is Pressed and Wrecked
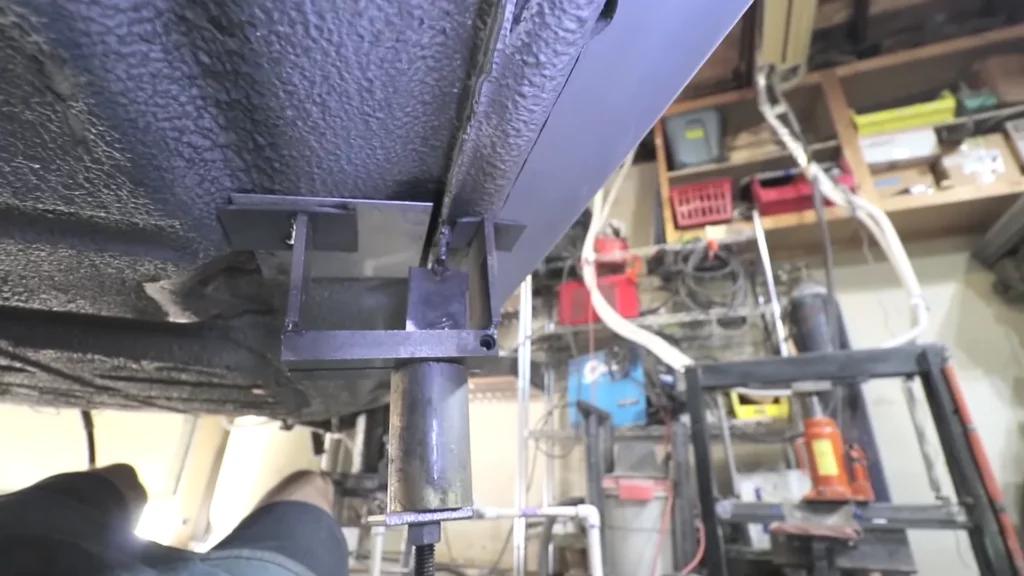
In this case, you may want to create your own custom tool. You may be wondering what custom tool I’m referring to. The solution is to design a tool that can pull the bent down for you. This requires a lot of imagination and hard work, but don’t worry, I’ve got a video for you.
Take a look at this video to get an idea of the type of tool you’ll need to build.
Please keep in mind that if your pinch weld is overly pressed in, these tools will not help you. The only thing you can do is replace the pinch weld.
Wrapping it Up
Any damage caused by pinch welding can be repaired in a variety of ways. Depending on the severity of the damage to your pinch weld, you will have a few different options to choose from when attempting to repair it. Additionally, there may be times when you need to completely replace your pinch weld.


