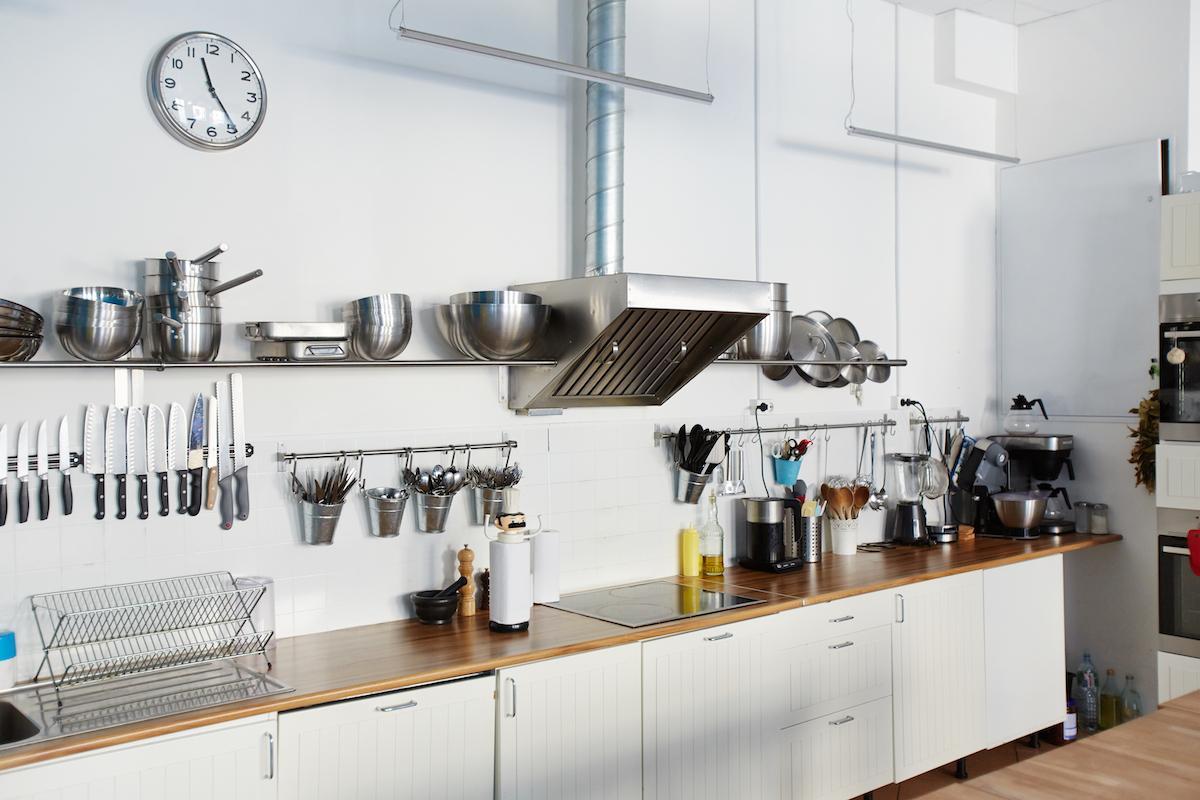
Kitchen
How to Spray Paint Kitchen Cabinets Like a Pro?
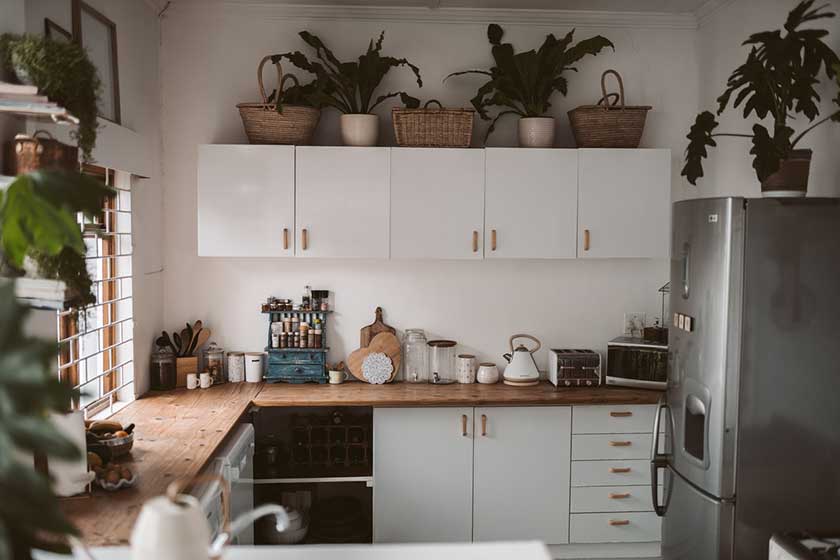
If your kitchen cabinets are outdated and you’ve been thinking of replacing them but cannot bear the cost. Nothing to worry about because I’ve got the perfect solution to your problem. You can spray paint your kitchen cabinets like a pro and make them look fresh and almost new.
This article contains everything you need to know to paint your kitchen cabinets. With my hands-on experience on the matter, I will answer every possible question and list all the materials and tools required to get the job done, along with a detailed step-by-step guide.
Thus, read on and follow the procedure precisely to give your kitchen an outstanding and smooth finish, just like a professional at your house.
Why Should You Spray Paint Kitchen Cabinets?
If you want to give your kitchen cabinets a fresh look and cannot afford to refurbish them, spray painting is by far the best way to go.
It reduces the overall painting cost and provides an outclass and extra smooth finishing that is second to none.
Moreover, if you’ve cabinets with places that are hard to paint with a brush or have raised panels, spray paints can be of significant use for you.
Many experts recommend spraying kitchen cabinets because it is much more effective and less time-consuming.
Although it does require some time and practice in the beginning to get the hang of it, once you do, believe me, it’s worth the struggle.
Thus, the most durable and suitable option for old-class-looking kitchen cabinets is spray painting.
Step-By-Step Guide to Spray Paint Kitchen Cabinets.
An inexperienced person with minimal exposure can make mistakes and ruin your work.
Therefore, to guide you throughout the process and make it more proficient. We have gathered below a step-by-step procedure to spray paint kitchen cabinets correctly.
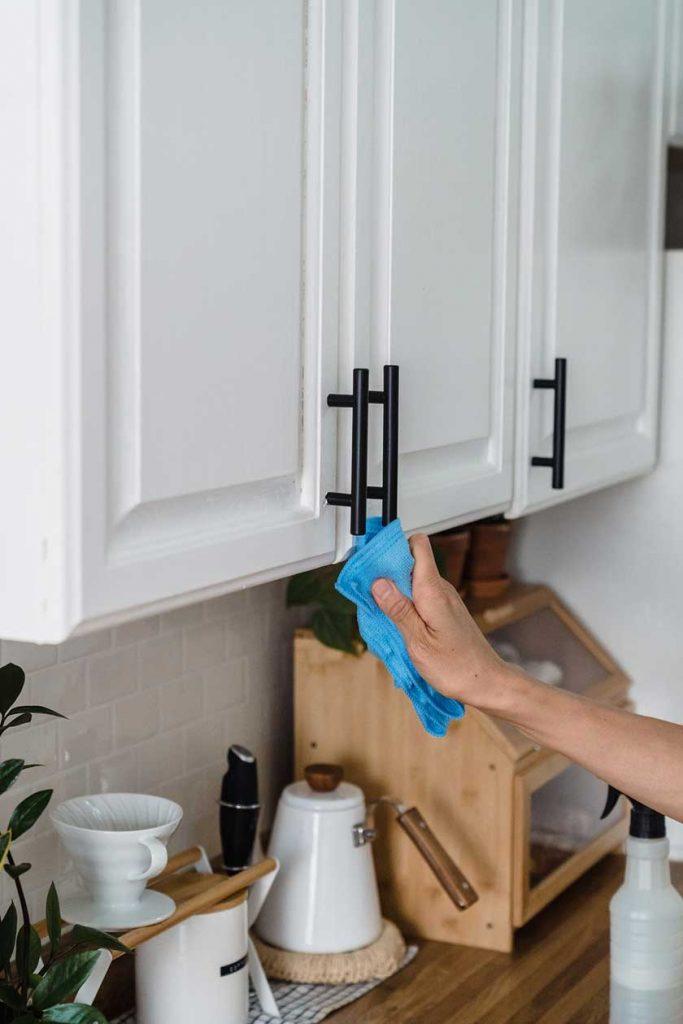
Step 1: Cleaning the Kitchen Cabinets
The first step is to thoroughly clean your kitchen cabinets to remove any grease or dirt gathered on the doors and shelves.
You can do that by crossing the kitchen cleaning checklist. or following the step below:
- Detach the doors and drawers of your kitchen cabinets and make sure to label them so that you wouldn’t have trouble while reinstalling.
- Then take them to an open space such as the garage or another spacious workplace where they could be placed separately.
- Here, you can clean them with the help of a detergent and warm water. Ensure to rinse the surface of the doors and drawers perfectly. Otherwise, the paint wouldn’t stick for long. The same goes for the cabinet frames in the kitchen.
- Once rinsed, cover the areas where you don’t want the paint to adhere using tape or old newspapers. Wrap the appliances, cover the countertops, tape the ceiling, flooring, and walls. Almost everything that abuts the kitchen cabinets should be adequately covered.
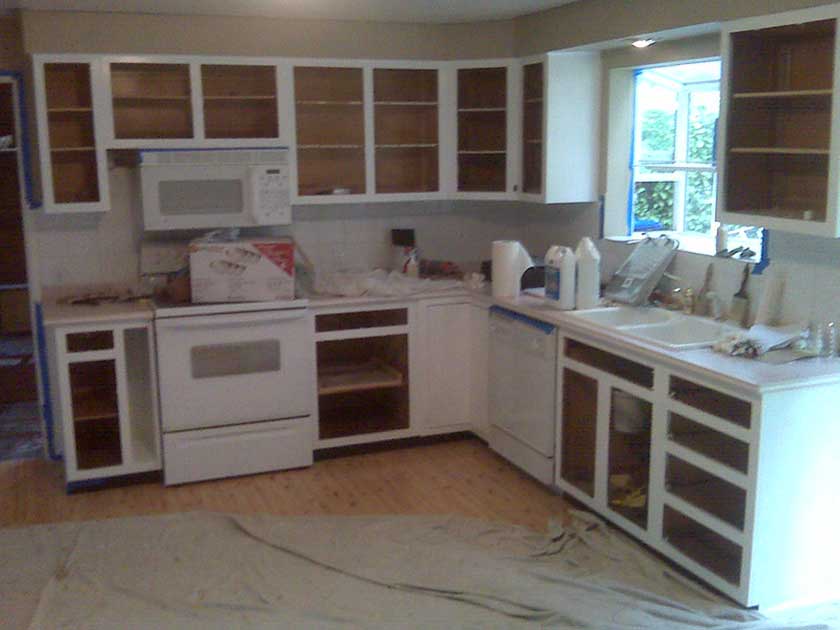
Step 2: Repair and Prep the Kitchen Cabinets
After making sure that the cabinets are thoroughly cleaned, you can move towards the second step, which involves repairing any tough spots to remove the ridges or burrs from the cabinets, if there are any. The procedure is as below:
- You can use the spackling compound to repair the scratches and fill the holes in the cabinet doors and frames. With the help of a putty knife, settle the compound into the damaged areas and let it dry.
- Then sand the cabinet frames and doors using 320-grit sandpaper, just light enough to sand off the shine and not the finish.
- Afterward, you can use a bristle attachment for vacuuming any dust gathered on the wood.
- Then with the help of a tack cloth, wipe out the cabinet frames and doors before you are ready to apply the primer.
Step 3: Prime the Kitchen Cabinets
The third step includes applying the stain-blocking primer to the doors and frames of the cabinets. The procedure is as follows:
- Use a paintbrush instead of the roller to paint the primer on the doors and sides of the cabinets. The roller can affect the finish by leaving a bad texture, and it is also hard to work with the apertures.
- An easy way is to prime one side of the doors first and then prime the frames and sides of the cabinets while the paint on the doors dries. Afterward, prime the other side of the doors.
- Once the primer has dried out properly, sand the doors, frames, and sides of the cabinets to smoothen them and then paint with a fine-grit sandpaper.
- If your kitchen cabinet doors are of oak wood grain, you’ll have to fill in the grain using the spackling compound to get a smooth look.
Step 4: Paint the Exposed Areas of the Kitchen Cabinets
Once the primer is applied, your next step would be to prepare the paint by mixing in the paint thinner. So, the procedure will be as below:
- First of all, thin the paint using the Floetrol paint additive and water. The water and Floetrol help to level out the paint when applied and also slows down the drying process so that you can get a more even coating after spraying.
- Then use a paintbrush to paint the exposed sides and frames of the cabinets. Ensure to use a high-quality paintbrush and latex enamel paint because it provides a shiny, hard, and stainless finish.
- While the paint dries off, you can practice spray painting on a rough surface first, like cardboard, to get a hold of the spraying gun. Adjust the nozzle and the flow rate of the spraying gun so that it covers the surface without running out.
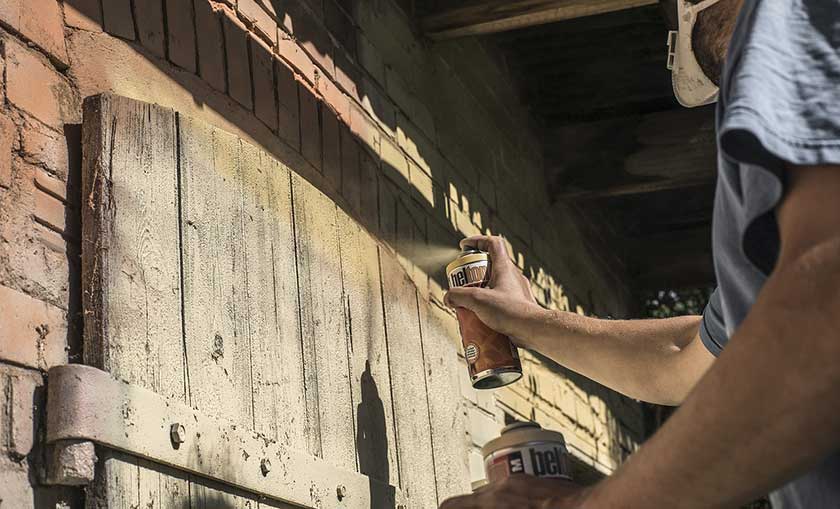
Step 5: Spray Paint the Kitchen Cabinets
This is the most fun part of the spraying process you’ve been waiting for. For this step, you’ll have to buy an HVLP (High-Volume Low-Pressure) spraying gun because it makes the job much easier and simpler.
On the other hand, if you try to attempt this using spray cans, your pointer finger will get sore in no time.
Thus, the HVLP sprayers are the best option to go with, and they also come with a targeted dial that helps spray the crannies or nooks perfectly.
Furthermore, a spraying gun significantly reduces the time required to spray the cabinets.
I remember the last time I spray painted my kitchen cabinets a year ago. It took me a total of 80 mins to spray 16 cabinet doors and six drawers.
So, without wasting any time, let’s hop on to the spraying process:
- First things first, assemble a proper working space, wear a respirator mask before spray painting, and don’t forget to ventilate the room, even if it’s just a blowing fan in an open window.
- Afterward, fill up the spraying gun with the thinned paint mixture, and you’re ready to paint. Set up the cabinet doors on an empty box to rotate easily and then start spraying.
- Paint the edges and the detailed work in the first coat and let them dry overnight. The next day, do the second coat on the left out places of the doors, sides, and frames. A great tip is to sweep your whole arm back and forth while painting, not just the wrist.
- Then comes the turn of the drawers. After wrapping them properly with papers, paint them. Let them dry overnight, and then give them a second coat. If you find any paint runs, wait for the paint to dry and then repaint to remove any imperfections.
Once you are done with spray paint, it’s time to reinstall everything back to its original place. The first looks of the newly painted kitchen cabinets look astonishing, am I right?
You’ve done a great job. Now you can lie down or maybe sip hot coffee to relax.
Which Spray Paint Type Should You Use on Kitchen Cabinets?
The best spray paint type to use on a kitchen cabinet facing is the universal solvent-based paint formulated for the surface you are painting.
In the long run, it forms a durable and hard finish required for the cabinets and is widely universal, meaning you can use it on vinyl, acrylic, and timber kitchen cabinets.
However, you should choose the paint type that is best formulated with the material used in your kitchen cabinets to easily adhere to the surface and be effective for long periods.
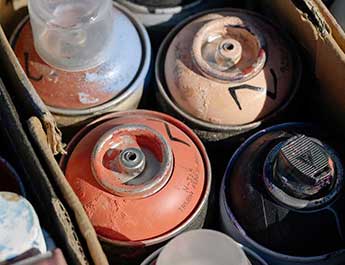
What Materials and Tools are required to Spray Paint Kitchen Cabinets?
Here, we have gathered the list of materials and tools required for you to spray paint your kitchen cabinets. In case you forget something, you can checkmark it from the list below:
Materials:
- 320-grit sandpaper
- Rosin paper
- Spackling compound
- Floetrol
- Painter’s tape
- Primer (Stain blocker)
- Latex enamel paint
- Plastic drop cloth
- Masking paper
- Cardboard
Tools:
- Safety glasses
- Putty knife
- Shop Vacuum
- Screwdrivers
- Paintbrush
- Rags
- Cordless drill
- Utility knife
- Bucket
What is the Total Cost of Spray Painting Kitchen Cabinets?
Typically, if you DIY spray paint your kitchen cabinets, the overall cost ranges between 200$-600$ depending upon the quality of supplies such as paints, brushes, and spray guns you are using.
However, if your kitchen cabinets are in bad condition, they may cost more.
Conclusion.
To sum up, if your kitchen cabinets are in good condition and you just want to change their appearance, spray paint is the best option for you.
After reading this article, I hope you’ll be able to spray paint your kitchen cabinets like a pro.
How to Paint Kitchen Cabinets with Paint Sprayer (Video Guide)
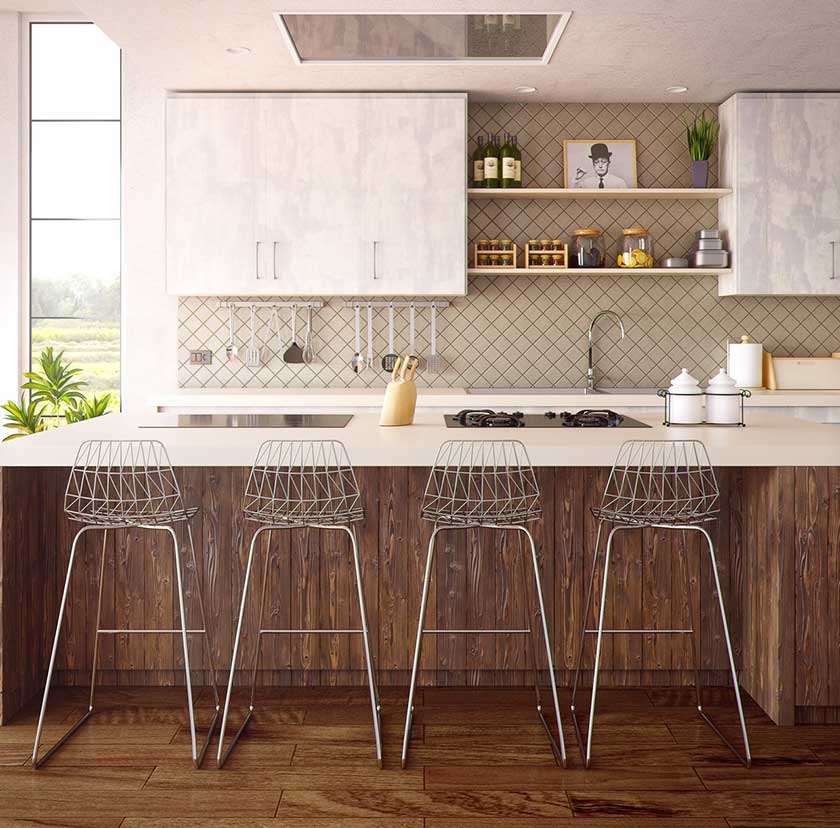
Kitchen
Kitchen Tools and Equipment that You Must Have
With new and upcoming different types of kitchen appliances, tools, and types of equipment being introduced into the market on a daily basis. It is easy to become overwhelmed and confused about what essentials you should have in your home kitchen. Whether you have prior cooking experience or are just starting out, we have compiled a list of kitchen tools and equipment that you must have.
You installed your kitchen cabinet and make sure it looks good. The next step is coming… First and foremost, gather your basic kitchen utensils. It is critical that you should stock your kitchen with all of the cutlery you and your family require to cook and enjoy meals at home. Here is our list of essential kitchen utensils:
1. Knives Are One of The First Kitchen Tools and Equipment Everyone Should Have
Food preparation can be a chore without the right chef’s knife. So, if you are in a pinch, opt for the inexpensive 8-inch Misen Chef’s Knife. It is a favorite of both the Test Kitchen manager, Breana Lai Killeen, and food editor, Carolyn Malcoun, who rave about how well it handles and how affordable it is. A good chef’s knife cannot be found for less.
Those butcher blocks full of knives may look nice on your counter, but you really only need three: a serrated knife, an 8- to 10-inch-long chef’s knife, and a paring knife. Purchase the best knives you can afford; they will last for many years.
2. Sharpener for Knives
Once you have found the right knife, you must keep it sharp. However, you do not need to hire a sharpening service or spend a lot of cash on a fancy electric gadget.
3. Cutting Board
A good quality cutting board is essential when preparing vegetables and ingredients for cooking. To chop your ingredients, we recommend using a wooden board.
4. Grater
When a recipe calls for less chopping and more grating, use a grater. A grater is an absolute must-have in any kitchen, whether for freshly grated parmesan, garlic, or onions.
5. Mixing Bowls Are One of The Most Important Kitchen Tools and Equipment Everyone Should Have
What is the point of having the tools to chop and cut your ingredients if you cannot mix them? Prepare your kitchen with all of the mixing bowls you will need for various recipes.
6. Pans and Pots
After you have combined your ingredients, you will need plenty of pots and pans to cook them in. Make sure you have a variety of pans and skillets for roasting or sauteing vegetables, as well as pots for making delicious pasta dishes.
7. Towels and Potholders
Every kitchen should have towels and potholders to make cooking and serving easier. Not to mention that potholders can be used as cute kitchen décor.
8. Colander
When preparing a pasta dish, make sure you have a colander at the ready. Nothing is worse than finishing your pasta only to discover that your kitchen lacks a colander to drain the pasta water.
When it comes to dinner parties or family meals, presentation is often the icing on the cake of what will undoubtedly be a delicious meal. That is why, when serving food to family or guests, a serving platter is essential. A salad dish, a pasta dish, and a large platter for any meat or fish dishes are ideal.
9. Blender is One of The Main Kitchen Tools and Equipment Everyone Should Have
This kitchen tool is often overlooked. But you would be surprised how important it is. Include a blender on your kitchen tools and equipment list for everything from morning smoothies to homemade sauces to hearty soups.
10. Tupperware
Make sure you have the right post-cooking tools to make clean-up and food storage easier. Tupperware comes in a variety of sizes, from small containers for fresh fruit or leftover sauce to large ones for meat, fish, and pasta. Remember that Tupperware is essential for an organized, clutter-free kitchen.
11. Saran Wrap, Aluminium Foil
Last but not least, do not forget to include aluminum foil and saran wrap on your list of cooking tools and equipment. These ingredients will help your food retain its delicious flavor, allowing you to enjoy homemade meals throughout the week.
12. Kettle (Electric)
An electric kettle is a useful kitchen appliance for quickly heating water.
Most electric kettles on the market today have an impressive feature that turns off the heating as soon as the water reaches boiling temperature. It not only saves electricity and energy, but it also saves the user from having to monitor the temperature of the water and turn off the kettle. This is also a safety check because you do not have to worry about leaving your electric kettle on while you are busy with other cooking errands. You can also use it to boil eggs, cook ready-to-eat or instant noodles, make soups, and even sterilize small items.
13. Oven Microwave is One of The Most found Kitchen Tools and Equipment Everyone is Installing in Their Home by Defaults
The microwave oven is a must-have in the kitchen because of its versatility and the variety of meals it can produce from such a small box space. Of course, the main purpose of a microwave oven is still to heat food. And it is efficient in doing so because the expected taste is not reduced even after use, and the expected texture is also achieved with the right temperature and timing.
A microwave oven is an excellent choice for quickly reheating leftovers or serving fresh popcorn for movie night. But it can also be used for baking, grilling, boiling, steaming, and even roasting.
—
Last Words
There you have it. Your kitchen essentials list, equipment to keep on hand at all times, and tools to help you store and organize your leftover meals.
If you are thinking of buying kitchen countertops, find out the main used types first to make the process easy for you.
Kitchen
What are Floating Kitchen Cabinets? Complete guide to Floating Cabinets!
Now the trend of floating kitchen cabinets increases every day? You may notice that the old kitchen had shelves and did not introduce the cabinets. The direction of installing floating cabinets is new.
Everyone wants to know what floating kitchen cabinets are and how they provide more benefits than traditional choices.
Therefore here we came with the complete guide about floating cabinets.
Floating Kitchen Cabinets
The floating kitchen cabinets are more stylish and break from monotony to regular ones. Traditionally the cabins are below the shelves.
The floating cabinets hang on the wall with structural security. It gives an aesthetic look to the kitchen according to the color combination of the kitchen interior. When you install the floating cabinets, it provides a more spacious look to the floor.
Moreover, it gives a three-dimensional look to your kitchen along with more space. You can secure a wide variety of items in floating cabinets instead of keeping them on the shelves.
The floating cabinets give a modern way to install various themes and stay consistent.
Why you need to install the Floating Kitchen Cabinets?
There are many reasons to install floating cabinets. Here we will share some of them that also help us understand it.
Lots of Storage
The floating kitchen cabinet offers a lot of additional storage space. It gives a new and trendy look to the kitchen and provides a tremendous amount of space.
In addition, you can install different types of floating cabinets, including racks for holding glasses or plates, separate box cabins, and many more.
You can store the special crockery in floating cabinets with additional protection. However, floating cabinets are the perfect option if you need storage in your kitchen.
You can also use the floating cabinet doors for decoration purposes. It comes with plenty of choices in color, size, and doors.
Get a put-together look
It is another excellent reason to install floating kitchen cabinets. You can get a cohesive look according to your choice.
If you feel that your kitchen is messy, install the floating cabinets with more solid doors. It gives a way to break the traditional look as you can choose the clear glass doors instead of the wood and its similar shades.
Moreover, the cabinet with the increased height, double doors, extend more towards the ceiling, stacked with the modeling details, and some more are incredible choices to give a solid look.
All these choices depend on your kitchen interior. Besides these, it is a way to get a close look at more storage and interior options in your kitchen.
Hide the clutter
The floating kitchen cabinets are a key to hide the clutter. We all have a lot of things in the kitchen that make an incredible mess if not stored properly. Some of these things are essential, and others are just clutter. But still, we want to secure them for later use.
So the kitchen floating cabinets give the best solution to get a clean look. When you have the cabinets in your kitchen, you can store and maintain every item in its place.
Take a moment and think of all the disorganized dishes coffee cups on your kitchen shelf. It is a scary sight, but I also didn’t find time to sort them.
Thus, the kitchen floating cabinets hide all these clutters unless you have the time to organize them.
Affordable
Do you ever compare the cost of floating cabinets and installing the new shelves or countertop? The price of installing a new countertop depending upon the material is way more than the floating cabinets. The average cost for the kitchen floating cabinets depends on their sizes and material.
However, the average price is around $6000 for installing the new floating cabinets. Whereas you need to have considerable space for the new shelves for countertops, it is also a bit pricey.
The kitchen floating cabinets are also expensive, but they give your money the perfect worth. You don’t need to get the additional accessories for maintaining the storage requirement in the kitchen.
Easy to maintain
It is easy to maintain the kitchen with floating cabinets. Once you install it and set all the necessary items, it needs cleaning after months. You can sort them according to your time feasibility.
Moreover, it also requires less time to maintain as you can do it one by one. The best way to keep them clean is by using mild soap and warm water once every six months.
Pros of floating kitchen cabinets
Here are some essential benefits or pros to having floating kitchen cabinets in your kitchen.
- Perfect for enhancing the look of your kitchen interior
- Creates the ideal focal points when you enter the space
- Quickly change the decor according to season demands
- Complement the backsplash and help to stand out nicely
- Provide incredible storage space
- Help to organize the kitchen in better ways
- Create the perfect look according to trend
- Make the kitchen more aesthetic
Cons of floating kitchen cabinets
Every great thing also has some drawbacks. Similarly, floating kitchen cabinets have some cons that you should know.
- Require the professional labor to install it
- Needs the significant wall space
- Depend on the metal frame or other security support.

Final words
There are many reasons to install floating kitchen cabinets. You also understand floating kitchen cabinets through this guide if you are new to it.
The floating cabinets hang with the kitchen wall and give additional space to store and maintain the essential items.
You can double your kitchen space by utilizing the walls and organizing your kitchen in better ways. The kitchen is the central part of every place like house and office so it should be in proper condition.
We hope this guide helps you answer your doubts in the best ways.


Kitchen Tools and Equipment that You Must Have

Optimizing Your Bedroom Lighting for a Perfect Sleep: 7 Ways to Follow

Energy Efficiency and Style: The Advantages of Roof Windows in the Modern Home

How to Weld If You Have Long Hair? Pro Welder’s Tips

What are Floating Kitchen Cabinets? Complete guide to Floating Cabinets!

How to Repair Damaged Pinch Weld? Is it possible?

How Do I Choose a Cup Size of TIG Welding [Cup Size Chart]

How Much Electricity Does Welding Consume? [Excel Sheet]

Which is the Best Welding Rod for Pipe Fence?

E6013 Welding Rod: A Complete Guide With Specifications, Settings & Amps Table

Why Won’t My Solder Stick? 6 Common Causes and Solutions

Does Welding Shorten Your Life: Life expectancy of a welder?